
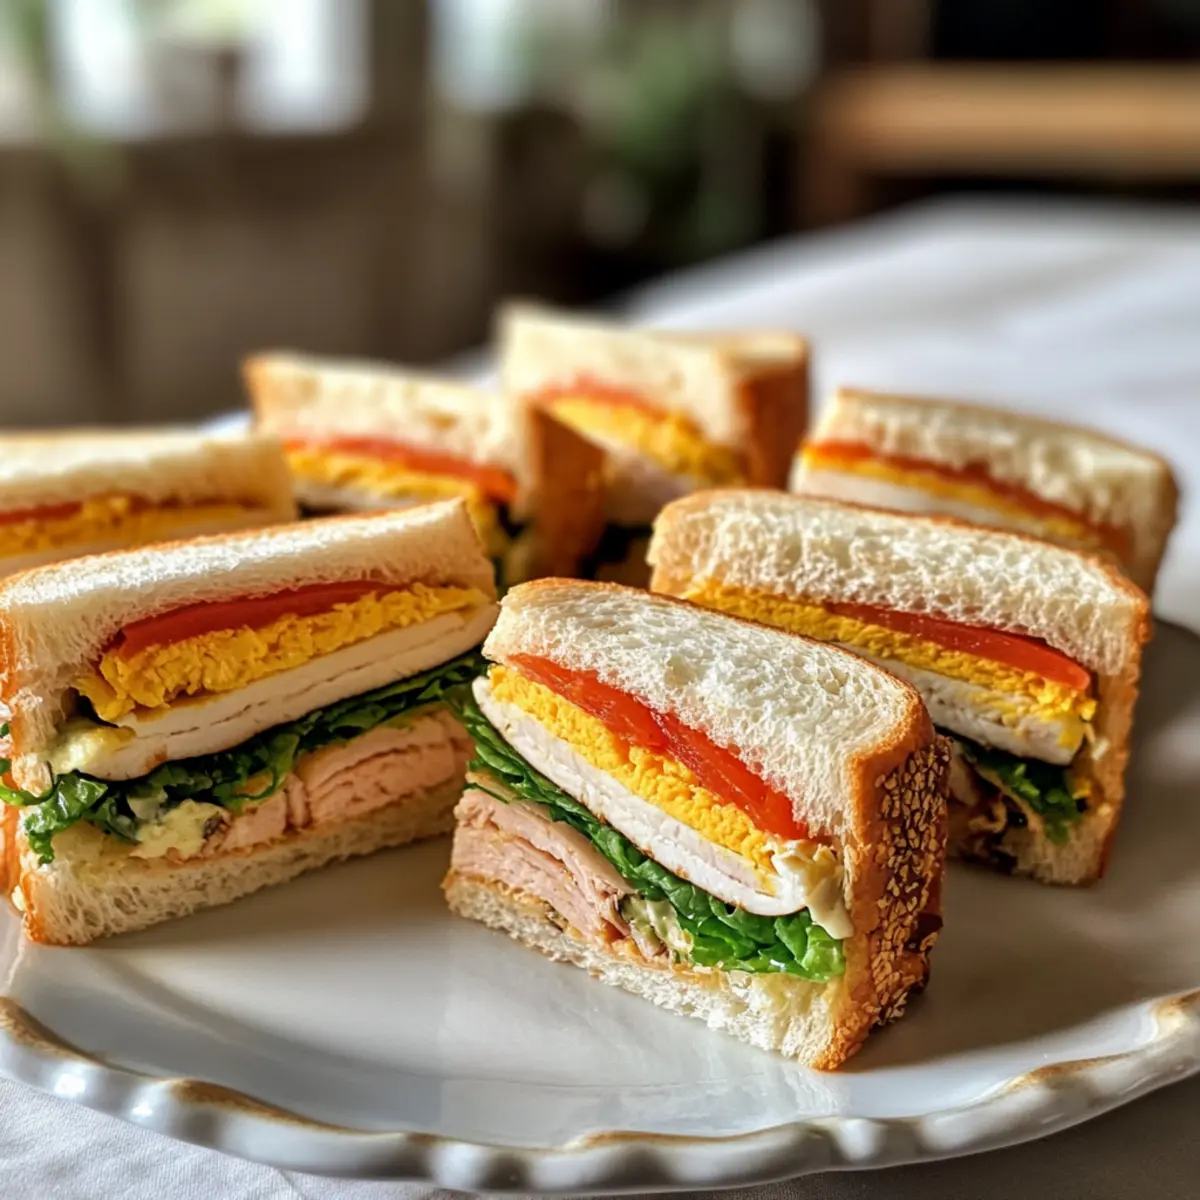
At my last gathering, I couldn’t help but notice the excitement surrounding a platter of mini finger sandwiches; they seemed to steal the show. These delightful bites are perfect for any occasion, effortlessly bridging the gap between elegance and casual charm. With our Mini Finger Sandwiches recipe, you can prepare a variety of fillings and bread types that cater to everyone’s taste, making them not just a crowd-pleaser, but also a make-ahead marvel! Whether you’re hosting a luxurious tea party or a laid-back potluck, these sandwiches promise to impress and allow you to enjoy the moment instead of being stuck in the kitchen. Isn’t it time to elevate your gathering game? Let’s dive into the world of whimsical fillings and baked delights together!

Why Are Mini Finger Sandwiches a Must-Have?
Versatile fillings mean endless flavor combinations! Perfect for both meat lovers and vegetarians, these bites can suit any guest’s palate. Make-ahead magic allows you to prep in advance, leaving you free to mingle at your gathering. Eye-catching garnishes elevate presentation, ensuring your platter looks as wonderful as it tastes. Plus, they are ideal for any occasion, from casual potlucks to chic tea parties. Pair them with a light salad or some Breakfast Finger Foods for an unforgettable spread!
Mini Finger Sandwiches Ingredients
• Bread Variety
White bread – offers a soft texture that absorbs spreads perfectly.
Whole grain bread – provides a nutty flavor and added fiber.
Croissants – flaky and buttery for an indulgent twist.
• Spread Options
Cream cheese – brings a rich and creamy base, perfect for sweet or savory fillings.
Hummus – a flavorful vegan alternative, ideal for adding moisture.
Avocado – creamy and healthy, great when paired with fresh veggies.
• Filling Choices
Turkey slices – a classic choice that adds a savory punch.
Ham slices – brings a delightful saltiness and pairs well with mustard.
Roasted vegetables – perfect for vegetarian options, adding depth and flavor.
Egg salad – a creamy, protein-packed filling that’s always a hit.
• Garnishes
Fresh herbs – like parsley or dill to add a pop of color and fragrance.
Edible flowers – for an elegant touch that makes your sandwiches stand out.
• Moisture Additions
Butter – adds richness that enhances flavors, especially on warm bread.
Mayonnaise – helps bind ingredients while adding creaminess; substitute with a vegan spread if desired.
Elevate your gatherings with these mini finger sandwiches, ensuring they are as delicious as they are visually appealing!
Step‑by‑Step Instructions for Mini Finger Sandwiches
Step 1: Select Your Bread
Begin by choosing a variety of breads for your mini finger sandwiches, such as soft white bread, hearty whole grain, or flaky croissants. Aim for at least two types to cater to differing tastes. Slice each loaf into even pieces, ideally about 1 inch thick, ensuring they’re fresh and manageable for filling.
Step 2: Prepare the Spread
In a mixing bowl, combine your chosen spread ingredients like cream cheese, hummus, or avocado. Stir well until the mixture is smooth and creamy, adding seasonings to enhance flavor. Make sure it’s vibrant in color and has a lovely aroma, as this will greatly contribute to the overall appeal of your mini finger sandwiches.
Step 3: Layer Fillings
Take one slice of your chosen bread and generously spread a layer of your mixture across the surface, creating a thin coat. Next, add your desired fillings, whether it’s turkey, ham, or roasted vegetables, ensuring to layer them evenly without overstuffing. This balance will maintain the structure and beauty of each sandwich.
Step 4: Assemble Sandwiches
Once your fillings are in place, gently press a second slice of bread on top, ensuring the fillings are secured. Lightly press down to adhere the two layers together without squashing the sandwich. This is crucial for maintaining the distinct layers in your mini finger sandwiches, making them easier to cut and serve.
Step 5: Cut and Present
Using a sharp knife, trim the edges for a neat finish, then slice the sandwiches into visually appealing shapes such as triangles or squares. Aim for bite-sized pieces that will be easy for guests to grab. Arrange your mini finger sandwiches on a serving platter, creating an inviting display.
Step 6: Garnish
Finish your presentation by adorning the mini finger sandwiches with fresh herbs or edible flowers atop each piece. This adds a touch of elegance and visual interest, ensuring your sandwiches not only taste delicious but also look spectacular for any gathering.
Expert Tips for Mini Finger Sandwiches
• Quality Ingredients: Use fresh, high-quality ingredients for optimal flavor. Avoid pre-packaged spreads and opt for homemade wherever possible.
• Don’t Overfill: Avoid the mistake of overstuffing your sandwiches, which can lead to a messy presentation. Keep fillings neat and balanced for a delightful bite.
• Chill Before Serving: Assemble the mini finger sandwiches a few hours in advance and refrigerate. This helps the flavors meld and keeps the bread fresh.
• Cut with Care: To achieve clean cuts, use a sharp knife and a gentle sawing motion. This ensures the sandwiches maintain their beautiful shape without squishing the fillings.
• Creative Variations: Experiment with different breads and spreads to find your favorite combinations. Mini finger sandwiches are great for letting your culinary creativity shine!
• Perfect for Any Occasion: Remember, these mini finger sandwiches are a versatile choice. Tailor them for any gathering from casual brunches to elegant tea parties for a crowd-pleasing treat.
Make Ahead Options
Mini Finger Sandwiches are perfect for busy home cooks looking to save time during gatherings! You can assemble these delightful sandwiches up to 24 hours in advance. To prep ahead, layer your spreads and fillings between slices of your choice of bread (just be careful not to overstuff to maintain their shape). Wrap each sandwich tightly in plastic wrap to keep them fresh and prevent drying out. When you’re ready to serve, simply slice them into your desired shapes and garnish with herbs or edible flowers for added flair. This way, you’ll have time to enjoy the company of your guests while still serving delicious, ready-to-eat Mini Finger Sandwiches!
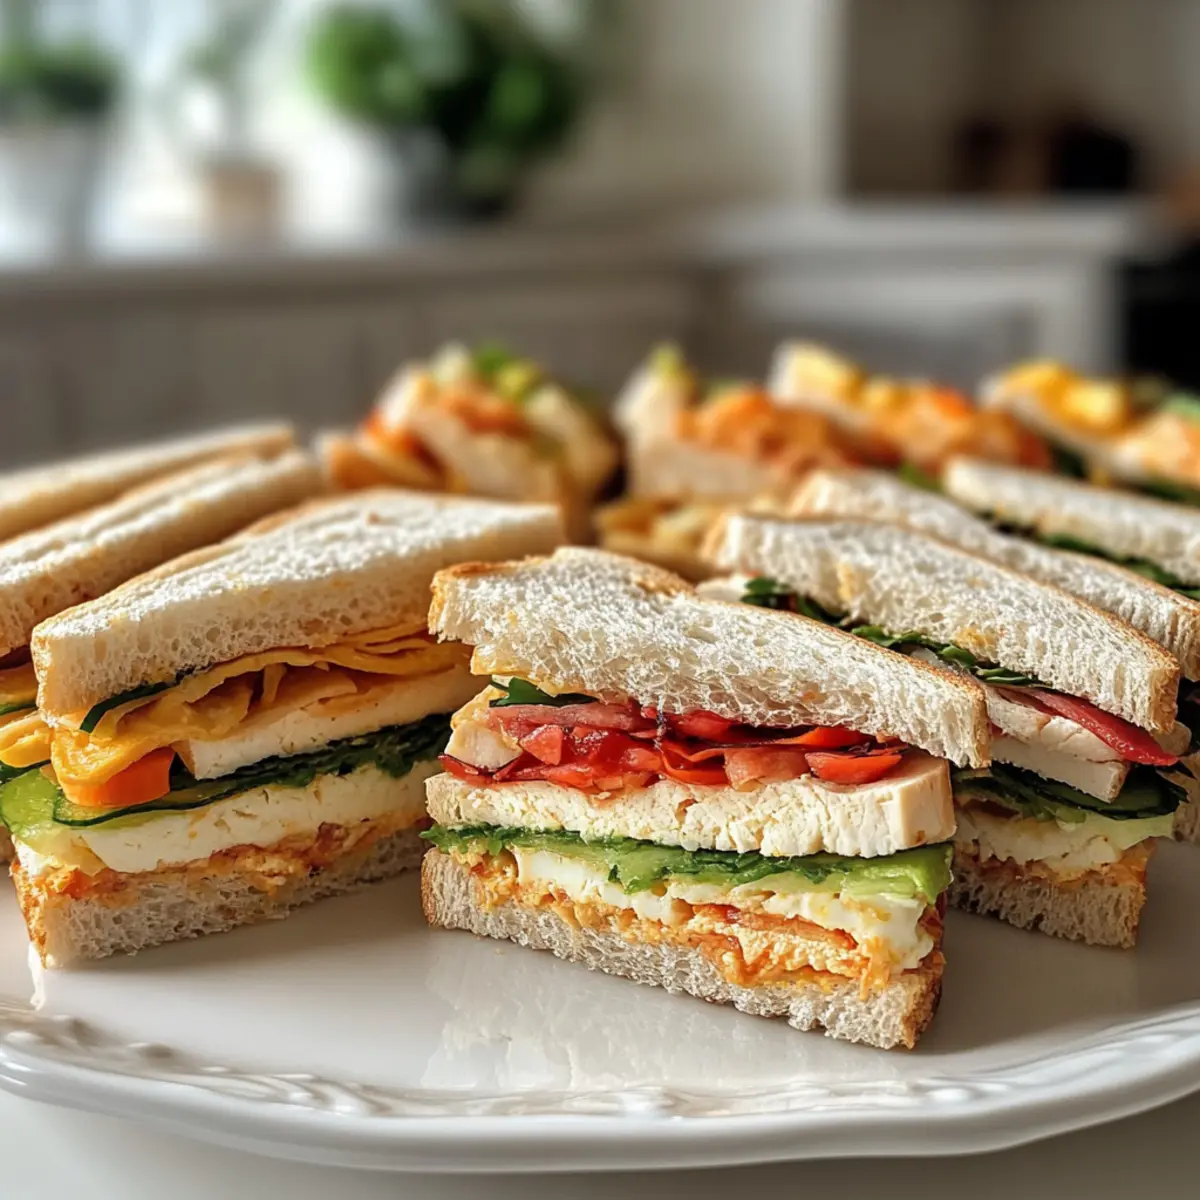
Mini Finger Sandwiches Customizations
Feel free to get creative with your mini finger sandwiches and cater to the preferences of your guests with these delightful variations!
-
Vegetarian Twist: Swap out meats for roasted veggies or hummus for a wholesome, meat-free option. This twist not only keeps the flavor but adds beautiful color to your platter.
-
Bread Varieties: Experiment with different bread types like lavash or focaccia for a unique texture and taste. Each bread can elevate your fillings differently, bringing a new experience with every bite!
-
International Flavors: Explore global tastes by trying fillings like Italian mozzarella, tomato, and basil or spicy Mexican chicken with guacamole. It’s a fun way to whisk your guests around the world on a platter!
-
Little Heat: Add a kick to your sandwiches by incorporating sliced jalapeños or spicy mustard. The perfect blend of creaminess and heat can create a memorable bite that will have guests raving.
-
Sweet & Savory: Try incorporating sweet elements like apple slices with brie or fig jam with prosciutto. This can create a delightful contrast that surprises and delights the palate!
-
Herb Infused Spreads: Mix fresh herbs like dill or basil into your spreads for an aromatic lift. This simple addition can transform basic cream cheese or hummus into something extraordinary.
-
Flavor Packed Spreads: Infuse your spreads with garlic or roasted red peppers for an extra depth of flavor. Who can resist a garlic-spread sandwich offering a zesty punch?
For even more inspiration, check out these tempting recipes, like my Mini Beef Wellington or Breakfast Finger Foods, to pair with your mini finger sandwiches for an irresistible spread!
What to Serve with Mini Finger Sandwiches
Elevate your gathering with delightful accompaniments that complement these charming bites, making every moment just as memorable.
- Crispy Potato Chips: They add a satisfying crunch and light saltiness, balancing the softness of the sandwiches perfectly.
- Light Green Salad: A fresh salad with a citrus vinaigrette provides a burst of brightness that contrasts beautifully with savory flavors.
- Cheese Platter: An assortment of cheeses pairs wonderfully, offering creamy textures that enrich your taste experience.
- Chilled Iced Tea: This refreshing drink cools the palate and adds a touch of sophistication to any gathering.
- Sparkling Lemonade: Its sweetness and carbonation provide a festive flair, complementing the lightness of the sandwiches effortlessly.
- Fruit Skewers: Fresh, seasonal fruits bring a juicy, refreshing touch, brightening up your spread with vibrant colors and flavors.
- Assorted Dips: Serve with homemade hummus or a light yogurt dip to enhance the finger-licking experience of your mini finger sandwiches.
- Mini Desserts: End on a sweet note with small pastries or macarons, adding a delightful finish that enchants your guests.
How to Store and Freeze Mini Finger Sandwiches
Fridge: Keep assembled mini finger sandwiches in an airtight container for up to 3 days. This prevents drying out and ensures they stay fresh for your guests.
Freezer: For longer storage, wrap individual sandwiches tightly in plastic wrap and place them in a freezer-friendly bag. They can be frozen for up to 1 month; just thaw in the fridge before serving.
Reheating: If desired, reheat thawed mini finger sandwiches lightly in the microwave for 10-15 seconds to restore softness. This works best for those with spreads that can melt slightly without compromising taste.
Make-Ahead: These sandwiches are perfect for making a day in advance. Just wait until serving to cut and garnish to maintain their aesthetic appeal.

Mini Finger Sandwiches Recipe FAQs
What type of bread is best for mini finger sandwiches?
Opt for a variety of bread types to cater to different tastes—soft white bread creates a classic base, whole grain offers nuttiness and fiber, while flaky croissants add an indulgent flair. Experimenting with different textures can elevate your sandwiches!
How should I store mini finger sandwiches?
To keep them fresh, store assembled mini finger sandwiches in an airtight container in the refrigerator for up to 3 days. This helps prevent drying out and maintains their delicious taste, allowing your guests to enjoy them as if they were freshly made.
Can I freeze mini finger sandwiches for later use?
Absolutely! To freeze, wrap each sandwich tightly in plastic wrap and place them in a freezer-friendly bag. They can be stored for up to 1 month. When you’re ready to enjoy, simply thaw them in the fridge overnight, and they’re good to go!
How do I prevent mini finger sandwiches from getting soggy?
To keep the bread from becoming soggy, spread a thin layer of butter or mayonnaise on the insides of the bread slices before adding your fillings. This acts as a barrier, keeping moisture from the spreads and fillings at bay, ensuring your sandwiches maintain their delightful texture.
Are there any dietary considerations for mini finger sandwiches?
Yes! Mini finger sandwiches can easily accommodate various dietary needs. For a vegetarian option, simply swap meats with roasted vegetables or hummus. If allergy concerns arise, always check ingredient labels for gluten, dairy, or nut contents, and feel free to substitute accordingly!
How far in advance can I prepare mini finger sandwiches?
These delightful bites can be made a day ahead of your gathering. Just assemble them and store in the refrigerator wrapped tightly to preserve freshness. Wait to cut and garnish until shortly before serving to maintain that eye-catching presentation!
Mini Finger Sandwiches That Will Steal the Show at Any Party
Ingredients
Equipment
Method
- Select a variety of breads and slice them into 1 inch thick pieces.
- In a mixing bowl, combine spreads until smooth and creamy.
- Layer the fillings on one slice of bread, spreading the mixture evenly.
- Press a second slice of bread on top and gently press to secure.
- Trim the edges and slice into bite-sized shapes.
- Garnish with fresh herbs or edible flowers for presentation.
Leave a Reply