
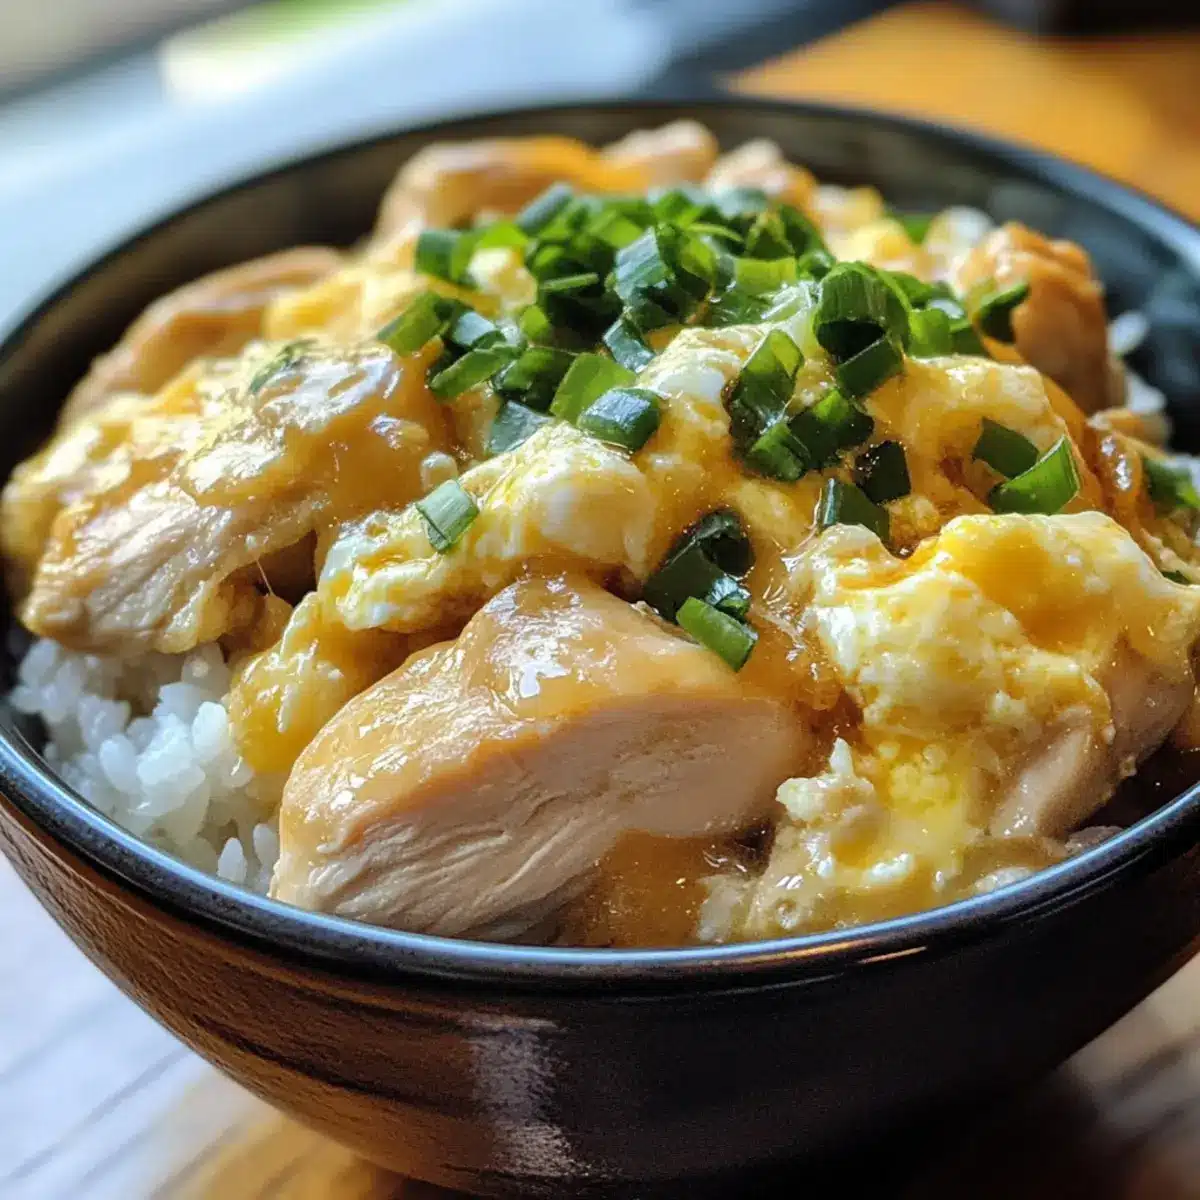
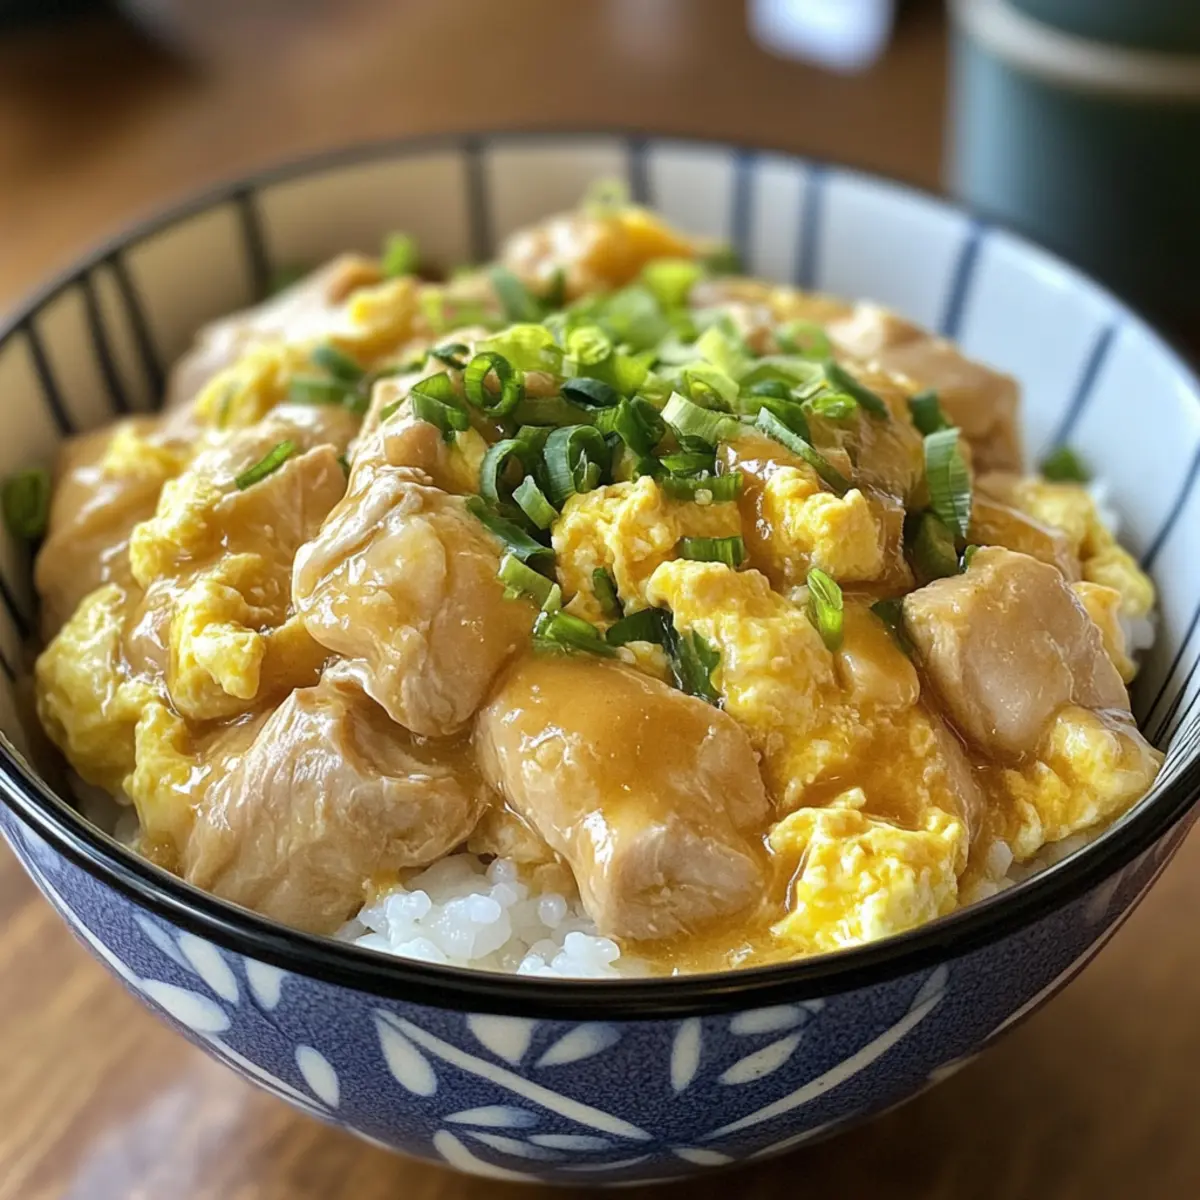
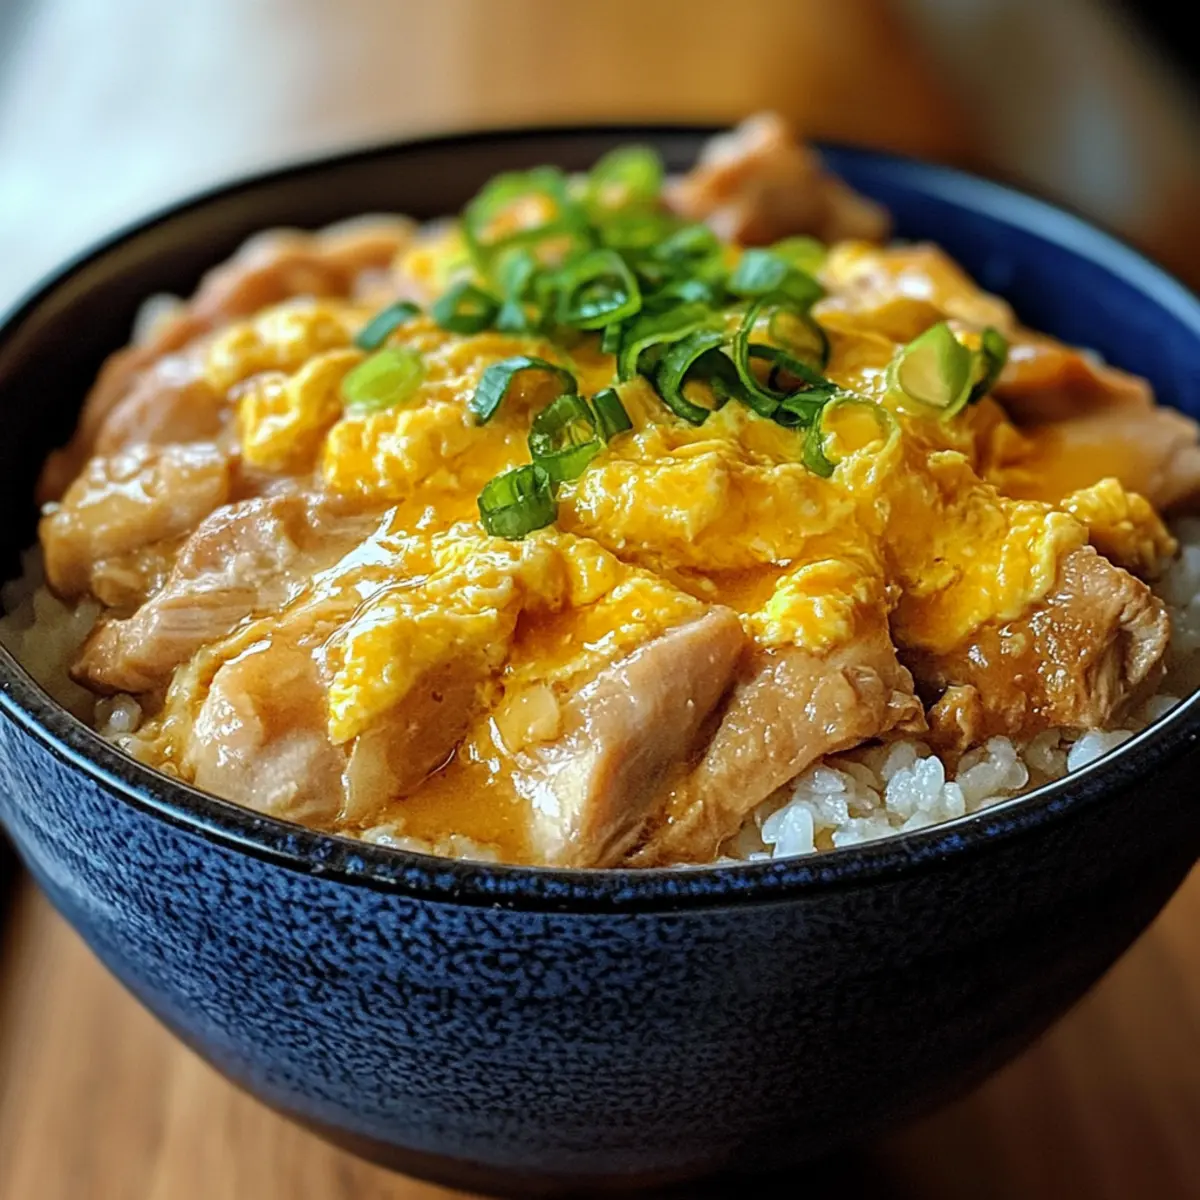
The aroma of savory chicken and fragrant broth wafted through the kitchen, whisking me straight to my favorite Japanese eatery. Today, I’m thrilled to share my 15-Minute Oyakodon, a delightful Japanese Chicken & Egg Rice Bowl that’s become my go-to for those busy weeknights. This dish wraps tender chicken and silky scrambled eggs in a sweet soy-based sauce, all served over warm rice—a true hug in a bowl! What makes this recipe even better is its quick prep and the ability to customize it with your favorite vegetables or mushrooms, allowing you to make it uniquely yours. Cooked in a single pan, it’s a wonderfully easy meal that promises to bring comfort without the fuss. Are you ready to dive into this delicious culinary journey?

Why is Oyakodon a Must-Try Dish?
Quick and Easy: In just 15 minutes, you can whip up a hearty meal that beats any takeout. Single Pan Wonder: No need for multiple pots—everything cooks together for easy cleanup. Customization: Tailor it to your taste with mushrooms or veggies, making each bowl a unique delight. Rich, Savory Flavor: The harmony of chicken, eggs, and a sweet soy broth is a comforting classic. Crowd-Pleaser: Perfect for family dinners or impressing guests; everyone will want seconds! This cozy recipe will quickly become your go-to dish, just like my favorites, Crack Chicken Pinwheels and One Pot Chicken.
Japanese Chicken & Egg Rice Bowl Ingredients
• Here’s what you need to create your delightful Oyakodon!
For the Chicken and Broth
- Chicken Thighs – Main protein source providing tenderness; substitute with chicken breast for a leaner option.
- Onion – Adds sweetness and aromatic flavor; shallots or green onions are great alternatives.
- Chicken Stock/Dashi – Provides umami depth to the broth; vegetable stock can be used for a vegetarian option.
- Soy Sauce – Key seasoning for saltiness and depth; tamari works well for a gluten-free variant.
- Mirin – Adds sweetness and complexity; mix sugar and water if mirin isn’t available.
- Sugar – Balances the flavors in the broth; can be omitted or replaced with honey or agave syrup.
For the Egg Mixture and Rice
- Eggs – Creates a luscious scramble that binds the dish; no alternative for this essential component.
- Cooked Rice – Acts as the base, absorbing flavors of the dish; use short-grain rice for authenticity.
For the Garnish
- Green Onion – Adds fresh color and flavor; can replace with chives if needed.
- Sesame Oil – Enhances flavor and aroma; a drizzle goes a long way.
- Nori – Seaweed that adds a nice textural contrast; break into small pieces for a topping.
- Togarashi – A Japanese spice blend that lifts the dish with a hint of heat; add to taste for some zing.
This Japanese Chicken & Egg Rice Bowl is all about simplicity and comforting flavors!
Step‑by‑Step Instructions for Japanese Chicken & Egg Rice Bowl
Step 1: Marinate the Chicken
In a mixing bowl, combine the chicken thighs, soy sauce, mirin, and sugar. Allow this mixture to marinate for about 5 to 10 minutes, which will enhance the flavor of your chicken. The sugar will help create a lovely glaze while the soy sauce infuses a savory depth, preparing the chicken for the delectable broth in your Japanese Chicken & Egg Rice Bowl.
Step 2: Prepare the Egg Mixture
While the chicken marinates, crack the eggs into a bowl and lightly beat them with a whisk or fork, leaving some egg whites visible for a textured scramble. Aim for about 70-80% mixed, which will give you that soft and silky finish in your Oyakodon. Set the bowl aside, allowing the eggs to reach room temperature while you continue with the next steps.
Step 3: Cook the Aromatics
Heat a large non-stick skillet over medium heat and add the chicken stock or dashi. Once it begins to boil, add the sliced onion, sautéing for approximately 1 minute until they soften and become fragrant. This step builds the foundation of flavors for your Japanese Chicken & Egg Rice Bowl, ensuring a comforting aroma fills your kitchen.
Step 4: Add the Chicken
Introduce the marinated chicken thighs to the skillet. Cook for 1 to 2 minutes on each side, ensuring they are almost cooked through but still juicy. You’ll know the chicken is ready when it turns golden brown and no longer pink in the center. This step ensures the chicken is perfectly tender, soaking up the delicious broth.
Step 5: Incorporate the Eggs
Pour the prepared egg mixture evenly over the chicken in the skillet. Allow it to cook for about 2 minutes until the edges start to set, then gently scramble the eggs with a spatula, mixing everything together carefully. You want the eggs to remain slightly runny, enveloping the chicken beautifully, thus creating a luscious layer in your Oyakodon.
Step 6: Serve and Garnish
Scoop warm cooked rice into bowls, then spoon the chicken and egg mixture generously over the top. For an added touch, garnish with chopped green onions or a drizzle of sesame oil, along with a sprinkle of togarashi if desired. Presenting this comforting Japanese Chicken & Egg Rice Bowl while it’s hot allows everyone to relish in its delightful aroma and flavor.
Storage Tips for Japanese Chicken & Egg Rice Bowl
Fridge: Store in an airtight container and enjoy within up to 2 days for the best flavor and texture.
Freezer: While not recommended for optimal freshness, you can freeze the chicken and broth mixture for up to 1 month. Thaw overnight in the fridge before reheating.
Reheating: Gently reheat in a skillet over medium heat, adding a splash of chicken stock to rehydrate the dish and avoid drying out the eggs.
Leftovers: If customizing with vegetables, ensure they are also stored properly; add any extra broth needed to maintain consistency during reheating.
Expert Tips for Oyakodon
-
Perfect Rice: Use slightly less water when steaming rice to ensure it absorbs the savory broth from the Japanese Chicken & Egg Rice Bowl properly.
-
Egg Whisking: Whisk eggs to about 70-80% mixed to achieve a soft, silky texture in your scramble that complements the dish perfectly.
-
Extra Veggies: Add pre-cooked mushrooms or vegetables for added nutrition and flavor. Just ensure you increase broth accordingly to keep it saucy.
-
Garnish Smartly: Enhance flavor and presentation by topping with fresh green onions, a drizzle of sesame oil, and a sprinkle of togarashi for a spicy kick.
-
Mind the Chicken: Don’t overcook the chicken; it should be golden brown and juicy to maintain tenderness through the quick cooking process.
What to Serve with 15-Minute Oyakodon?
Transform your dinner table into a comforting feast with these delightful sides and pairings!
-
Quick Pickled Vegetables: Bright and tangy, these crunchy bites balance the rich flavors of the Oyakodon, adding freshness to each spoonful.
-
Miso Soup: A warm bowl of miso soup complements your Japanese Chicken & Egg Rice Bowl wonderfully, enhancing the Japanese dining experience. The umami flavors create a harmonious pairing that warms the soul.
-
Steamed Edamame: Simple and nutritious, these tender green pods are perfect for snacking as you enjoy your meal. Sprinkle with sea salt for that delightful finish.
-
Japanese-style Cucumber Salad: A cool, crisp side with a hint of sweetness, this salad brightly contrasts the warmth of the Oyakodon, elevating your meal in texture and flavor.
-
Sautéed Spinach with Garlic: Adding a touch of earthy greens, this side dish brings a nutritious element, providing a delightful contrast to the creamy eggs and tender chicken.
-
Chilled Soba Noodles: Serve these silky noodles dressed in a light soy-based sauce, offering a refreshing and hearty addition that fits perfectly alongside your rice bowl.
-
Green Tea or Sake: Sip on a light green tea or a glass of sake, which adds a refined touch and enhances the overall dining experience.
Enjoy creating a full meal that embraces the spirit of comfort and satisfaction!
Make Ahead Options
These flavorful Oyakodon bowls are perfect for busy weeknights, allowing you to prep components in advance for truly effortless cooking! You can marinate the chicken in the soy sauce, mirin, and sugar up to 24 hours ahead, ensuring maximum flavor absorption. Additionally, slice the onions and prepare the egg mixture, storing them separately in the fridge for up to 3 days. When you’re ready to serve, simply sauté the onions and chicken in the broth, then pour in the egg mixture for a quick finish. This way, you’ll enjoy a comforting Japanese Chicken & Egg Rice Bowl just as delicious as if it were freshly made!
Japanese Chicken & Egg Rice Bowl Variations
Feel free to personalize your Oyakodon and make it truly your own with these fun twists!
-
Vegetable Boost: Add pre-cooked spinach or bell peppers for a colorful and nutritious touch. The sweetness of the veggies complements the savory broth beautifully.
-
Mushroom Magic: Incorporate shiitake or enoki mushrooms to deepen the flavor and texture of your dish. They lend an earthy note, making each bite even more satisfying.
-
Dairy-Free Delight: Swap the eggs with tofu scramble for a plant-based option that still provides a creamy texture. You’ll enjoy the same rich flavors in this comforting dish.
-
Spicy Twist: Drizzle in some chili oil or sprinkle togarashi for a nice kick! The heat elevates the whole bowl, turning a comforting meal into an exciting experience.
-
Cilantro Freshness: Top your bowl with fresh cilantro instead of green onions for a zesty finish. It adds a lovely burst of brightness that lifts each bite.
-
Quinoa Alternative: Use quinoa instead of rice for a high-protein, gluten-free base. This swap gives your Oyakodon a unique flavor while adhering to health-conscious choices.
-
Sriracha Sauce: Drizzle sriracha right before serving for an extra punch of flavor. This simple addition can transform the dish to fit your spice preference perfectly.
-
Fusion Style: Layer Oyakodon on a bed of cauliflower rice for a low-carb alternative. It’s a great way to enjoy this classic dish while keeping it light!
Remember, if you’re looking for more comforting meals, you might also love Rosemary Chicken Salad or try my savory Crack Chicken Pinwheels. Enjoy your culinary adventure!
Japanese Chicken & Egg Rice Bowl Recipe FAQs
What type of chicken should I use for Oyakodon?
Absolutely, I recommend using chicken thighs for their tenderness and rich flavor. They stay juicy during cooking, making for a delightful experience. If you’re looking for a leaner option, chicken breast works as well, just be careful not to overcook it.
How should I store leftovers of my Oyakodon?
Very! Store your Japanese Chicken & Egg Rice Bowl in an airtight container in the fridge, where it will last for up to 2 days. Be sure to reheat it gently on the stove to preserve the texture, adding a splash of chicken stock if needed to keep it moist.
Can I freeze Oyakodon?
Of course! You can freeze the chicken and broth mixture for up to 1 month. Just follow these steps:
- Allow the dish to cool completely.
- Transfer it into a freezer-safe container, leaving some space for expansion.
- Label it with the date.
When you’re ready to enjoy it, thaw it overnight in the fridge and reheat gently on the stove.
What veggies can I add to my Oyakodon?
You can customize its flavor by adding pre-cooked mushrooms like shiitake or enoki, or vegetables such as spinach or bell peppers for a nutritional boost. Just ensure to adjust the chicken stock if you’re adding more ingredients to maintain that deliciously saucy consistency!
What if my eggs don’t scramble nicely?
No worries! If you find your eggs are overcooked, it may be because they were cooked too long at too high a heat. Aim for a gentle scramble by cooking the eggs until the edges start to set but are still slightly runny in the center. This creates the perfect silky texture that binds your Japanese Chicken & Egg Rice Bowl together.
Is Oyakodon suitable for people with allergies?
Absolutely! Just be cautious with soy sauce if someone has a gluten allergy—substituting with tamari can resolve this. The dish is naturally free of gluten if you modify your soy sauce choice and check for other allergies related to specific garnishes like sesame oil or nori.
Delicious Japanese Chicken & Egg Rice Bowl Ready in 15 Minutes
Ingredients
Equipment
Method
- In a mixing bowl, combine the chicken thighs, soy sauce, mirin, and sugar. Allow this mixture to marinate for about 5 to 10 minutes.
- While the chicken marinates, crack the eggs into a bowl and lightly beat them, leaving some egg whites visible. Set the bowl aside.
- Heat a large non-stick skillet over medium heat and add the chicken stock or dashi. Once it begins to boil, add the sliced onion, sautéing for about 1 minute.
- Introduce the marinated chicken thighs to the skillet and cook for 1 to 2 minutes on each side until golden brown.
- Pour the prepared egg mixture over the chicken in the skillet, cooking for about 2 minutes until the edges start to set, then scramble gently.
- Scoop warm cooked rice into bowls, then spoon the chicken and egg mixture over the top. Garnish with green onions, sesame oil, and togarashi.
Leave a Reply