
As I poured vibrant pink cotton candy syrup into my mixing bowl, I was instantly transported back to the fairgrounds of my youth, where sweet, sugary dreams floated in the air. This Homemade Cotton Candy Ice Cream is my delightful homage to that nostalgic treat. With just five simple ingredients, this recipe is not only straightforward but also a guaranteed crowd-pleaser for family gatherings or warm-weather celebrations. Perfectly creamy and playfully sweet, this ice cream delivers a whimsical twist that’s healthy and homemade, putting a flourish on any dessert table. Want to bring a taste of the carnival to your kitchen? Let’s dive in!
Why is Cotton Candy Ice Cream So Special?
Nostalgic Flavor: Every scoop bursts with the sweet taste of childhood fairs, transporting you back to sunny days and cotton candy delights.
Easy to Make: With just five simple ingredients, this recipe is suitable for all skill levels, making it a fantastic choice for home cooks and busy chefs alike.
Perfect Party Treat: Impress your guests with a unique dessert that stands out at any gathering, ensuring smiles all around.
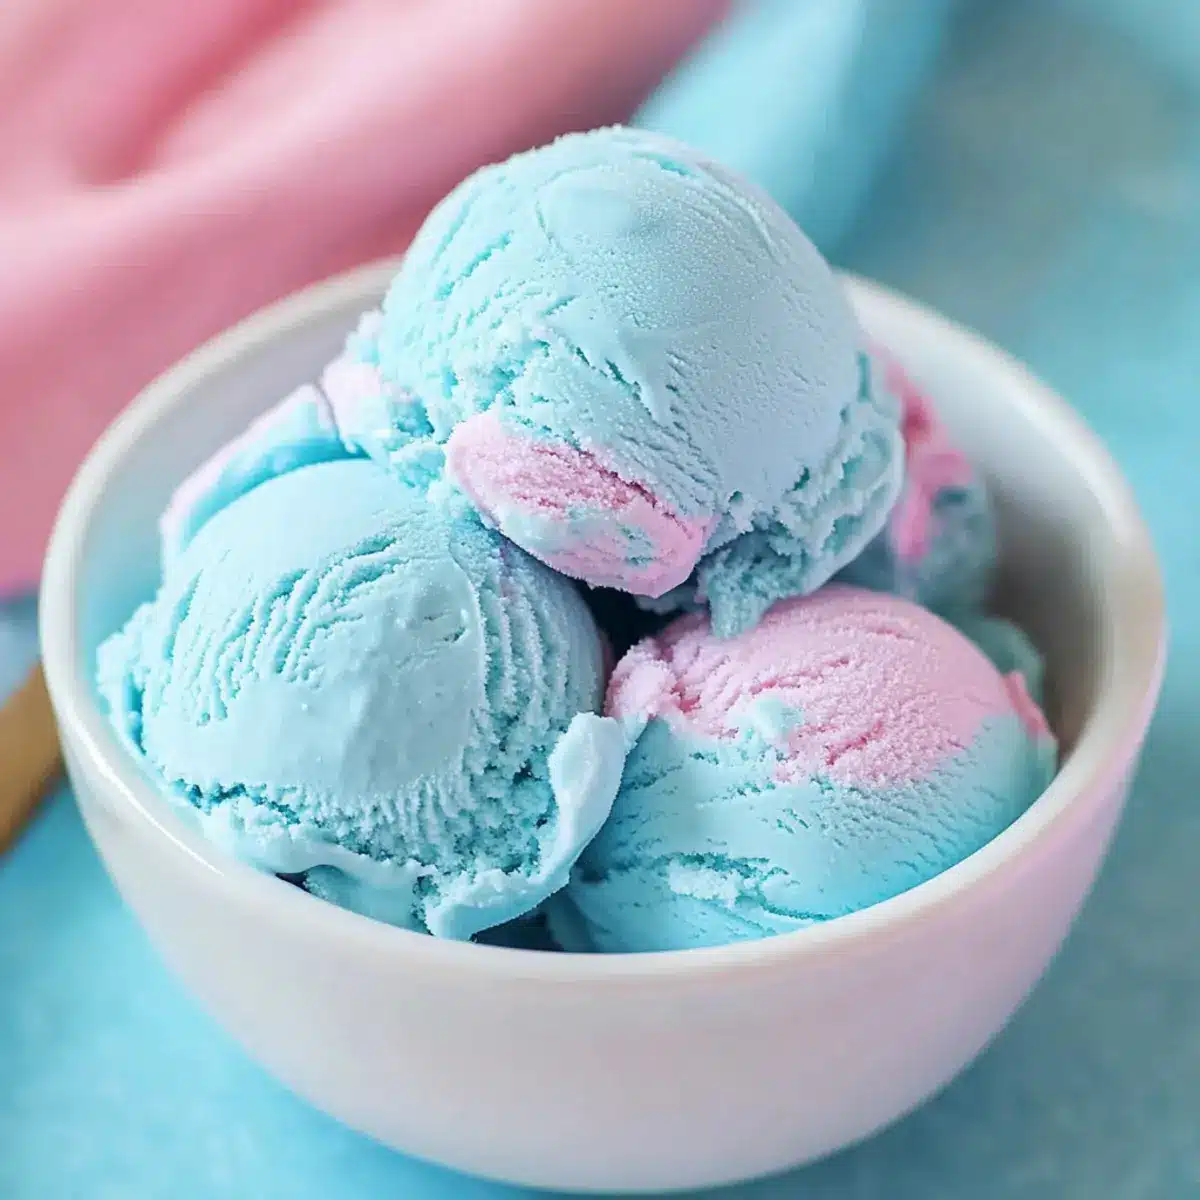
Customizable Colors: Add your favorite food coloring for a fun visual twist that adds excitement to your dessert presentation.
Versatile Ingredients: Experiment with different flavored syrups for an array of delectable variations—perfect for satisfying every sweet tooth! Enjoy it alongside dishes like Green Bean Casserole or Scalloped Potatoes for a delightful meal experience.
Cotton Candy Ice Cream Ingredients
For the Ice Cream Base
- Heavy Whipping Cream – Offers a rich, creamy texture essential for a smooth and decadent finish.
- Whole Milk – Adds moisture and richness; using lower-fat milk may change the texture.
- Granulated Sugar – Sweetens your cotton candy ice cream; feel free to adjust based on syrup sweetness.
- Cotton Candy Syrup – The magical ingredient providing that nostalgic cotton candy flavor; other flavored syrups can also add a creative twist.
- Vanilla Extract – Enhances the depth of flavors, making your ice cream irresistibly delicious.
- Pinch of Salt – Balances the sweetness for a perfect flavor profile.
For Color Customization (Optional)
- Food Coloring – Personalize the look of your ice cream to match your occasion or mood!
Step‑by‑Step Instructions for Cotton Candy Ice Cream
Step 1: Prepare the Ice Cream Maker
Start by placing the ice cream maker’s bowl and paddle in the freezer for at least 24 hours before you begin. This ensures that your Cotton Candy Ice Cream will churn to the perfect creamy texture. Once frozen, set your ice cream maker in a safe, stable spot on your countertop, ready for action.
Step 2: Mix Ingredients
In a medium mixing bowl, whisk together 2 cups of heavy whipping cream, 1 cup of whole milk, ¾ cup of granulated sugar, ½ cup of cotton candy syrup, 1 teaspoon of vanilla extract, and a pinch of salt. Stir vigorously until the sugar fully dissolves, creating a sweet, creamy base that captures the flavors of cotton candy. This should take about 2-3 minutes.
Step 3: Color Adjustment
If you want to customize the color of your Cotton Candy Ice Cream, now is the time to add food coloring. Just a drop or two will work—mix thoroughly until you achieve your desired hue. The vibrant color will make your ice cream visually stunning and even more appealing to eat, so feel free to get creative!
Step 4: Churning Process
Pour the sweet mixture into the prepared ice cream maker, ensuring not to overfill it. Turn on the machine and churn for 25-30 minutes. Keep an eye on it as it transforms into a fluffy, creamy texture, and the mixture expands; it should be thick enough to hold its shape when done.
Step 5: Serving Options
Once the churning process is complete, if you prefer a soft-serve texture, scoop out the Cotton Candy Ice Cream into bowls and enjoy immediately. For a firmer texture, transfer the ice cream into an airtight container and freeze for an additional 4-6 hours. This will allow it to fully set, making it easy to scoop and serve.

Make Ahead Options
These Homemade Cotton Candy Ice Cream treats are perfect for meal prep enthusiasts! You can mix the ice cream base (cream, milk, sugar, cotton candy syrup, vanilla, and salt) up to 24 hours in advance, allowing the flavors to meld beautifully. Simply whisk the ingredients together and store the mixture in an airtight container in the refrigerator. To ensure the best quality, prevent excessive air exposure to maintain freshness. When you’re ready to enjoy, pour the chilled mixture into your pre-frozen ice cream maker, churn for 25-30 minutes, and then freeze for an additional 4-6 hours for a firm texture. You’ll have delightful cotton candy ice cream ready for any joyful occasion!
What to Serve with Homemade Cotton Candy Ice Cream
A whimsical homemade dessert like this deserves equally delightful companions to create a full experience.
-
Fresh Berries: The tartness of strawberries or raspberries perfectly balances the sweetness, adding a refreshing contrast to your creamy treat.
-
Sugar Cookies: Soft, buttery cookies bring a delightful texture to each bite, perfect for enjoying alongside the playful ice cream.
-
Chocolate Sauce: Drizzle over the cotton candy ice cream for a decadent twist that satisfies the sweet tooth and adds richness.
-
Whipped Cream: A fluffy cloud of freshly whipped cream enhances the ice cream’s creaminess, making every scoop delightful and airy.
-
Rainbow Sprinkles: Add a fun, colorful touch that mirrors the joy of carnival days, inviting memories of laughter and summertime fun.
-
Sparkling Lemonade: This zesty drink complements the sweetness of the ice cream, providing a tart sparkle that refreshes the palate.
-
Mini Cupcakes: Little bites of cake are perfect for parties, allowing guests to mix and match flavors while enjoying their cotton candy ice cream.
-
Chocolate-Covered Pretzels: The salty crunch of pretzels contrasts beautifully with the sweet ice cream, creating a fun flavor profile.
How to Store and Freeze Cotton Candy Ice Cream
Fridge: Keep leftover cotton candy ice cream in an airtight container for up to 3 days for the best texture and flavor.
Freezer: For longer storage, freeze your cotton candy ice cream in an airtight container for up to 2 weeks. Ensure it’s tightly sealed to prevent freezer burn.
Serving Tip: Before serving from the freezer, let the ice cream sit at room temperature for 5-10 minutes to soften slightly. This makes scooping easier and brings back the creamy texture.
Reheating: If you notice any ice crystals forming, briefly stirring the ice cream before serving can help restore its creamy quality.
Cotton Candy Ice Cream Variations
Feel free to let your creativity shine by customizing this delightful recipe in various ways to match your taste!
- Flavor Swap: Replace cotton candy syrup with root beer, raspberry, or strawberry syrup for a new take. Each syrup brings its unique sweetness, offering different vibes!
- Dairy-Free Delight: Use coconut milk or almond milk to craft a dairy-free version. Just remember to add a thickener like cornstarch or xantham gum for a creamy finish.
- Extra Sweetness: For those with a sweet tooth, add a sprinkle of marshmallow fluff into the mix to enhance that dreamy, sugary flavor. It’s like incorporating a fluffy cloud into your ice cream!
- Nutty Addition: Stir in some finely chopped nuts like almonds or pecans for a tasty crunch. This unexpected twist adds a delightful texture contrast!
- Berry Blast: Toss in fresh or frozen berries like strawberries or blueberries for a fruity explosion. Their tartness pairs beautifully with the sweet base, creating a refreshing balance!
- Chocolate Drizzle: Prior to churning, add a few tablespoons of chocolate syrup for a chocolatey swirl. This will take your ice cream to a whole new level of indulgence!
- Spice It Up: Experiment by adding a dash of cinnamon or nutmeg. These warming spices can provide a surprising depth and warmth to each scoop.
- Celebrate Color: Go wild with your food coloring choices! Create a rainbow effect by adding different colors in layers while you churn. It’ll not only taste good but look fantastic too!
With these variations, you can enjoy your Cotton Candy Ice Cream in multiple ways, whether at a birthday party, a picnic, or simply a fun day at home!
Expert Tips for Cotton Candy Ice Cream
- Taste Test First: Always taste your mixture before churning. Adjust sugar or syrup for your perfect level of sweetness in the cotton candy ice cream.
- Milk Matters: Stick with heavy cream and whole milk for the best texture. Avoid reducing fat content unless you’re okay with a different consistency.
- Syrup Sensitivity: Not all cotton candy syrups are created equal. Test different brands to find the one that delivers the flavor you love!
- Serve with Ease: Invest in a Zeroll scoop for serving; it glides through frozen ice cream effortlessly, giving you perfect scoops every time.
- Experiment Boldly: Feel free to switch up the cotton candy syrup with other flavors for an exciting twist that keeps ice cream time fresh and fun!

Cotton Candy Ice Cream Recipe FAQs
How do I choose ripe ingredients for cotton candy ice cream?
Absolutely! For this cotton candy ice cream, focus on freshness. Choose heavy whipping cream and whole milk with no sign of spoilage—check expiration dates. A good quality cotton candy syrup will also ensure the best flavor, so aim for brands known for their authentic sweet taste.
How long can I store cotton candy ice cream in the fridge and freezer?
You can keep your cotton candy ice cream in the fridge for up to 3 days in an airtight container, but for optimal flavor and texture, it’s best to consume it sooner. For longer storage, transfer it to the freezer, where it will stay delicious for up to 2 weeks. Always ensure the container is well-sealed to keep out air and prevent freezer burn.
What is the best way to freeze cotton candy ice cream?
To freeze your cotton candy ice cream, scoop it into an airtight container, smoothing the top to remove any air pockets. For extra protection, you can place a piece of plastic wrap directly on the surface before sealing the container. This prevents ice crystals from forming and keeps your ice cream creamy. It’ll be good for up to 2 weeks, but I recommend eating it sooner for the best experience!
What should I do if my ice cream is too hard after freezing?
Very! If your cotton candy ice cream has become too hard after freezing, just let it sit out at room temperature for about 5-10 minutes before serving. This slight thawing will soften it enough for easy scooping while returning it to that delightful creamy texture. If it still has ice crystals, stirring it gently with a spoon can help revive its smoothness!
Can I make this cotton candy ice cream dairy-free?
Of course! To create a dairy-free version of cotton candy ice cream, substitute the heavy whipping cream with coconut cream and the whole milk with almond milk or another plant-based milk. Just keep in mind that using non-dairy alternatives may change the texture, so you might need to add an emulsifier or thickener like cornstarch or gelatin to maintain creaminess.
Is cotton candy ice cream safe for pets or individuals with allergies?
Very! It’s essential to keep this cotton candy ice cream away from pets, as many dairy products can upset their stomachs. Additionally, those with allergies should check the cotton candy syrup and any store-bought components for potential allergens like artificial flavors or gluten. Always feel free to customize the ingredients to suit your dietary needs!

Homemade Cotton Candy Ice Cream That'll Sweeten Your Day
Ingredients
Equipment
Method
- Prepare the Ice Cream Maker: Place the ice cream maker’s bowl and paddle in the freezer for at least 24 hours.
- Mix Ingredients: In a medium mixing bowl, whisk together heavy whipping cream, whole milk, granulated sugar, cotton candy syrup, vanilla extract, and salt until well combined.
- Color Adjustment: If desired, add food coloring and mix until the desired hue is achieved.
- Churning Process: Pour the mixture into the prepared ice cream maker and churn for 25-30 minutes.
- Serving Options: Enjoy immediately for a soft-serve texture or freeze for 4-6 hours for a firmer texture.
Leave a Reply