
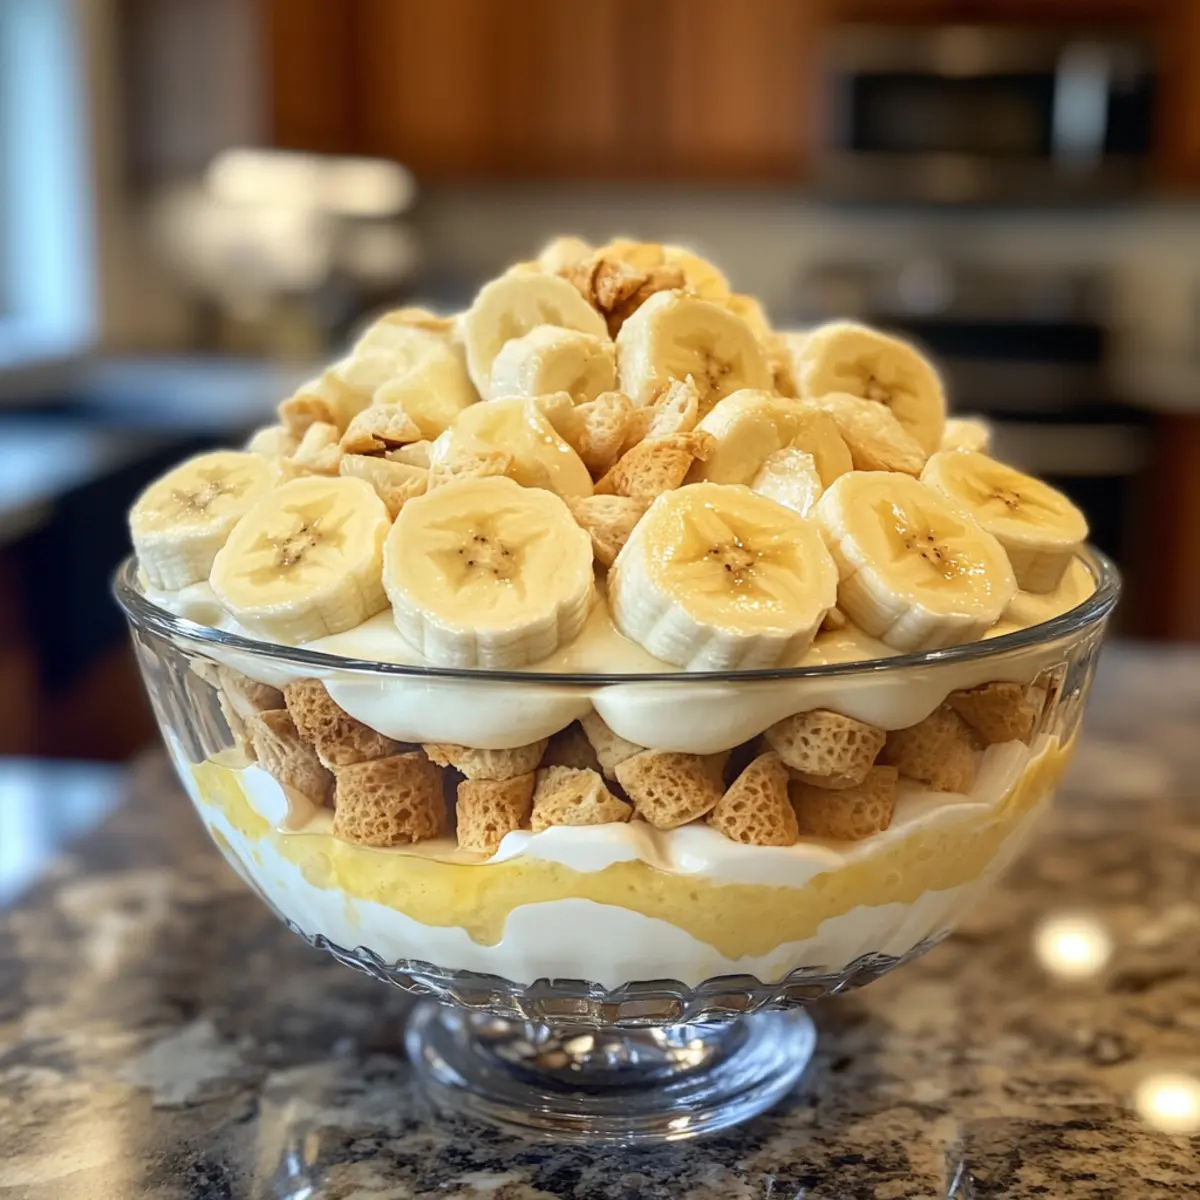
As I stirred the creamy mixture on the stovetop, the sweet aroma of vanilla filled the air, transporting me back to my grandmother’s kitchen. This Old-Fashioned Homemade Banana Pudding brings a taste of nostalgia and comfort in every luscious bite. With layers of velvety vanilla pudding, crunchy vanilla wafers, and ripe bananas, it’s a classic Southern dessert that’s not only easy to whip up but also a crowd-pleaser for any gathering. This delightful treat comes together in no time and, after a little chill in the fridge, transforms into the perfect ending to a family meal. Trust me, whether it’s a potluck, holiday feast, or just a quiet night in, this Banana Pudding is sure to bring smiles around the table. Curious about how to make this classic comfort food?
Why Is Banana Pudding So Irresistible?
Creamy Comfort: This recipe embodies the essence of home cooking, combining rich, velvety vanilla pudding with sweet, ripe bananas.
Nostalgic Flavors: Each spoonful transports you to simpler times, reminiscent of cozy family gatherings around Grandma’s table.
Easy Preparation: With just a few ingredients and straightforward steps, you’ll have a stunning dessert ready to impress.
Versatile Delight: Feel free to experiment by adding crushed pineapple or swapping out cookies to create your perfect version!
Crowd-Pleasing Treat: Whether for a holiday party or a weeknight dinner, this Banana Pudding will have everyone reaching for seconds.
Perfect Make-Ahead Option: Chill overnight for a flavor explosion that gets even better with time. Don’t forget to check out my tips for serving this delightful dessert in a beautiful way!
Banana Pudding Ingredients
• Classic ingredients for a delicious dessert.
For the Pudding
- Sugar – Sweetness; consider using brown sugar for a deeper flavor.
- Flour – Thickening agent; essential for achieving the right pudding consistency.
- Salt – Enhances flavor; don’t skip this ingredient as it balances the sweetness.
- Milk – Creaminess; whole milk works best for a rich texture.
- Eggs – Provides structure and richness; remember to temper to avoid scrambling.
- Vanilla Extract – Flavor enhancer; opt for pure vanilla for optimal taste.
For the Layers
- Vanilla Wafers – Adds structure and crunch; about 8 oz. works perfectly.
- Bananas – Natural sweetness and flavor; use ripe bananas for the best results.
Feel free to customize this classic Banana Pudding recipe to match your taste!
Step‑by‑Step Instructions for Old-Fashioned Homemade Banana Pudding
Step 1: Combine Dry Ingredients
In a medium saucepan, whisk together 1 cup of sugar, 1/3 cup of flour, and a pinch of salt until well blended. This mixture will form the base of your delicious Banana Pudding. Set the saucepan over medium heat and prepare to add the milk for a smooth texture in the coming steps.
Step 2: Thicken the Mixture
Gradually whisk in 2 3/4 cups of whole milk into the dry ingredients, ensuring there are no lumps. Continue to stir over medium heat for about 5-7 minutes, or until the mixture becomes thick and bubbly. You’ll know it’s ready when it holds a consistent texture and appears glossy on the surface, signaling it’s time for the next step.
Step 3: Add the Eggs
Lower the heat and cook the thickened mixture for an additional 2 minutes, stirring continuously, then remove it from the heat. In a separate bowl, whisk 3 beaten eggs gently, tempering them by slowly adding a few tablespoons of the hot pudding mixture. This prevents the eggs from scrambling when combined back into the saucepan for the classic Banana Pudding texture.
Step 4: Cook Until Bubbles Form
Return the egg mixture to the saucepan, stirring constantly over low heat. Continue to cook until you see gentle bubbles forming and the pudding thickens even further, which should take about 3-5 minutes. This step is crucial for achieving the perfect vanilla pudding consistency that beautifully complements the bananas and wafers.
Step 5: Incorporate Vanilla and Cool
Once the bubbles have formed, remove the pan from heat and stir in 1 tablespoon of pure vanilla extract. Allow the mixture to cool for about 15 minutes, stirring occasionally to prevent a skin from forming on top. This cooling step helps to enhance the flavor of your homemade Banana Pudding before layering.
Step 6: Layer the Ingredients
In an ungreased 8-inch square pan, begin layering by placing about 25 vanilla wafers on the bottom. Next, add half of the sliced ripe bananas, followed by half of the creamy pudding mixture. Repeat the layering process with the remaining wafers, bananas, and pudding. This assembly creates delightful layers that will shine through when served.
Step 7: Chill and Set
Cover the assembled Banana Pudding with plastic wrap, ensuring it touches the surface to prevent moisture from forming. Refrigerate for at least 4 hours, but preferably overnight. This chilling time allows the flavors to meld beautifully and gives the pudding a chance to set for a creamy final texture.
Step 8: Serve and Garnish
Before serving, crush any remaining vanilla wafers and sprinkle them generously over the top for added crunch. Garnish with a few fresh banana slices just before serving to keep them looking vibrant and appealing. Your Old-Fashioned Homemade Banana Pudding is now ready to be enjoyed, bringing joy to your family and friends!
What to Serve with Old-Fashioned Homemade Banana Pudding
As you prepare to enjoy this creamy masterpiece, consider these delightful pairings to create a memorable meal.
- Fresh Berries: The tartness of strawberries or blueberries adds a refreshing contrast to the rich banana pudding.
- Grilled Peaches: Sweet, caramelized stone fruit will elevate the dessert’s warmth and nostalgia, creating a lovely balance.
- Sweet Tea: A classic Southern beverage, its bold sweetness perfectly complements the creamy layers of your pudding.
- Chocolate Chip Cookies: Crunchy, chewy cookies provide a fun texture contrast while echoing the homey sweets.
- Pecan Pie: For an indulgent touch, this buttery dessert with its nutty crunch harmonizes beautifully with banana pudding.
- Vanilla Ice Cream: A scoop of creamy vanilla ice cream melds seamlessly, adding an extra chill to your sensational dessert experience.
- Coconut Flan: The smooth creaminess and subtle coconut flavor create an intriguing juxtaposition to the banana-centric treat.
Embrace these sides and drinks to craft a comforting and inviting meal, celebrating the nostalgia of homemade desserts!
How to Store and Freeze Banana Pudding
Fridge: Store covered Banana Pudding in the refrigerator for up to 4 days. Use plastic wrap directly on the surface to prevent moisture from forming, keeping it fresh and delicious.
Freezer: Avoid freezing Banana Pudding; the texture will deteriorate once thawed, turning creamy pudding into a soupy mess upon defrosting.
Serving Tips: For the best experience, serve chilled with freshly sliced bananas on top. Add crushed vanilla wafers just before serving for an extra crunch that elevates each bite.
Leftovers: If you have any pudding left after serving, tightly cover the dish to keep it fresh, but remember to enjoy it within a few days for the best flavor!
Make Ahead Options
These Old-Fashioned Homemade Banana Pudding are a fantastic choice for meal prep enthusiasts looking to save time! You can prepare the pudding base up to 24 hours in advance by following the first five steps and then allowing it to cool completely before covering it tightly with plastic wrap and refrigerating. This helps to maintain the creamy texture while keeping flavors vibrant. The layering can be completed just a few hours before serving, ideally adding fresh bananas and crushed wafers right before enjoyment to prevent browning. With this method, you can have a delightful dessert ready to impress your guests with minimal effort on the day of your gathering!
Expert Tips for Banana Pudding
Chill Overnight: Allowing your Banana Pudding to rest overnight enhances flavor, creating a creamy texture that everyone loves.
Fresh Bananas: Always add sliced bananas just before serving to prevent them from browning and keep your dessert looking fresh.
Proper Tempering: When adding eggs, temper them correctly with a bit of the hot pudding to avoid scrambling, ensuring a smooth texture.
Avoid Freezing: Do not freeze Banana Pudding, as it changes the consistency and texture; keep it refrigerated instead.
Flavor Boost: For a stronger banana flavor, incorporate mashed bananas into the pudding mixture when cooking.
Variations & Substitutions for Banana Pudding
Feel free to put your own spin on this cherished classic; the possibilities are as delightful as the original!
- Gluten-Free: Substitute all-purpose flour with a gluten-free flour blend or cornstarch to thicken the pudding without compromising flavor.
- Dairy-Free: Use almond milk or coconut milk instead of whole milk for a delicious dairy-free twist that everyone will enjoy.
- Sweetness Swap: For a lower glycemic option, try coconut sugar instead of regular sugar to add a rich flavor without the guilt.
- Chocolate Banana Pudding: Incorporate cocoa powder into the boiling mixture for a chocolatey indulgence; it’s like dessert paradise in a bowl!
- Flavor Boost: Add a touch of almond extract along with the vanilla for a subtle nutty flavor that pairs beautifully with the bananas.
- Tropical Twist: Toss in some crushed pineapple or coconut flakes for a tropical vibe that’ll transport you straight to a beach getaway.
- Layered Delight: Use ladyfingers or shortbread cookies instead of vanilla wafers for a unique spin on the texture that will intrigue your taste buds.
- Spice it Up: Sprinkle some cinnamon or nutmeg on top before serving for an unexpected aromatic twist that enhances the overall flavor.
Remember, creativity in the kitchen can lead to wonderful surprises! For example, if you’re looking for more delicious dessert options, don’t miss out on my Chocolate Cream Pie or Lemon Meringue Pie; both are sure to delight your family and friends!
Old-Fashioned Homemade Banana Pudding Recipe FAQs
How do I choose the right bananas for my pudding?
Absolutely! For the best flavor, look for ripe bananas that are slightly speckled with brown spots. This indicates they are sweet and ready to use. Avoid bananas that are overly mushy or have dark spots all over, as they can affect the texture of your pudding.
How should I store leftover Banana Pudding?
I recommend covering your Banana Pudding with plastic wrap, ensuring it touches the surface to avoid moisture build-up. Store it in the refrigerator for up to 4 days. It will stay fresh and delicious; just remember to enjoy it quickly to savor the creamy goodness!
Can I freeze Banana Pudding?
It’s best to avoid freezing Banana Pudding, as the texture will deteriorate once thawed. If you do need to freeze it, place it in an airtight container for up to 3 months. When ready to enjoy, thaw it in the refrigerator overnight and whip it gently to restore some creaminess. However, I typically advise making it fresh!
What if my pudding isn’t thickening properly?
Very! If your Banana Pudding isn’t thickening, make sure you’re cooking it over medium heat and stirring continuously to prevent it from sticking. If it still doesn’t thicken, try sprinkling in a little more flour or cornstarch mixed with water during cooking. This can help achieve that luxurious pudding consistency you’re aiming for!
Are there any allergy considerations I should be aware of?
Certainly! This recipe contains milk and eggs, which are common allergens. For a gluten-free option, use cornstarch instead of flour, and for a dairy-free version, substitute with a non-dairy milk like almond or coconut milk. Always check the specific brands of your ingredients to ensure they meet your dietary needs.
How can I make my Banana Pudding even more flavorful?
I often suggest adding a mashed ripe banana into the pudding mixture while cooking for deeper banana flavors. You can also stir in a bit of cinnamon or nutmeg to add warmth and spice that perfectly complements the sweetness of the bananas. Enjoy experimenting to find your delicious twist!
Creamy Banana Pudding That'll Take You Back to Grandma's Kitchen
Ingredients
Equipment
Method
- In a medium saucepan, whisk together 1 cup of sugar, 1/3 cup of flour, and a pinch of salt until well blended. Set over medium heat.
- Gradually whisk in 2 3/4 cups of whole milk into the dry ingredients, stirring until thick and bubbly for about 5-7 minutes.
- Lower the heat and cook the thickened mixture for an additional 2 minutes. In a separate bowl, whisk 3 beaten eggs and temper them.
- Return the egg mixture to the saucepan, stirring constantly over low heat until bubbles form and the pudding thickens.
- Remove from heat and stir in 1 tablespoon of vanilla extract. Allow the mixture to cool for about 15 minutes.
- In an ungreased 8-inch square pan, layer about 25 vanilla wafers, half of the sliced bananas, and half of the pudding.
- Repeat the layering process with the remaining wafers, bananas, and pudding. Cover with plastic wrap and refrigerate for at least 4 hours.
- Before serving, crush remaining wafers and sprinkle over the top. Garnish with banana slices just before serving.
Leave a Reply