
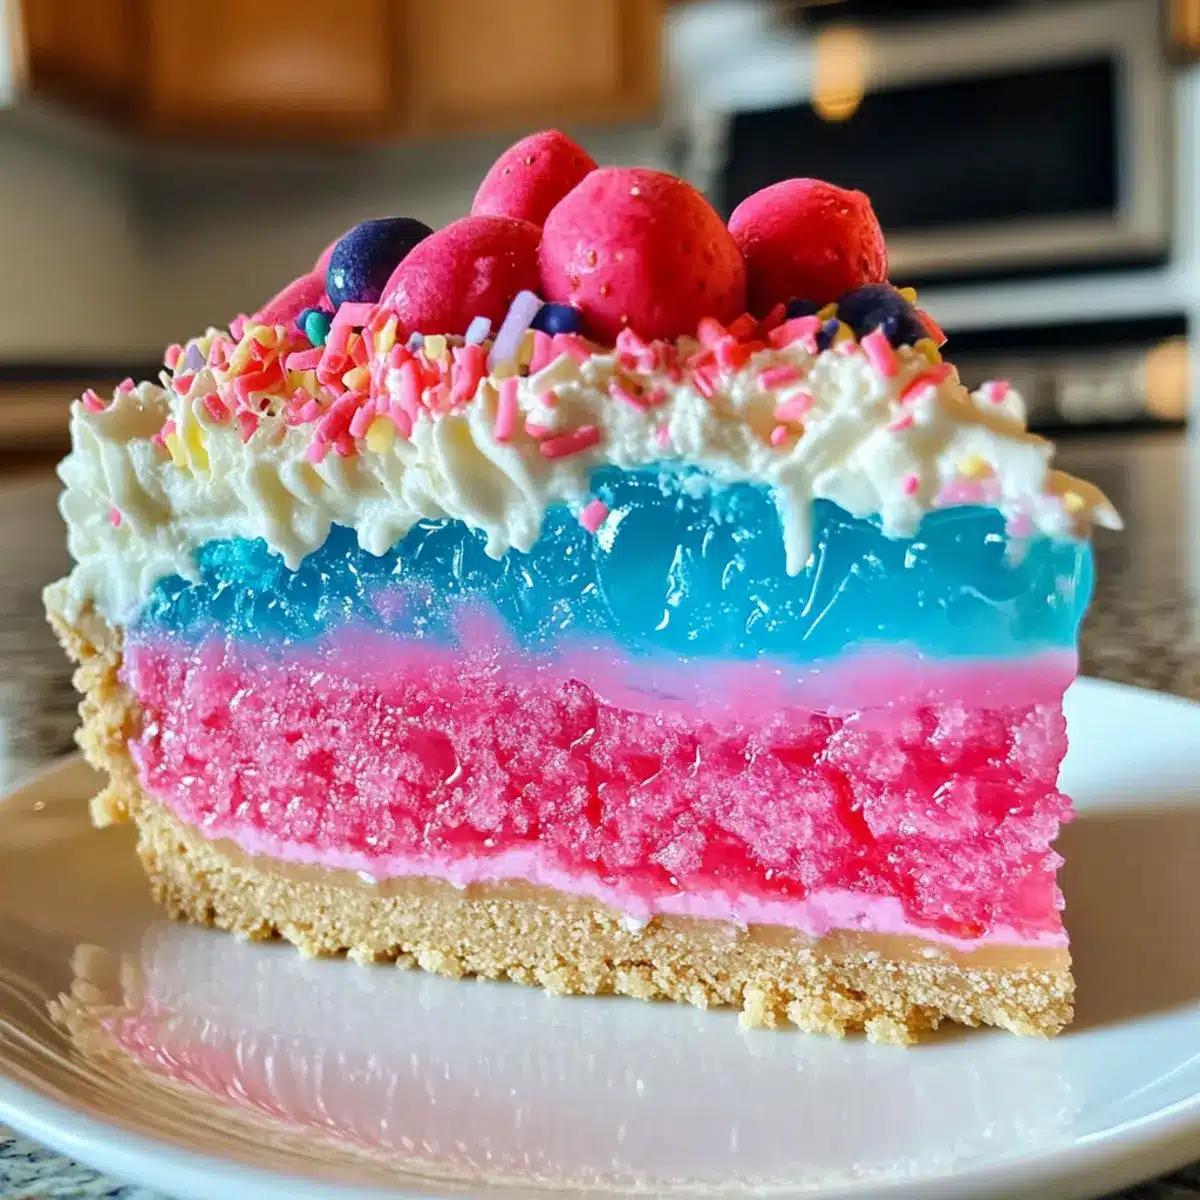
As I stood in the kitchen, the tempting scent of spring in the air reminded me of bright, cheerful gatherings with family and friends. This Easter, I’m excited to share my No-Bake Easter Jello Cheesecake, a dessert that’s as playful as it is delicious. The vibrant, layered look of this cheesecake is sure to captivate your guests while the creamy, fruity flavors provide a refreshing finish that’s perfect for your holiday celebrations. With its effortless preparation, this easy dessert will let you spend more time enjoying the festivities and less time slaving away in the kitchen. Trust me; this charming treat will not only elevate your dessert table but also leave your loved ones asking for seconds! Are you ready to impress with a dessert that screams spring? Let’s dive into the deliciousness!
Why is this Easter Jello Cheesecake special?
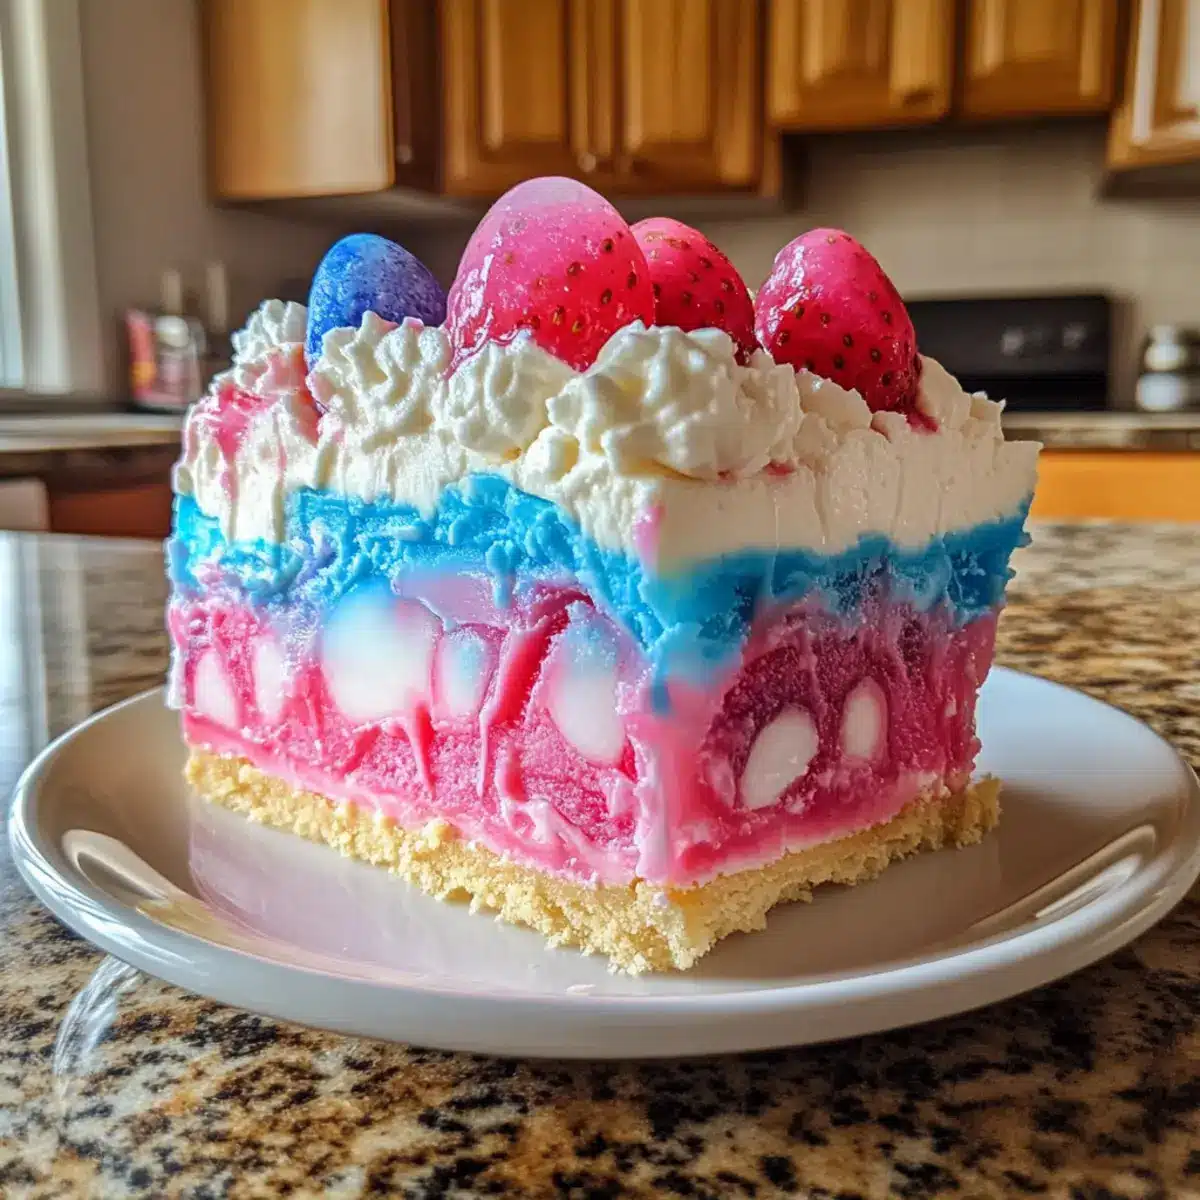
Festive and Fun: This dessert brings a burst of color and joy to your spring celebrations, making it a visual delight as well as a delicious choice.
No-Bake Convenience: Enjoy the ease of a no-bake recipe; simply mix and chill, leaving you free to focus on your gathering.
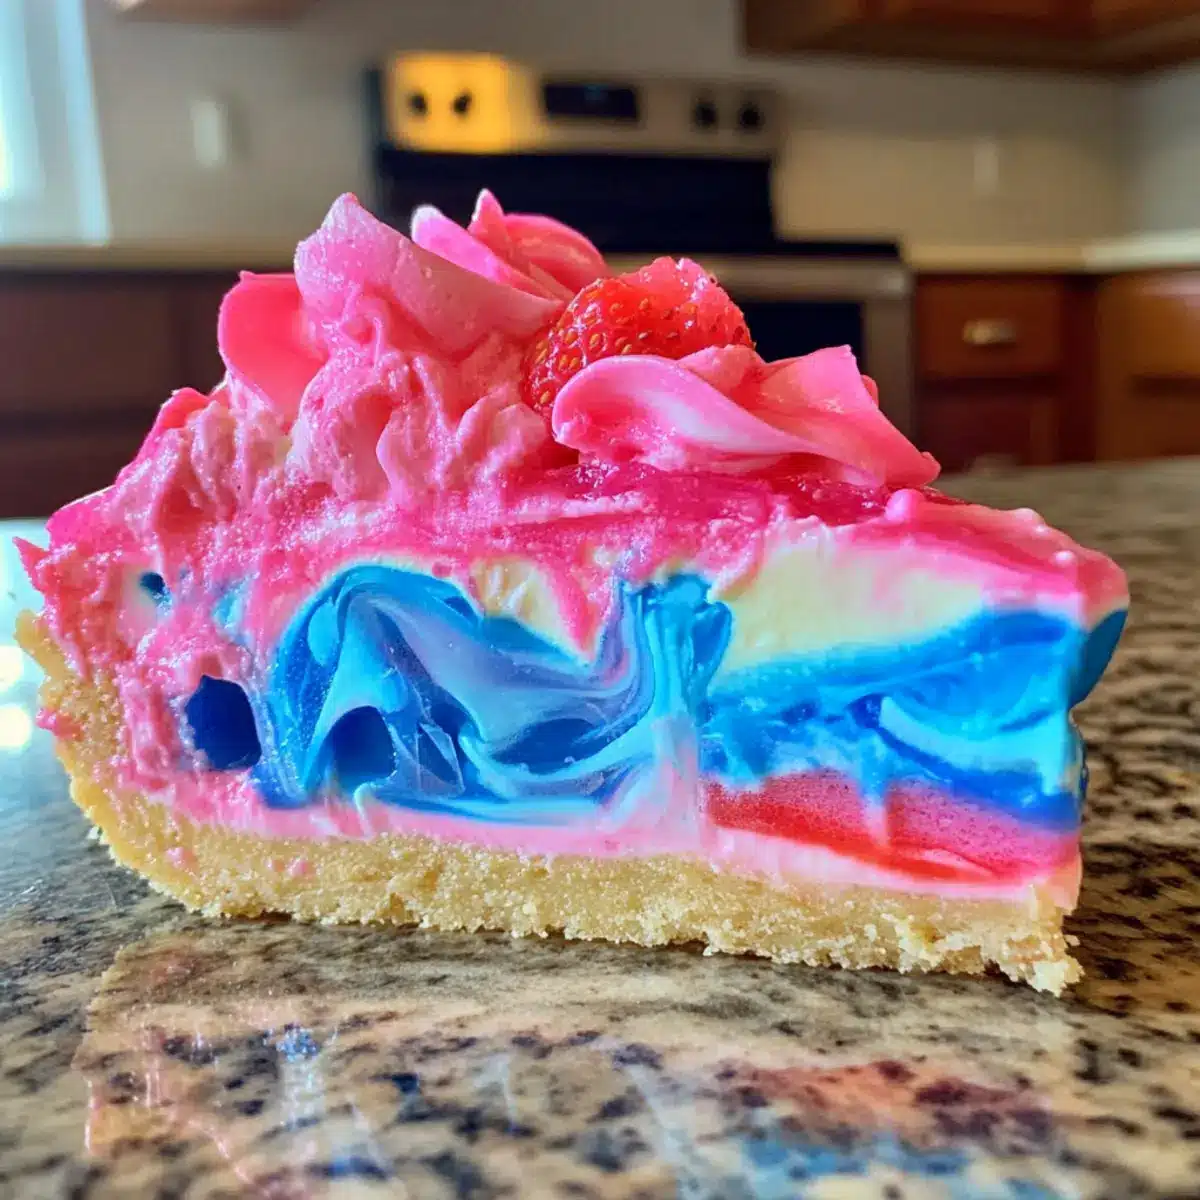
Layered Delight: The combination of creamy cheesecake and fruity Jell-O layers creates an exciting texture that’s sure to please.
Customizable Flavors: Feel free to experiment with different Jell-O flavors, making it unique for any occasion—consider swapping in lime for a zesty twist!
Crowd-Pleasing Appeal: With its lightness and sweetness, this cheesecake is a hit with kids and adults alike, ensuring it’s a favorite at any festive table.
Make-Ahead Magic: Perfect for hosting, you can prepare this treat in advance, guaranteeing you’ll have more time to enjoy with your guests. If you’re looking for more delicious layered desserts, check out my Pecan Pie Cheesecake and Pecan Pumpkin Cheesecake ideas!
Easter Jello Cheesecake Ingredients
• Get ready to create a delightful spring treat!
-
For the Cheesecake Base
-
1 (11.1 oz.) box Jell-O no-bake Classic cheesecake – This serves as the creamy layer base; just follow package instructions for assembly.
-
Cooking spray – Prevents sticking in the springform pan; any non-stick spray can work.
-
For the Jell-O Layers
-
3 tbsp blue Jell-O granules – Adds a fruity flavor and vibrant color; feel free to substitute with any Jell-O flavor you fancy.
-
3 tbsp strawberry or cherry Jell-O granules – Provides another layer of delicious flavor; choose your favorite for variation.
-
For the Creamy Topping
-
3 (8 oz.) tubs Cool Whip – This adds lightness and creaminess to the layers; you can substitute with whipped heavy cream if preferred.
-
Miscellaneous
-
Water – Essential for dissolving the Jell-O granules for a smooth consistency.
-
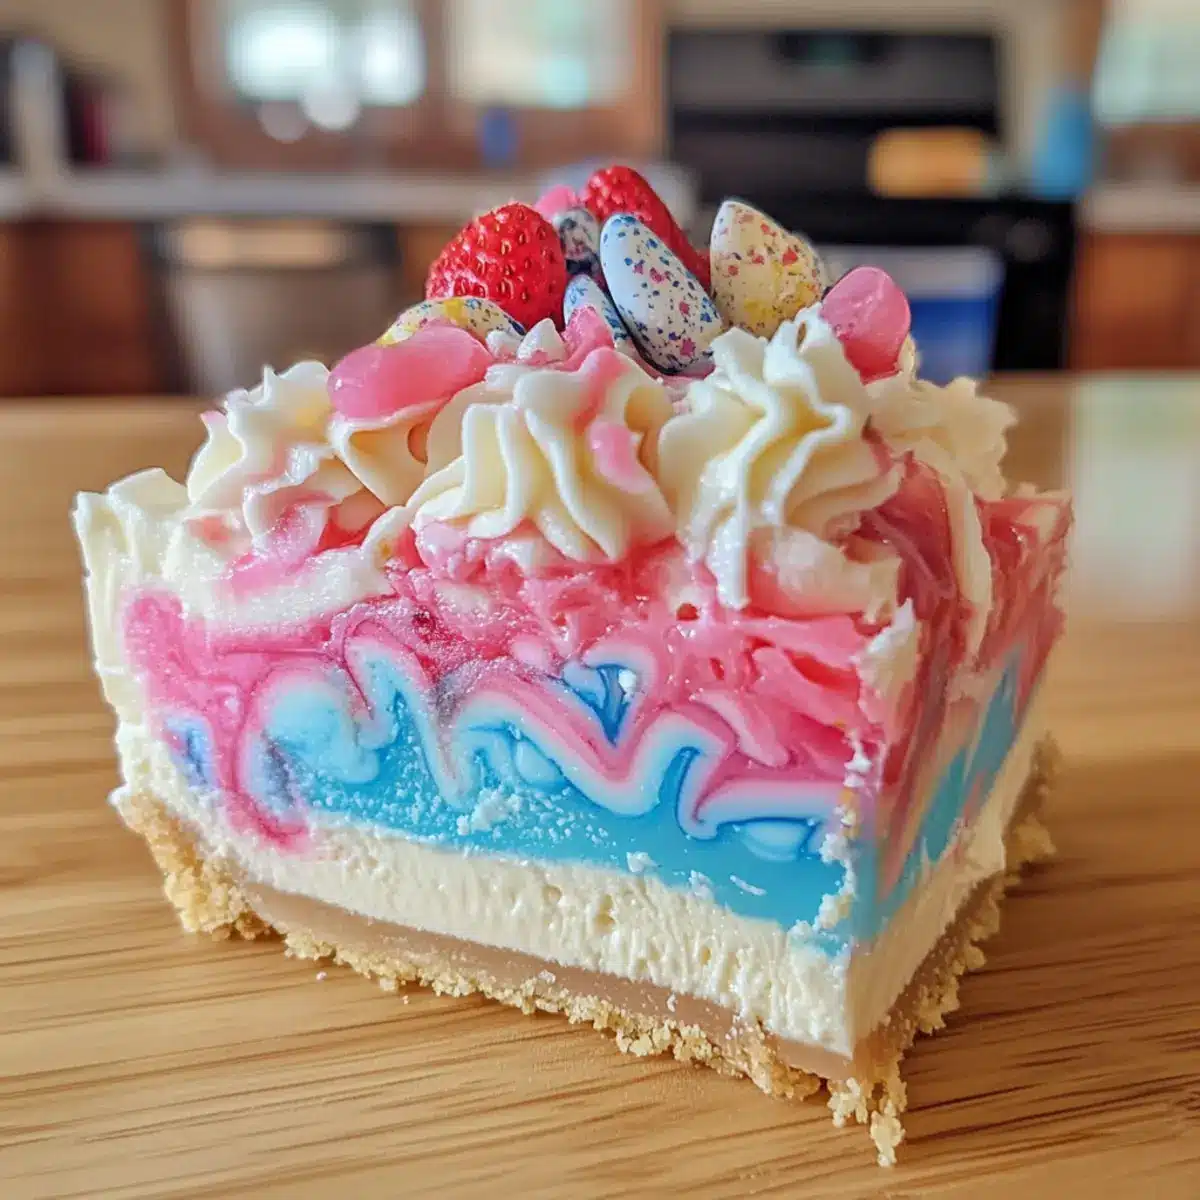
Cadbury Pastel Mini Eggs – Optional decoration for a festive touch; any pastel candy will liven it up!
-
9” springform pan – Important for shaping the cheesecake; a regular round cake pan can be used but is less effective for this styled dessert.
-
1M piping tip and disposable piping bags – For decorative finishing touches; while not necessary, they elevate the presentation beautifully.
With these ingredients in hand, you’re well on your way to crafting a beautiful Easter Jello cheesecake that will delight all your guests!
Step‑by‑Step Instructions for Easter JELLO Cheesecake
Step 1: Prepare the Crust
Begin by following the instructions on the Jell-O no-bake Classic cheesecake box. Lightly grease your 9” springform pan with cooking spray to prevent sticking. Once the crust mixture is ready, press it evenly into the base of the pan, creating a smooth layer. Set aside while you prepare the cheesecake layer.
Step 2: Make the Cheesecake Layer
In a mixing bowl, combine cheesecake mix according to the package instructions. Blend until smooth and creamy, ensuring there are no lumps. Pour this luscious mixture over the prepared crust in the springform pan. Place the pan in the refrigerator for 30 minutes to allow the cheesecake layer to set firmly.
Step 3: Prepare Blue Jell-O Layer
For the vibrant blue layer, dissolve 3 tablespoons of blue Jell-O granules in 1/3 cup of boiling water, stirring until fully dissolved. To cool it down quickly, add ice-cold water. Once chilled, fold in one tub of Cool Whip gently until well combined. Refrigerate the mixture for about 30 minutes until it thickens slightly.
Step 4: Layer Blue Jell-O
After the blue Jell-O mixture has cooled, carefully spread it over the set cheesecake layer. Make sure to do this gently to avoid mixing the layers. Once spread evenly, cover the springform pan with plastic wrap and place it back into the refrigerator for at least 2 hours to allow the blue layer to solidify.
Step 5: Prepare Pink Jell-O Layer
Repeat the process for the pink Jell-O layer using the strawberry or cherry flavor. Dissolve the Jell-O granules in boiling water, mix well, then add ice water to cool down. Once ready, fold in the remaining tub of Cool Whip until the mixture is light and fluffy. Refrigerate for a short time to thicken.
Step 6: Layer Pink Jell-O
Spread the pink Jell-O mixture over the chilled blue layer, smoothing it out carefully. Ensure that the layers stay distinct by applying gentle pressure. Once layered, cover again and let it refrigerate for a minimum of 4 hours, or overnight if you want to prepare it ahead of time.
Step 7: Decorate
Once fully set, carefully run a knife around the edges of the pan to loosen the cheesecake before unbuckling the springform. Top your stunning Easter Jello Cheesecake with the last tub of Cool Whip for a fluffy finish. Adorn it with Cadbury Pastel Mini Eggs for a festive look, or your choice of pastel candies, then slice and serve!
Make Ahead Options
This Easter Jello cheesecake is an excellent choice for meal prep, making your holiday hosting stress-free! You can prepare the cheesecake layer and refrigerate it up to 24 hours in advance for the best flavor and texture. Additionally, the Jell-O layers can be prepped and kept in the refrigerator up to 3 days prior to serving. To maintain quality, ensure the Jell-O layers have fully set before layering on top of the cheesecake. When ready to serve, simply add the final dollop of Cool Whip and your festive Cadbury Mini Eggs or candies for decoration. With this strategy, you can enjoy a delightful no-bake dessert without the last-minute rush!
How to Store and Freeze Easter Jello Cheesecake
Fridge: Store your Easter Jello cheesecake covered in the refrigerator for up to 3 days. Make sure it’s properly sealed to keep it fresh.
Freezer: If you want to freeze the cheesecake, wrap it tightly in plastic wrap and aluminum foil. It can be stored for up to 2 months.
Thawing: To enjoy from frozen, transfer it to the fridge and let it thaw overnight. Avoid thawing at room temperature to maintain texture.
Serving Tip: If you’ve made this delicious Easter Jello cheesecake ahead of time, re-chill it for a few hours before serving to ensure it’s refreshingly cool and delightful!
Easter Jello Cheesecake Variations & Substitutions
Get creative with your dessert by exploring some delightful twists that will surely impress your guests!
- Flavor Swap: Use different Jell-O flavors, like lime or orange, for a refreshing change. Each choice will add its unique fruitiness to the layers.
- Dairy-Free Delight: Substitute Cool Whip with coconut whipped cream for a light yet creamy texture anyone can enjoy.
- Add Fresh Fruit: Layer fresh fruit slices, like strawberries or kiwi, in between the Jell-O layers for added texture and a burst of freshness.
- Mini Cheesecake Bites: Pour the mixture into muffin cups or small jars for adorable single-serving desserts that are perfect for parties or picnics.
- Nutty Crunch: Sprinkle chopped nuts, like almonds or pecans, between layers for a delightful crunch that contrasts beautifully with the creamy texture. To keep that festive spirit alive, you might enjoy trying different nutty toppings in my Crisp Mini Cheesecakes.
- Cheesecake Swirl: Blend in some melted cream cheese for a richer flavor profile that contrasts with the fruity lightness of the Jell-O. This will create an enticing swirl effect that’s sure to wow!
- Chocolate Drizzle: Drizzle some melted chocolate over the top before serving for an indulgent touch that takes this dessert to the next level. If you’re a chocolate lover, you’ll also enjoy the deliciousness of my Pecan Pie Cheesecakes.
- Spicy Kick: For an adventurous palette, consider adding a pinch of cayenne or chili powder to the Jell-O layers to create a sweet and spicy surprise in every bite.
These variations will help you create a truly unique Easter Jello Cheesecake that reflects your personal taste and creativity!
Tips for the Best Easter Jello Cheesecake
-
Dissolve Thoroughly: Ensure Jell-O granules are completely dissolved in boiling water to avoid gritty layers in your Easter Jello cheesecake, creating a smooth finish.
-
Chill Layers Well: Refrigerate each layer thoroughly before adding the next. This prevents mixing and maintains distinct, vibrant layers for a visually stunning dessert.
-
Experiment with Flavors: Feel free to mix and match your Jell-O flavors for a personal touch. Lime or orange can add delightful zests to your seasonal cheesecake.
-
Presentation Matters: For an impressive display, consider using mini jars for individual servings. This not only looks beautiful but is also great for parties!
-
Plan Ahead: This no-bake dessert can be prepared a day in advance. Making it ahead of time ensures the layers set beautifully, allowing you to enjoy the celebration stress-free.
What to Serve with Easter Jello Cheesecake
As you prepare to delight your guests with this colorful masterpiece, consider these delightful pairings that will beautifully complement the sweetness of your dessert.
- Fresh Berries: Ripe strawberries or blueberries add a tart contrast and a pop of freshness, enhancing the fruity essence of the cheesecake.
- Whipped Cream: A dollop of homemade whipped cream on the side offers a rich, creamy experience that elevates each bite.
- Mint Sprigs: A few sprigs of fresh mint provide a refreshing herbaceous note that plays beautifully against the sweetness of the cheesecake.
- Chocolate Drizzle: A light drizzle of chocolate sauce creates a delightful taste harmony, adding an indulgent touch that chocolate lovers will appreciate.
- Iced Tea or Lemonade: These refreshing beverages balance the sweetness with a cool, light sensation, perfect for a festive spring gathering.
- Mini Fruit Tarts: Offer a contrasting texture with perfectly baked fruit tarts, adding delightful crispness and tangy flavors that harmonize well with the cheesecake.
- Easter Cookie Platter: A mix of festive cookies, such as sugar adornments and lemon zest, can add a playful touch to your dessert spread.
- Sparkling Wine: A bubbly glass not only enhances the celebratory mood but also elevates the entire dining experience, making it feel special and festive.
- Pistachio Ice Cream: A scoop of creamy pistachio ice cream brings a unique nutty flavor that rounds out the dessert experience beautifully.
- Fruit Salad: A bright, refreshing bowl of mixed spring fruits adds a healthy option that balances the sweetness of the cheesecake, making for a colorful presentation.
Easter Jello Cheesecake Recipe FAQs
How do I choose the right Jell-O flavors?
Choosing Jell-O flavors can be a delightful part of creating your Easter Jello Cheesecake! Opt for flavors that complement each other, like blue raspberry with strawberry or cherry. The vibrant visual contrast of colors will elevate your dessert’s visual appeal. If you’re looking for a zesty twist, lime and orange can bring some refreshing brightness to the mix!
How should I store leftovers of my cheesecake?
Absolutely! Store your leftover Easter Jello cheesecake covered in the refrigerator for up to 3 days. Use plastic wrap or a cake dome to protect it from absorbing other flavors. If you’re prepping for a gathering, it’s a great idea to make this dessert ahead of time since it only gets better as it chills!
Can I freeze my Easter Jello cheesecake?
Yes, you can freeze it! To freeze your cheesecake, wrap it tightly in plastic wrap first, then cover it in aluminum foil. This helps to keep the texture intact. It can be stored in the freezer for up to 2 months. Just remember to let it thaw overnight in the fridge before serving!
What if my Jell-O doesn’t set properly?
Very! If you find that your Jell-O layers aren’t setting correctly, this usually indicates that the granules weren’t fully dissolved or that the mixed layers weren’t cooled enough before refrigeration. Always ensure that the Jell-O is fully dissolved in boiling water, and after mixing in Cool Whip, refrigerate each layer until it thickens before adding the next one. A little patience goes a long way in creating those beautiful layers!
Are there any dietary restrictions to consider for this recipe?
If you’re catering to dietary needs, this Easter Jello cheesecake is a relatively light dessert. However, keep in mind that it contains dairy due to the Cool Whip and cheesecake mix. For lactose-free versions, try using dairy-free whipped toppings and lactose-free cream cheese. Always check ingredient labels for allergens like gluten or specific flavor additives, especially with Jell-O products.
Easy Easter JELLO Cheesecake for Your Bright Spring Celebrations
Ingredients
Equipment
Method
- Prepare the crust by greasing the springform pan with cooking spray and pressing the cheesecake mixture evenly into the base.
- Mix the cheesecake layer according to package instructions, then pour it over the crust and refrigerate for 30 minutes.
- Prepare the blue Jell-O layer by dissolving Jell-O granules in boiling water, adding cold water, then folding in a tub of Cool Whip.
- Spread the blue Jell-O over the cheesecake layer gently, then cover and refrigerate for at least 2 hours.
- Prepare the pink Jell-O layer using the same method as the blue layer, then refrigerate until thickened.
- Layer the pink Jell-O mixture over the blue layer, cover, and refrigerate for at least 4 hours.
- Run a knife around the edges of the pan, top with Cool Whip and decorated with Cadbury Mini Eggs, then slice and serve.
Leave a Reply