
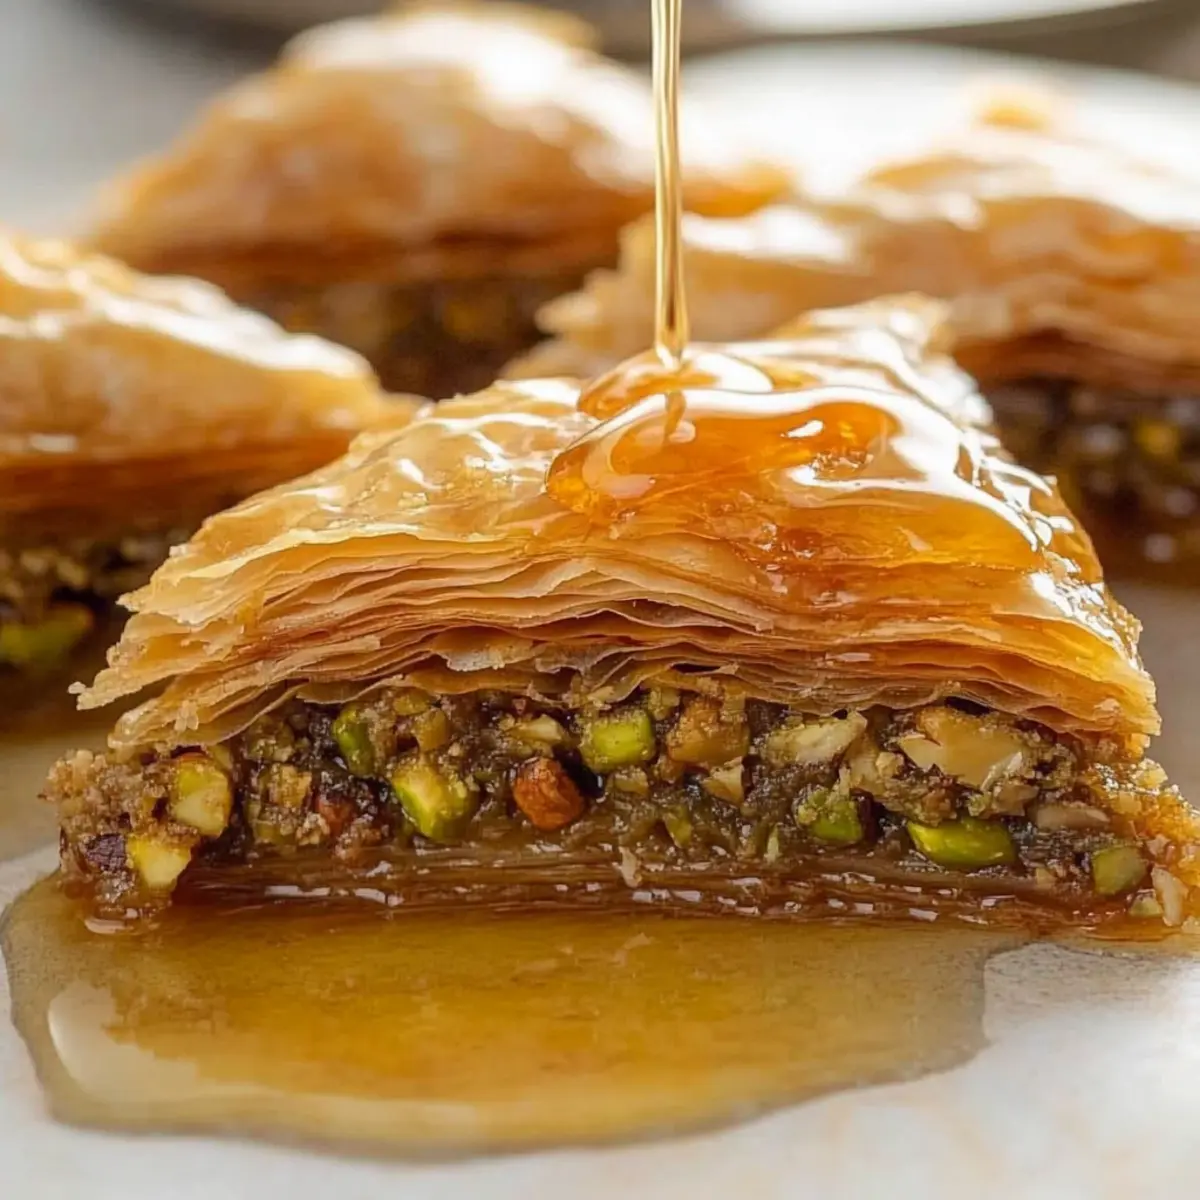
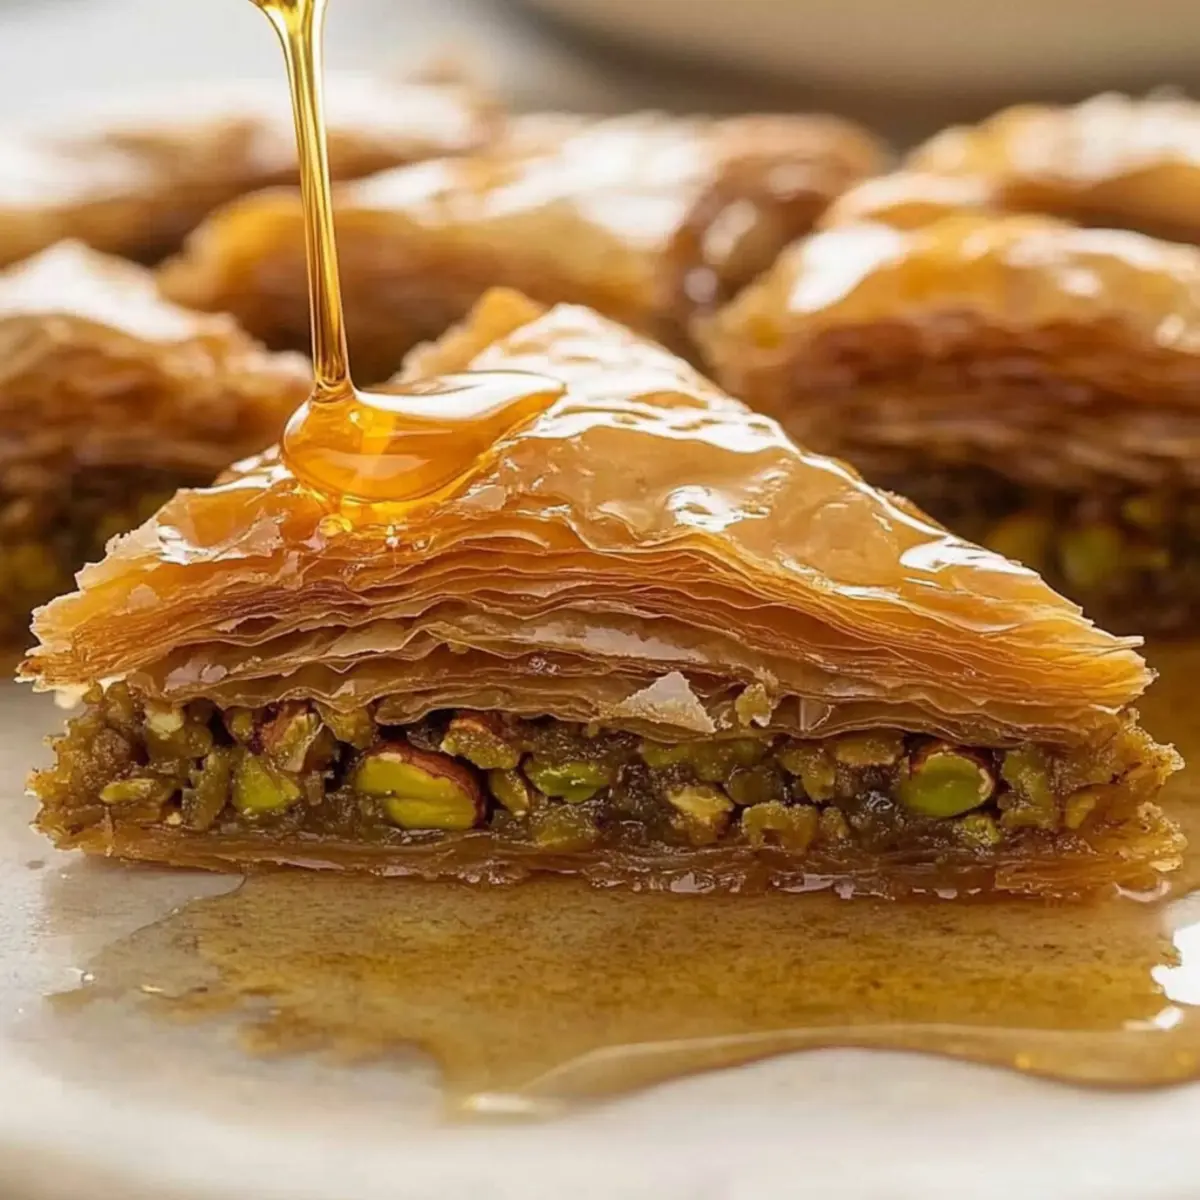
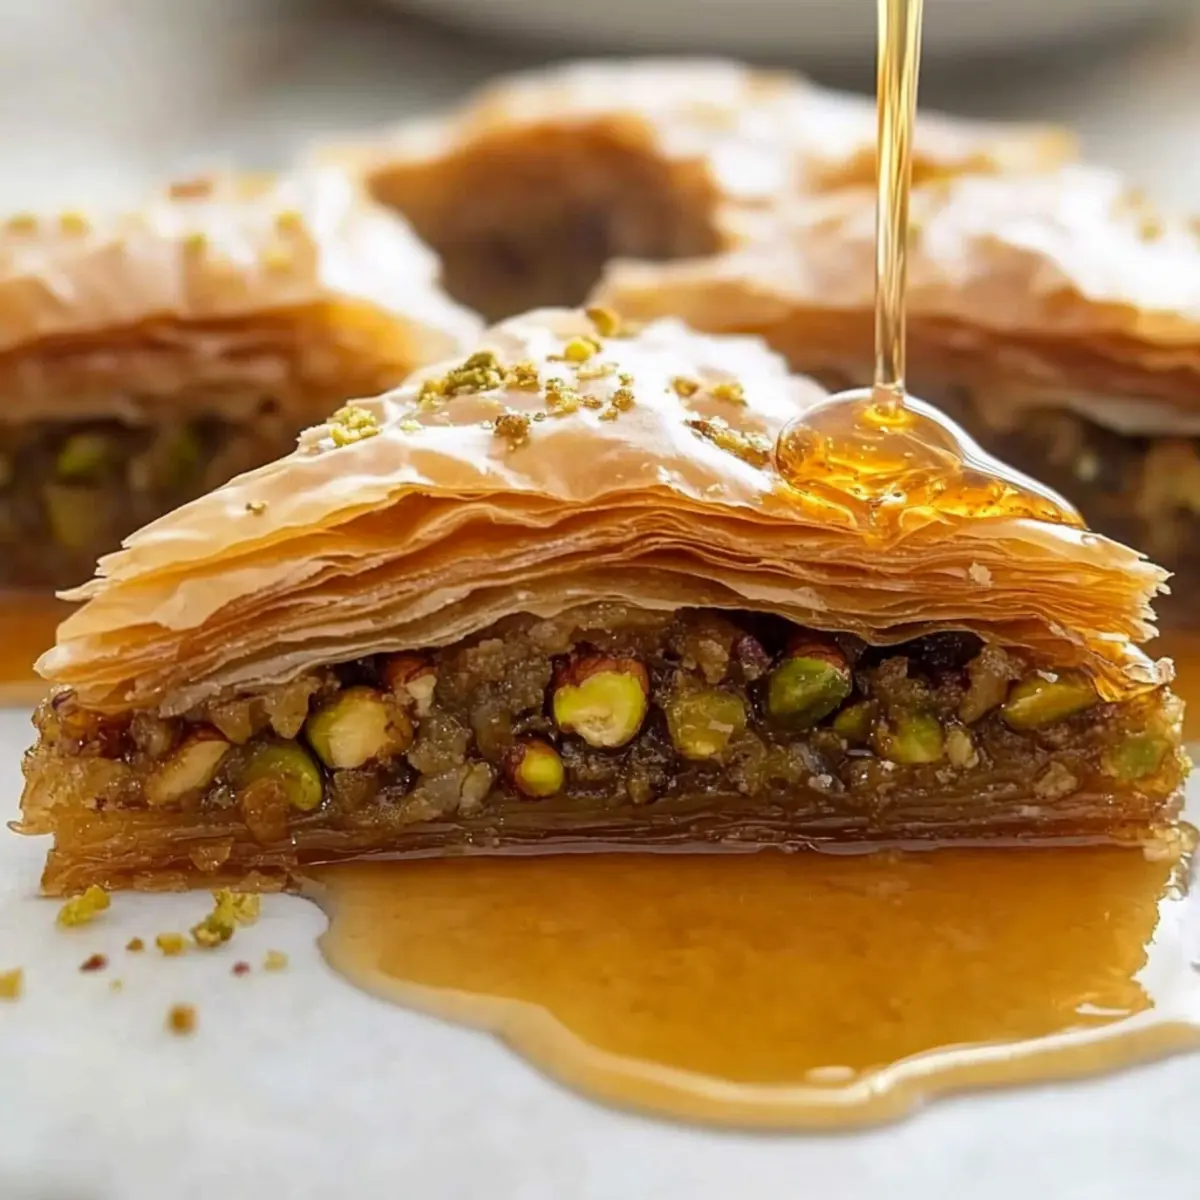
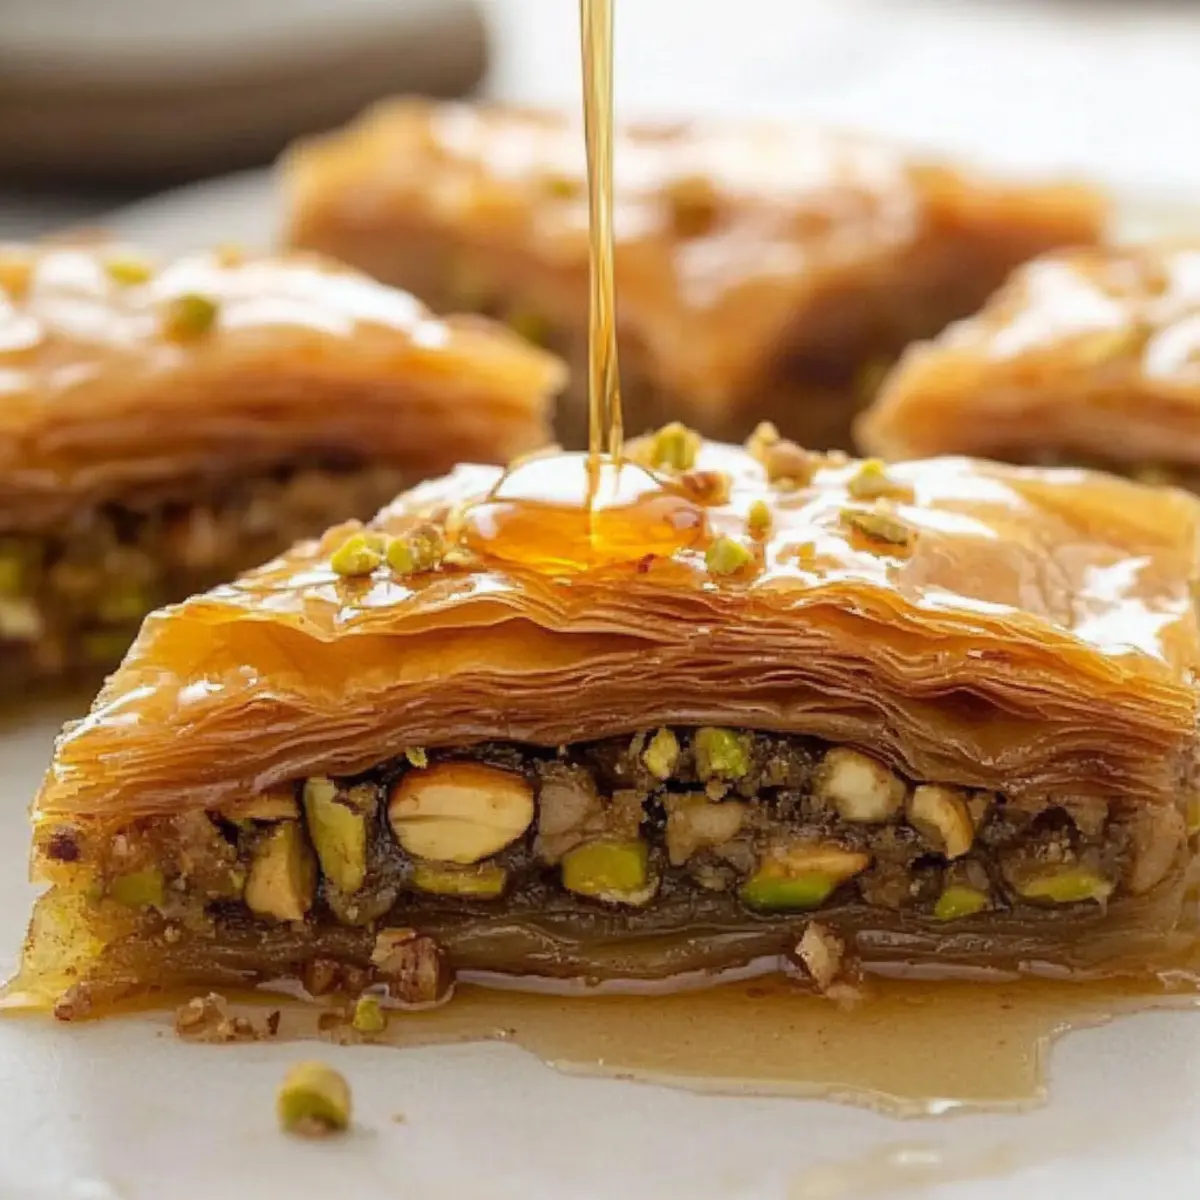
As I poured the fragrant honey syrup over the warm, delicately layered pastry, I knew I was about to embark on a sweet journey of flavors. This Greek Baklava recipe brings together a delightful medley of spiced walnuts and pistachios, all packaged in crisp phyllo layers that are simply irresistible. Not only is this dessert a wonderful treat for gatherings, but it’s also surprisingly easy to make ahead, allowing you to impress your family and friends without the last-minute stress. Each bite delivers a harmonious blend of crunch and sweetness, tempered by a hint of orange and cinnamon. Curious about how this classic indulgence can elevate your dessert game? Let’s dive into the world of authentic Greek Baklava!
Why is Greek Baklava so special?
Tradition, rooted in Mediterranean culture, every layer tells a story of culinary artistry. Make-Ahead Wonder: This recipe is perfect for planning ahead, just let it soak in flavor before serving. Unique Twist: The combination of walnuts and pistachios adds a rich nuttiness. Fancy Yet Simple: Impress guests without the stress—this baklava is surprisingly easy to prepare! Versatile Delight: Serve warm or at room temperature, paired with coffee or whipped cream; it’s a crowd-pleaser that fits any occasion.
Greek Baklava Ingredients
• Get ready to indulge in the sweet layers of Greek Baklava with these must-have ingredients!
For the Baklava
- Phyllo Dough – The light and flaky base that holds all the delicious layers; remember to thaw it overnight for the best texture.
- Butter (1 1/4 cups, melted) – The secret to crispy layers; ensure you cover each sheet lightly to avoid sogginess.
- Walnuts (8 ounces, finely chopped) – Rich in flavor and essential for that traditional nutty taste; feel free to swap in pecans if you’re in the mood for a change.
- Pistachios (8 ounces, shelled and finely chopped) – These add a gorgeous pop of color and distinctive flavor; you can omit them if you prefer a single-nut baklava.
- Ground Cinnamon (1 teaspoon) – A warm spice that elevates the nut mixture; this one is a keeper, with no substitutions needed.
For the Syrup
- Granulated Sugar (1 cup) – Sweetness for the syrup to soak into the baklava; honey can be a delightful alternative if you’re looking for something different.
- Water (3/4 cup) – The liquid base for your syrup; no need to switch this one out!
- Honey (1/2 cup) – The essential ingredient that sweetens and adds depth to the syrup; its aromatic qualities are a must for true Greek flavor.
- Lemon Juice (2 tablespoons) – Helps balance sweetness in the syrup; fresh juice will work wonders, but bottled is okay in a pinch.
- Fresh Orange Peel (2-inch piece) – Infuses delightful citrus notes into the syrup; can be swapped with lemon peel if you’re in a bind.
With these thoughtful choices, you’re all set to create a stunning Greek Baklava that will have your loved ones asking for seconds!
Step‑by‑Step Instructions for Authentic Greek Baklava
Step 1: Prepare Phyllo
Thaw the phyllo dough overnight in the refrigerator, keeping it tightly wrapped to prevent drying out. When ready to use, lay the phyllo sheets on a clean surface and cover them with a damp towel to maintain moisture. This ensures your layers remain pliable for easy handling as you assemble your delicious Greek Baklava.
Step 2: Make Syrup
In a medium saucepan, combine 1 cup granulated sugar, ¾ cup water, ½ cup honey, 2 tablespoons lemon juice, and a 2-inch piece of fresh orange peel. Bring the mixture to a boil over medium heat, stirring occasionally until the sugar dissolves. Once boiling, reduce the heat and let it simmer for 4 minutes. Remove from heat and allow the syrup to cool completely while you prepare the nut filling.
Step 3: Mix Nuts
In a food processor, pulse 8 ounces of finely chopped walnuts and 8 ounces of shelled pistachios with 1 teaspoon ground cinnamon until coarsely ground. This combination creates a rich and flavorful nut mixture, which is the key to elevating your Greek Baklava. Once mixed, set it aside for easy layering in the next steps.
Step 4: Assemble Baklava
Preheat your oven to 325°F (160°C). Brush a 9×13-inch baking dish with melted butter to prevent sticking. Carefully layer 10 sheets of phyllo dough into the dish, ensuring each sheet is brushed lightly with melted butter for optimal crispiness. Sprinkle ¾ cup of the nut mixture evenly over the phyllo, then repeat the layering process—add 5 more phyllo sheets and another ¾ cup of nuts—three more times, finishing with 6-10 sheets of phyllo on top.
Step 5: Cut Baklava
Using a sharp knife, carefully slice the assembled baklava into diamond-shaped pieces before baking. This step is crucial as it allows the syrup to penetrate the layers and ensures even cooking. Make sure to cut through all layers, reaching the bottom of the dish, to create those beautiful, bite-sized pieces of Greek Baklava.
Step 6: Bake
Place the baklava in your preheated oven and bake for 1 hour and 15 minutes, or until the top is golden brown and crisp. Keep an eye on it in the last few minutes, as oven temperatures can vary. The layers should be perfectly cooked, creating a crunchy texture that contrasts beautifully with the rich nut filling.
Step 7: Add Syrup
Once the baklava is done baking, immediately drizzle the cool syrup generously over the hot baklava in the baking dish. Allow it to soak in for a moistened, flavorful treat, enhancing the layers. Let the baklava cool completely for 4-6 hours before serving to allow the syrup to meld with the pastry, creating that irresistible sweetness synonymous with authentic Greek Baklava.
What to Serve with Authentic Greek Baklava
Indulging in sweet, flaky layers of baklava leaves you wondering what delightful pairings can enhance this rich dessert experience.
-
Greek Coffee: The robust flavor and aroma of Greek coffee balance the sweetness of the baklava, enhancing each bite beautifully. This pairing is traditional, uplifting your dessert to new heights.
-
Vanilla Ice Cream: Creamy vanilla ice cream provides a refreshing contrast to the warm, crunchy baklava, creating a delightful harmony of temperatures and textures. A scoop can elevate your dessert into a truly indulgent treat!
-
Cardamom Tea: The subtle warm spice of cardamom tea complements the nutty flavors of baklava, while its aromatic qualities create a cozy experience. Sipping on this tea as you enjoy baklava brings warmth to any gathering.
-
Whipped Cream: A dollop of lightly sweetened whipped cream adds a fluffy texture and a touch of coolness. This simple addition can lend a delightful creaminess that melds smoothly with the baklava’s layers.
-
Baklava Bites with Fresh Fruit: Pairing chunks of fresh fruit, like berries or citrus, crisply contrasts the richness of baklava, introducing a refreshing element. It’s an eye-catching and tasty way to add vibrance to your dessert spread!
-
Mint Tea: The bright and herbal notes of mint tea refresh the palate after rich bites of baklava. A light sip of this soothing tea creates the perfect end to a flavorful meal.
-
Dark Chocolate Drizzle: A drizzle of melted dark chocolate adds a luxurious touch to your baklava, harmonizing beautifully with the honey syrup. This chocolatey addition is sure to delight any sweet tooth!
-
Citrus Sorbet: For a lighter option, citrus sorbet serves as a refreshing palate cleanser that complements the sweet, rich profile of baklava. Its tangy zest awakens the senses and enhances the overall dessert experience.
How to Store and Freeze Greek Baklava
-
Room Temperature: Keep baklava loosely covered for up to 1 day to maintain its crispness and prevent drying out.
-
Fridge: Store any leftovers in an airtight container for up to 2 weeks. This will help retain flavor, although the texture may become softer.
-
Freezer: For longer storage, wrap the baklava tightly in plastic wrap and then in aluminum foil. It can be frozen for up to 2 months without losing its delicious taste.
-
Reheating: To restore crispiness, reheat baklava in the oven at 350°F (175°C) for about 10-15 minutes. Enjoy your delectable Greek Baklava freshly warmed!
Make Ahead Options
These Greek Baklava are perfect for meal prep enthusiasts! You can prepare the nut mixture and the syrup up to 3 days in advance, storing them separately in the refrigerator to maintain freshness. Just combine finely chopped walnuts and pistachios with ground cinnamon, and keep the syrup in an airtight container to keep flavors vibrant. Additionally, you can assemble the baklava, cover it tightly with plastic wrap, and refrigerate it for 24 hours before baking. This not only saves time during busy weeknights but also allows the flavors to meld beautifully. When ready to bake, simply preheat the oven, cut into diamond shapes, and follow the baking instructions for delicious results that are just as delightful as when made fresh!
Greek Baklava Variations & Substitutions
Feel free to explore these variations to make this delightful baklava your own and add your personal touch to this classic treat!
- Nut Variation: Use solely walnuts or pistachios for a nut-specific flavor that highlights the distinct taste of each nut.
- Fruit Infusion: Incorporate dried fruits like apricots or figs into the nut mixture for added sweetness and texture; it will give a lovely burst of flavor.
- Spiced Twist: Experiment with different spices such as nutmeg or allspice in the nut filling for a warm, aromatic twist that complements the original flavors beautifully.
- Chocolate Drizzle: Drizzle melted dark chocolate over the baklava before serving for an indulgent touch that chocolate lovers will adore. A little sweetness with a slightly bitter contrast elevates the dish.
- Honey Blend: Swap regular honey with flavored varieties like lavender or orange blossom for a unique twist on the standard syrup that adds a floral note.
- Healthier Sweetener: Try using coconut sugar or agave syrup instead of granulated sugar to give the baklava a slightly different flavor profile while keeping it sweet.
- Layered Surprise: Add a layer of melted dark chocolate between nut layers for a decadent twist; this will make each bite a delightful surprise!
- Lower Fat Alternative: Use applesauce in place of some of the butter for a lower-fat version, maintaining moisture without sacrificing flavor.
With these delicious variations, you’ll never tire of this classic indulgence. Don’t forget to enjoy the process of making your Greek Baklava, or even try pairing it with a side of warm coffee or a dollop of whipped cream for the perfect experience! Need more ideas? You might enjoy serving it with a scoop of homemade vanilla ice cream. Happy baking!
Expert Tips for Making Greek Baklava
-
Phyllo Perfection: Ensure the phyllo dough is completely thawed and kept covered with a damp towel while you work; this prevents it from drying out and cracking.
-
Butter Balance: Apply a light touch when brushing melted butter on each layer to avoid excess grease. This ensures your baklava remains delightfully crispy and not soggy.
-
Cool Syrup Magic: Always let your syrup cool before pouring it over the hot baklava. If the syrup is too warm, it can lead to sogginess, ruining the desired texture.
-
Cutting Technique: Slice the baklava into diamond shapes before baking, making it easier for the syrup to penetrate and ensuring even cooking throughout the layers.
-
Nut Variations: Feel free to experiment with different nut combinations, but remember that walnut and pistachio is the classic blend for a rich, flavorful Greek Baklava.
Greek Baklava Recipe FAQs
How do I choose the right phyllo dough?
Absolutely! When selecting phyllo dough, look for brands that specify “fresh” or “refrigerated.” Ensure it’s well-packaged and hasn’t reached the expiration date. Thawing overnight in the refrigerator is ideal for pliability, and keeping it covered during assembly prevents drying out.
What’s the best way to store cooked baklava?
Very! You can store baklava loosely covered at room temperature for up to 1 day to keep it crisp. After that, transfer it to an airtight container; it should stay fresh for up to 2 weeks in the fridge. However, the texture may soften slightly.
Can I freeze Greek Baklava? How?
Absolutely! To freeze, wrap the cooled baklava tightly in plastic wrap and then cover it with aluminum foil to prevent freezer burn. It can be stored for up to 2 months. When you’re ready to enjoy, simply reheat in the oven at 350°F (175°C) for about 10-15 minutes to regain its crispiness.
What if my baklava is too soggy?
Ah, the classic crunch conundrum! If you find your baklava soggy, it’s often due to warm syrup being poured over hot baklava or excess butter. Allowing the syrup to cool fully before drizzling and applying only a light coat of butter can help maintain that delightful crispy texture.
Are there any common allergens in Greek Baklava?
Yes! Greek Baklava typically contains nuts (walnuts and pistachios). If you or your guests have nut allergies, consider using seeds like sunflower seeds as a substitute in the nut mixture, keeping the flavor profile in mind. Avoid using phyllo if gluten is an issue—there are gluten-free options available for that!
Can I make baklava without honey?
Certainly! If honey isn’t an option for you, you can replace it with more granulated sugar or a 1:1 sugar substitute. For a unique twist, consider maple syrup for added depth of flavor, ensuring to adjust the liquid ratio in your syrup!
Delicious Greek Baklava with a Walnut-Pistachio Twist
Ingredients
Equipment
Method
- Thaw the phyllo dough overnight in the refrigerator, keeping it tightly wrapped.
- In a medium saucepan, combine sugar, water, honey, lemon juice, and orange peel. Bring to a boil, stir until sugar dissolves, then simmer for 4 minutes.
- Pulse walnuts and pistachios with cinnamon in a food processor until coarsely ground.
- Preheat oven to 325°F. Brush baking dish with melted butter. Layer 10 sheets of phyllo, brushing each with butter. Sprinkle nuts and repeat, finishing with 6-10 sheets.
- Cut the assembled baklava into diamond-shaped pieces before baking.
- Bake for 75 minutes until golden brown. Drizzle cool syrup over hot baklava immediately.
- Let cool for 4-6 hours before serving.
Leave a Reply