
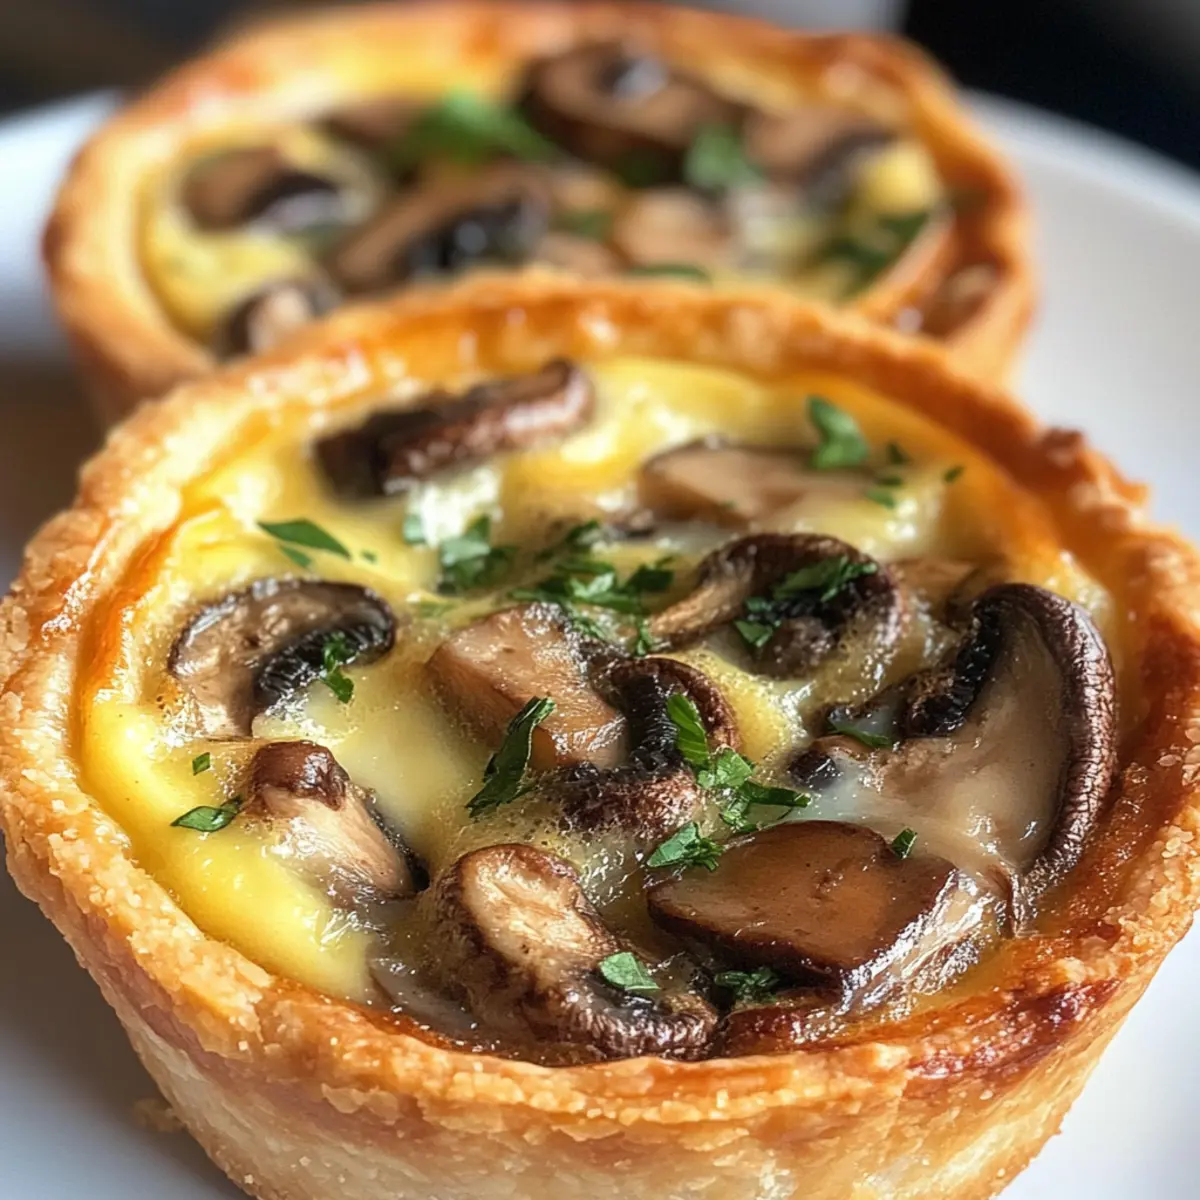
As I unwrapped the soft, flaky crust and inhaled the earthy scent of sautéed mushrooms, I knew I was in for a treat. These Low Calorie Mini Mushroom Quiches are an absolute game-changer, effortlessly transitioning from a cozy brunch to a quick weekday lunch. Not only do they offer the ideal blend of lightness and satisfaction, but they also shine in their versatility—perfect for meal prep or a fancy get-together. You can mix and match ingredients to suit your taste or dietary needs, making each quiche uniquely yours. Ready to discover the secret behind these delightful little bites? Let’s get cooking!

Why make mini mushroom quiche?
Adaptable Ingredients: Use any mushrooms on hand—cremini, shiitake, or even spinach—for a unique twist each time you bake.
Low-Calorie Delight: Light yet filling, these mini quiches make for guilt-free indulgence, perfect for brunch or lunch.
Quick Preparation: Whip these up in no time, making meal prep a breeze—ideal for busy weekdays or last-minute gatherings.
Versatile Pairings: Pair them with a fresh green salad or crispy breakfast potatoes for a complete meal experience.
Crowd-Pleasing Appeal: These little bites are sure to impress guests, similar to my Apple Crisp Mini or savory Mini Beef Wellington.
Mini Mushroom Quiche Ingredients
For the Crust
• Flour – Essential for structure; can substitute with whole wheat or gluten-free flour.
• Salt – Enhances flavor; adjust to your taste.
• Oil (Vegetable or Olive) – Adds moisture and richness; a flavored oil can elevate taste.
• Water – Binds the dough; use cold water for a flaky texture.
For the Filling
• Baby Bella or Cremini Mushrooms – Provide rich flavor and texture; substitute with white button mushrooms if needed.
• Garlic – Brings aromatic depth; mince finely for best results.
• Onion – Adds sweetness and depth; yellow or white onions work well, or shallots for a twist.
• Eggs – Create structure and richness; use large eggs for best results.
• Cream (or Milk) – Contributes creaminess; half-and-half or a non-dairy alternative can lighten it further.
• Swiss Cheese – Offers creaminess and flavor; cheddar or mozzarella works as a substitute.
• Black Pepper – Enhances overall flavor; adjust to taste.
• Garlic Powder – Optional but recommended for added flavor depth.
These delightful little bites offer a versatile platform for your creativity, making a Mini Mushroom Quiche a staple in your meal prep rotation!
Step‑by‑Step Instructions for Mini Mushroom Quiche
Step 1: Preheat the Oven
Begin by preheating your oven to 350°F (175°C). This ensures the perfect baking environment for your mini mushroom quiches. While the oven heats, gather your ingredients and equipment, including mixing bowls, a rolling pin, a knife, and mini tart pans to streamline your cooking process.
Step 2: Prepare the Vegetables
Slice the mushrooms into thin pieces, mince the garlic finely, and dice the onion for your filling. Sautéing these together brings out their rich flavors, establishing the quiche’s savory appeal. Set the prepared vegetables aside as you prepare your dough.
Step 3: Make the Dough
In a mixing bowl, combine flour and salt, then slowly incorporate the oil and cold water until the mixture forms a thick dough. Be careful not to overwork the pastry, as this helps maintain a flaky texture. Once mixed, transfer it to a lightly floured surface for the next step.
Step 4: Divide and Shape the Dough
Split the dough into four equal parts, flattening each piece into a disc. Lightly press each disc into your mini tart pans, ensuring they cover the bottoms and sides evenly. The goal is to achieve a uniform thickness for a perfectly baked crust that will cradle your delicious filling.
Step 5: Sauté the Filling
Heat a skillet over medium heat and add a drizzle of olive oil. Add your sliced mushrooms and diced onions, cooking them until they become golden and fragrant, about 5-7 minutes. Stir in the minced garlic for the last minute of cooking, allowing its aroma to permeate the mixture before removing it from the heat.
Step 6: Prepare the Egg Mixture
In a separate bowl, beat the eggs until frothy, then whisk in the cream until the mixture is smooth. This combination creates the rich, custardy filling for your mini mushroom quiches. Ensure everything is well blended, and set the bowl aside while you assemble the quiches.
Step 7: Assemble the Quiches
Distribute the sautéed mushroom and onion mixture evenly across the crusts in your mini tart pans. Sprinkle the cheese on top, followed by the egg mixture, filling each quiche about three-quarters full to allow for expansion during baking.
Step 8: Bake the Quiches
Carefully place the mini quiches in the preheated oven and bake for 30-35 minutes, or until the edges are golden brown and the filling is set. You’ll know they’re done when a toothpick inserted in the center comes out clean, showcasing their perfect puffed texture.
Step 9: Cool and Serve
Once baked, remove the mini mushroom quiches from the oven and let them cool for 5-10 minutes. This cooling phase allows the filling to firm up slightly, making them easier to serve. Enjoy these delightful little bites warm, or at room temperature, perfect for any gathering!
How to Store and Freeze Mini Mushroom Quiche
Fridge: Keep your mini mushroom quiche in an airtight container in the fridge for up to 4 days. This will help maintain their fresh taste and texture.
Freezer: For longer storage, freeze the quiches in a single layer, placing parchment paper between layers to avoid sticking. They can last up to 3 months in the freezer.
Reheating: To reheat, bake in the oven at 350°F (175°C) for about 10-15 minutes until warmed through and crisp. Avoid the microwave to keep that delightful flaky crust.
Expert Tips for Mini Mushroom Quiche
- Sauté First: Always sauté mushrooms to remove excess moisture, as this prevents sogginess in your mini mushroom quiche.
- Dough Handling: Be gentle when mixing the dough; overworking can lead to a tough crust. Keep it flaky for the best texture.
- Fill Smartly: Fill your quiches only 3/4 full to avoid spilling over while baking—this keeps the oven tidy and the presentation neat.
- Storage Savvy: If you’re making quiches ahead of time, store them in an airtight container; they’ll stay fresh for up to 4 days in the fridge.
- Reheat Right: Reheat your mini mushroom quiche in the oven to maintain the crust’s crispness, instead of using the microwave which can make it soggy.
Mini Mushroom Quiche Variations
Feel free to let your creativity shine with these adaptable ideas that will transform your quiches into delightful versions every time!
-
Cheese Swap: Substitute Swiss cheese with feta or goat cheese for a tangy twist that adds a delightful flavor contrast.
For a unique flair, sprinkle crumbled cheese on top before baking, giving your quiche a fancy touch. -
Veggie Boost: Replace mushrooms with spinach or bell peppers for a vibrant and colorful filling.
These veggies not only add flavor but also pack in nutrients, making your quiche even healthier! -
Herb Infusion: Add fresh herbs like thyme, basil, or parsley for an extra pop of flavor.
Herbs elevate the taste and bring an aromatic freshness that will tantalize your taste buds. -
Spice It Up: Incorporate a pinch of red pepper flakes for a subtle kick of heat.
This spice elevates the flavor profile, making each bite exciting without overpowering the other ingredients. -
Savory Add-Ins: Toss in cooked bacon or ham for a heartier quiche that feels indulgent yet is still light.
These savory additions create a wonderful contrast with the creamy filling, perfect for meat lovers! -
Gluten-Free Option: Use a gluten-free flour blend for a crust that everyone can enjoy.
This makes the quiche accessible for those with dietary restrictions while keeping the same delightful texture. -
Creamy Variation: Swap out cream for Greek yogurt or a non-dairy alternative for a lighter option.
This gives a different richness while keeping it low-calorie, ensuring guilt-free enjoyment. -
Mini Pairings: Serve with a side of fresh fruit or a crisp green salad for a refreshing contrast.
Consider pairing them with my Mini Spaghetti Meatball for a fun breakfast or brunch spread!
Let these variations spark your imagination and make your mini mushroom quiches a beloved recipe in your home!
Make Ahead Options
These Low Calorie Mini Mushroom Quiches are perfect for busy home cooks looking to save time during the week! You can prepare the dough and sauté the mushroom filling up to 24 hours in advance; just be sure to refrigerate them in separate containers to maintain freshness. When you’re ready to bake, simply assemble the quiches by filling the crusts with the sautéed mixture and the egg mixture, then pop them in the oven. They are just as delicious when baked and served fresh, making them an excellent choice for meal prep. For longer storage, you can freeze the unbaked quiches for up to 3 months; just be sure to thaw them overnight in the refrigerator before baking for perfectly flaky results!
What to Serve with Low Calorie Mini Mushroom Quiche
Bringing a delightful array of flavors and textures to your table can elevate these perfectly flaky beauties into a complete meal experience.
-
Fresh Green Salad: A crisp salad with mixed greens, cucumbers, and a light vinaigrette provides a refreshing contrast to the warm quiches.
-
Crispy Breakfast Potatoes: Their savory crunch makes a perfect match for the creamy filling, offering a satisfying complement to your quiches.
-
Honey-Glazed Carrots: Sweet and tender, glazed carrots add a touch of elegance and a sweet balance to the earthy mushroom flavors.
-
Roasted Asparagus: A simple side of roasted asparagus drizzled with olive oil enhances the meal with a burst of freshness and vibrant color.
-
Sparkling Water with Lemon: Refreshing and light, this drink elevates the brunch experience while keeping the focus on the delectable quiches.
-
Fresh Fruit Platter: A colorful mix of berries and melons not only adds a refreshing sweetness but also appeals visually to your brunch spread.
Each pairing harmonizes beautifully with the Low Calorie Mini Mushroom Quiche, creating a delightful and fulfilling meal for any occasion!

Mini Mushroom Quiche Recipe FAQs
How do I select the best mushrooms for my mini mushroom quiche?
Absolutely! For the best flavor and texture, choose fresh Baby Bella or Cremini mushrooms. Look for firm mushrooms without dark spots or wrinkles. If you can’t find those, white button mushrooms are a great substitute. Always opt for mushrooms that are dry to the touch and have a pleasant earthy aroma.
What’s the best way to store leftover mini mushroom quiches?
Very! Store your mini mushroom quiches in an airtight container in the fridge, where they can stay fresh for up to 4 days. To keep them at their best, ensure they are completely cool before sealing them up. You can also wrap individual quiches in plastic wrap for ease of serving later on!
Can I freeze my mini mushroom quiches?
Absolutely! To freeze, first let the quiches cool completely, then place them in a single layer with parchment paper between each layer to prevent sticking. They can be frozen for up to 3 months. When you’re ready to enjoy them, just reheat in the oven at 350°F (175°C) for about 10-15 minutes, or until warmed through and crispy.
What should I do if my quiche filling is too watery?
Oh no! If your filling ends up too watery, be sure to always sauté the mushrooms beforehand to reduce their moisture content. If you’ve skipped that step, consider adding a bit of cornstarch or flour to thicken the mixture in the egg mixture. Another option is to drain any excess liquid before pouring it into the crust.
Can I make mini mushroom quiche for someone with a dairy allergy?
Absolutely! For a dairy-free alternative, you can use a non-dairy milk such as almond or soy milk in place of cream, and opt for dairy-free cheese. This makes your mini mushroom quiche adaptable for anyone with dietary restrictions without sacrificing flavor!
How do I reheat mini mushroom quiche without losing its crust’s flaky texture?
Very nice question! To reheat while keeping that lovely flaky texture, place the quiches in a preheated oven at 350°F (175°C) for about 10-15 minutes. This method warms them thoroughly while crisping the crust, making sure your mini mushroom quiche is just as delightful as when you first baked it!

Mini Mushroom Quiche - Delightfully Light Brunch Bites
Ingredients
Equipment
Method
- Preheat your oven to 350°F (175°C). Gather your ingredients and equipment.
- Slice the mushrooms, mince the garlic, and dice the onion. Sauté them together until fragrant.
- In a mixing bowl, combine flour and salt, then mix in oil and cold water until it forms a dough.
- Divide the dough into four parts and press each into mini tart pans.
- Sauté the filling ingredients in a skillet over medium heat until golden and fragrant, about 5-7 minutes.
- Beat the eggs with cream in a bowl until frothy and smooth.
- Distribute the vegetable mixture across the crusts, sprinkle cheese, and then add the egg mixture.
- Bake for 30-35 minutes until golden brown and set. A toothpick inserted should come out clean.
- Let cool for 5-10 minutes before serving. Enjoy warm or at room temperature.
Leave a Reply