
As I savored the last bite of a creamsicle on a sun-soaked afternoon, nostalgia washed over me—warm days, sweet laughter, and carefree moments. That flavor is back in my kitchen with this delightful recipe for Orange Dreamsicle Fudge. Creamy, indulgent, and so easy to whip up, this no-bake treat is a celebration of summer in every bite. Not only does it channel that childhood classic we all adore, but it’s also gluten-free, making it perfect for gatherings or simply treating yourself. The velvety white chocolate marries beautifully with the tangy orange, creating a fudgy experience that’s sure to impress friends and family alike. What’s your favorite way to enjoy summertime flavors? Let’s dive into this luscious recipe!
Why is This Fudge So Irresistible?
Creamy Indulgence: Each bite of this Orange Dreamsicle Fudge melts in your mouth, delivering that beloved creamsicle flavor without the fuss of baking.
Easy to Make: Perfect for both novice and experienced chefs, this no-bake treat requires minimal effort and only a few simple ingredients.
Gluten-Free Delight: Ideal for those with dietary restrictions, this fudge allows everyone to enjoy a nostalgic dessert without worry.
Versatile Variations: Want to switch things up? Try mixing in some citrus zest or cocoa powder to create your own unique twist on this classic flavor!
Perfect for Sharing: Whether it’s a summer barbecue or a casual get-together, this visually stunning fudge is sure to be a hit among friends and family, much like the refreshing Cranberry Orange Prosecco.
It’s the perfect addition to your dessert table or as a thoughtful homemade gift!
Orange Dreamsicle Fudge Ingredients
For the Fudge Base
- Heavy Cream – Adds richness and creaminess to the fudge; for a dairy-free option, use coconut cream.
- Granulated Sugar – Provides sweetness and structure; no substitutions for best results.
- Unsalted Butter – Contributes flavor and a smooth texture; can be substituted with margarine for a dairy-free version.
- Marshmallow Cream – Gives the fudge its chewy texture and sweetness; can replace with homemade marshmallow fluff for less sugar.
- White Chocolate Chips – Imparts a sweet, creamy flavor; for a different twist, use dark chocolate chips instead.
For the Orange Flavor
- Orange Extract – Delivers the essential orange flavor that echoes the famed creamsicle taste; fresh orange zest can be added for more brightness.
- Orange Food Coloring – Optional for visual appeal; omit for a purely white fudge.
Now that you’re equipped with the necessary ingredients for this delicious Orange Dreamsicle Fudge, let’s whisk up some summer nostalgia!
Step-by-Step Instructions for Orange Dreamsicle Fudge
Step 1: Prepare the Pan
Begin by greasing a 9×13-inch baking pan with butter or non-stick spray, ensuring every corner is coated. Next, line the bottom and sides with parchment paper, leaving a bit overhang; this will help to lift out the fudge later. Set the prepared pan aside while you prepare the fudge mixture.
Step 2: Cook the Base Ingredients
In a large saucepan over medium heat, combine unsalted butter, heavy cream, and granulated sugar. Stir continuously for about 5-7 minutes until the mixture is completely melted and smooth. Use a candy thermometer to monitor the temperature, heating the mixture until it reaches 235°F, also known as the softball stage, which will ensure a creamy texture in your Orange Dreamsicle Fudge.
Step 3: Incorporate the Final Ingredients
Once the mixture reaches the softball stage, carefully remove it from the heat. Immediately stir in the marshmallow cream and white chocolate chips, mixing vigorously until the chocolate is fully melted and the fudge is smooth. You should achieve a silky consistency and a delightful creamy aroma that will make you eager to continue!
Step 4: Color and Divide Mixture
Next, separate about 1 cup of the fudge mixture into a small bowl and set it aside. To the remaining larger portion, add the orange extract along with orange food coloring, if desired. Stir well until the mixture is fully combined and takes on a beautiful orange hue, reminiscent of an actual creamsicle.
Step 5: Layer and Swirl the Fudge
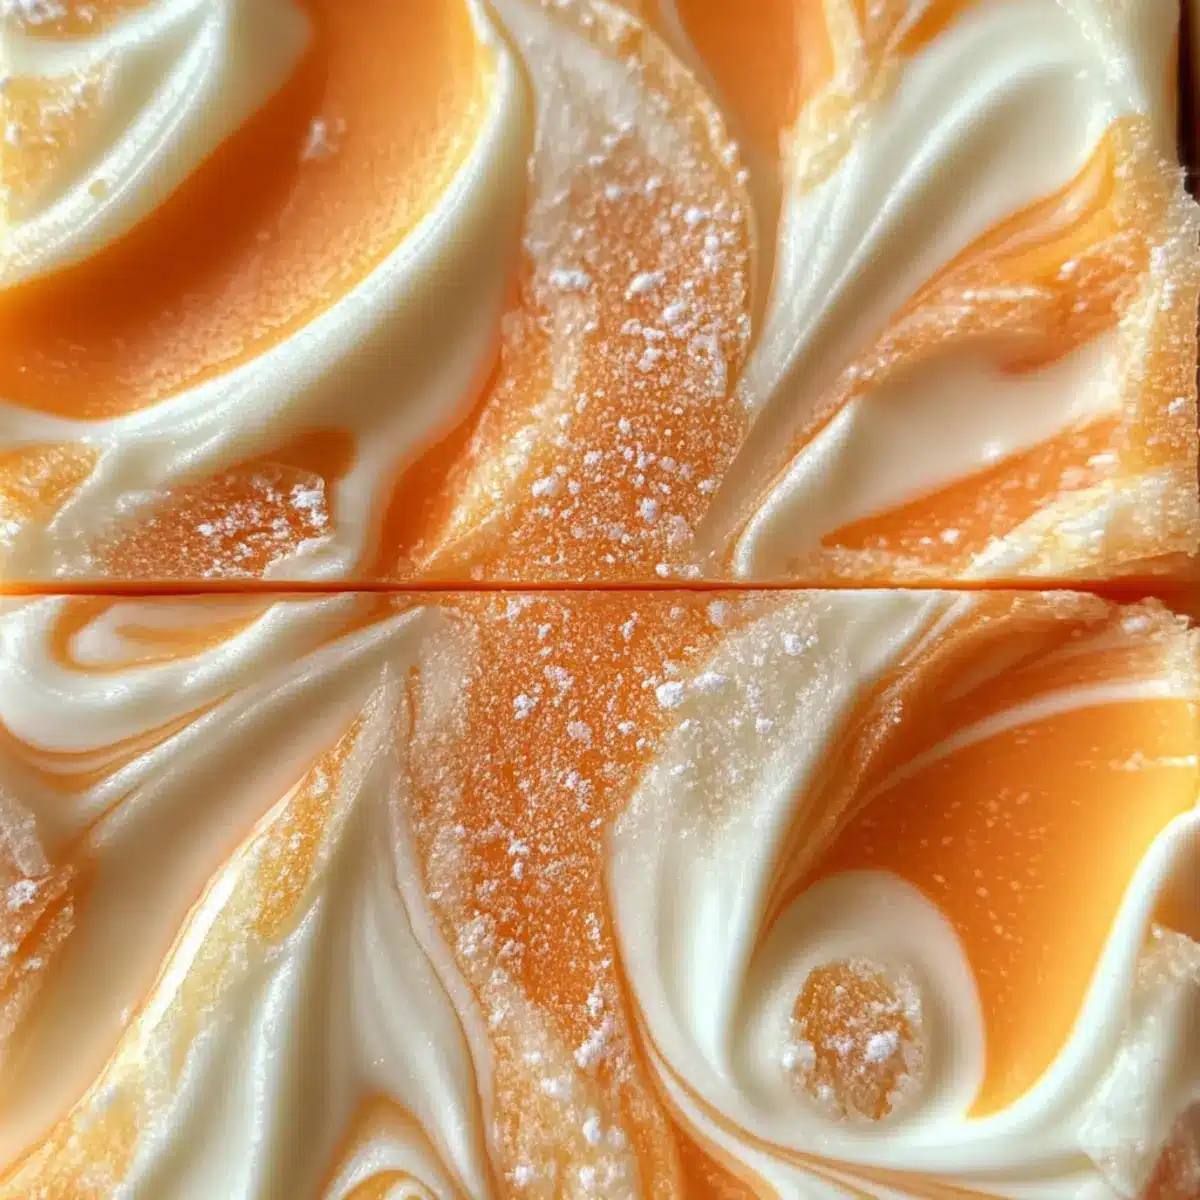
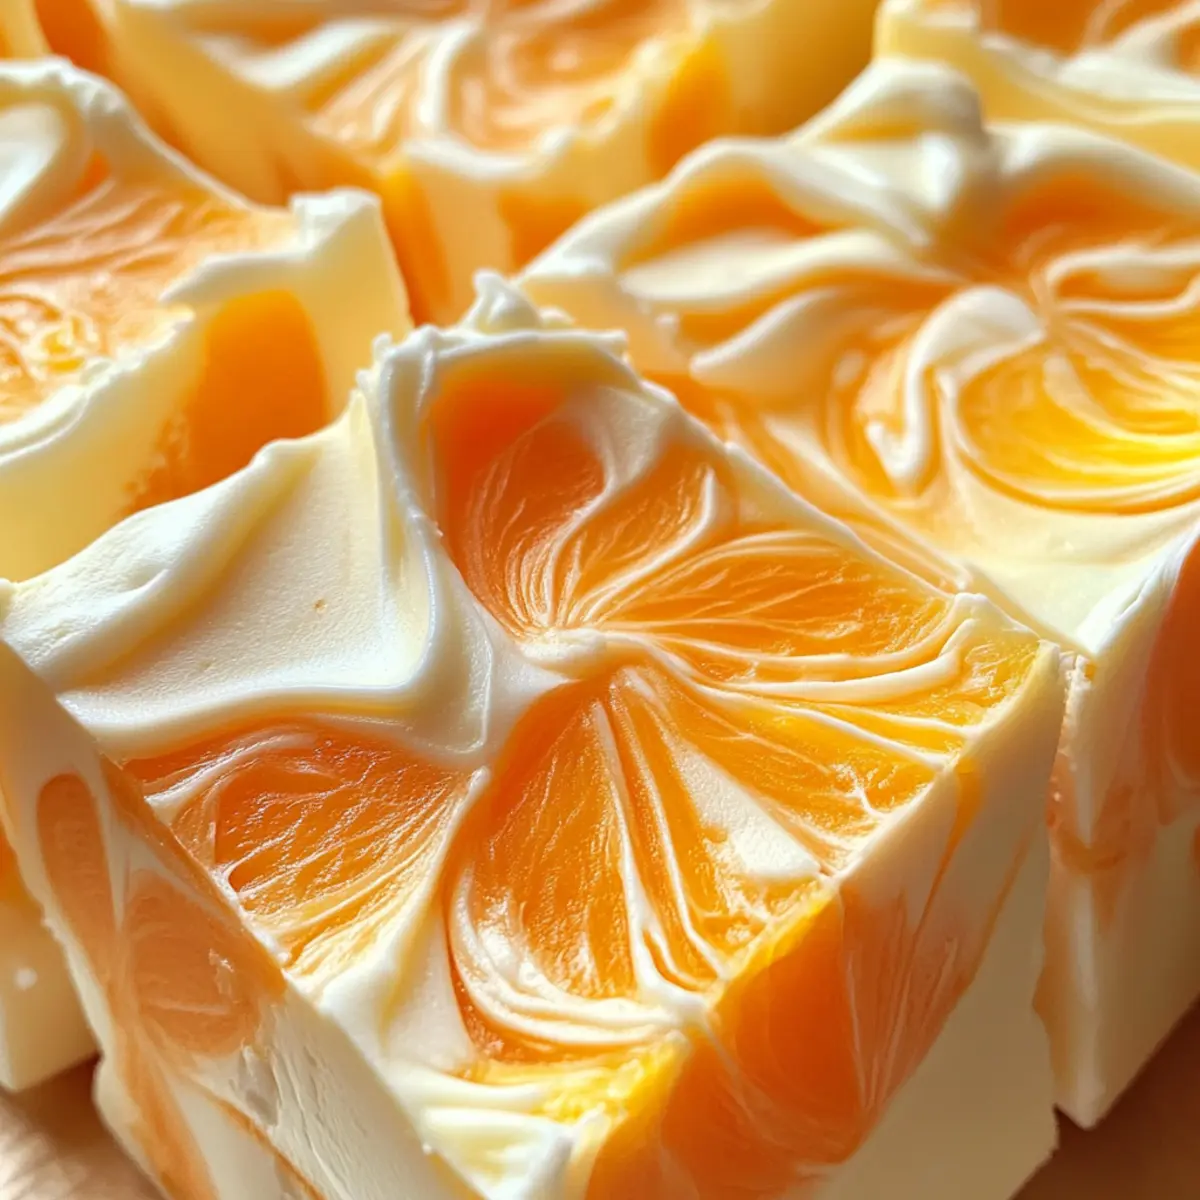
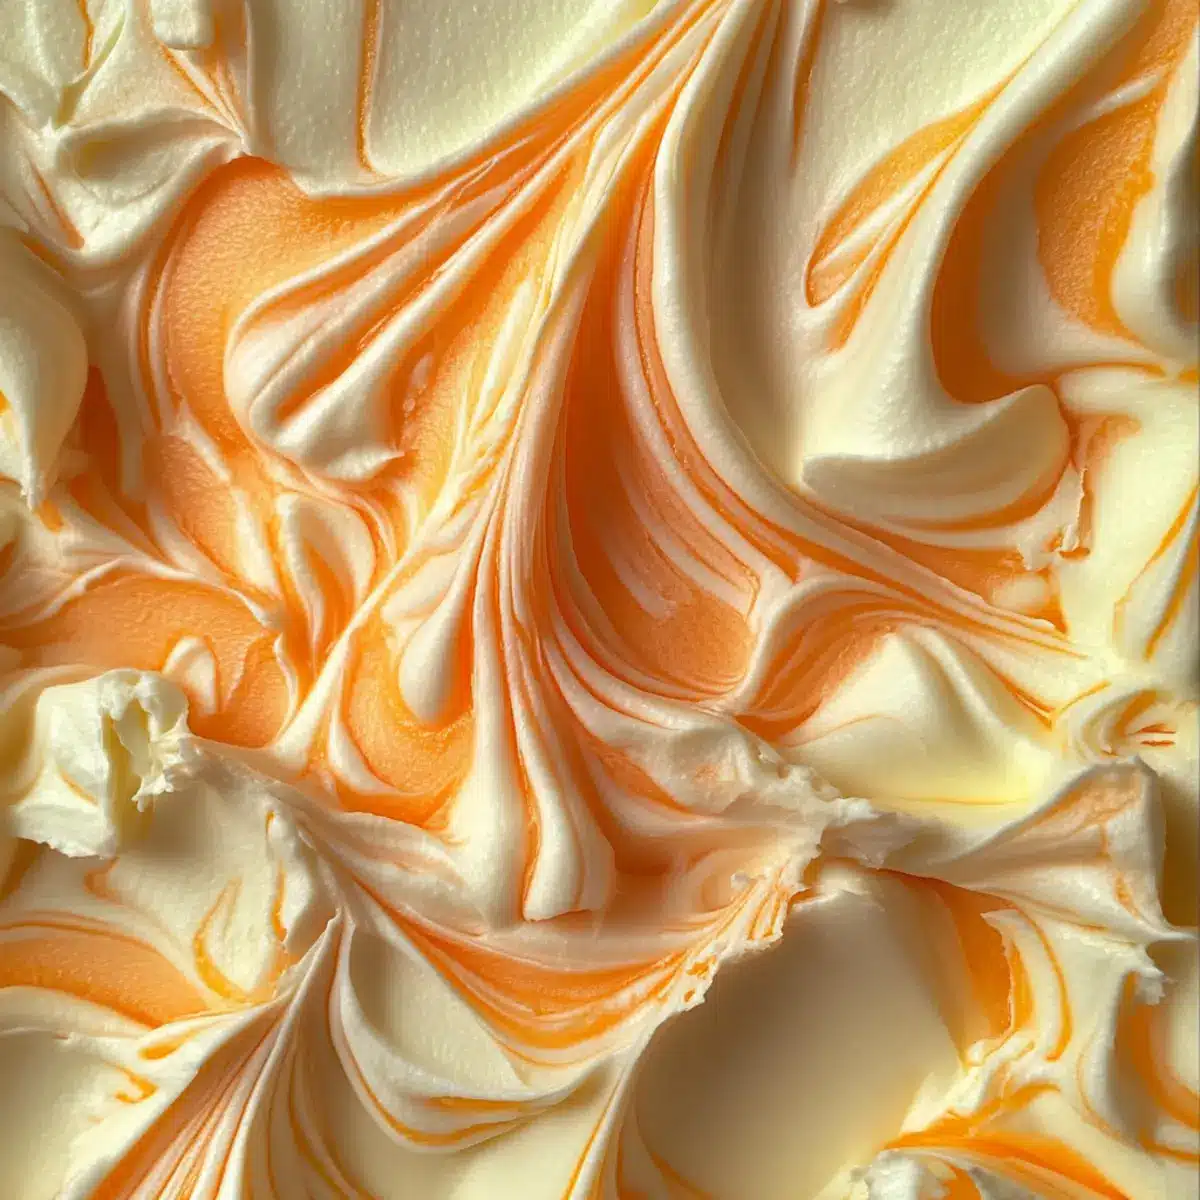
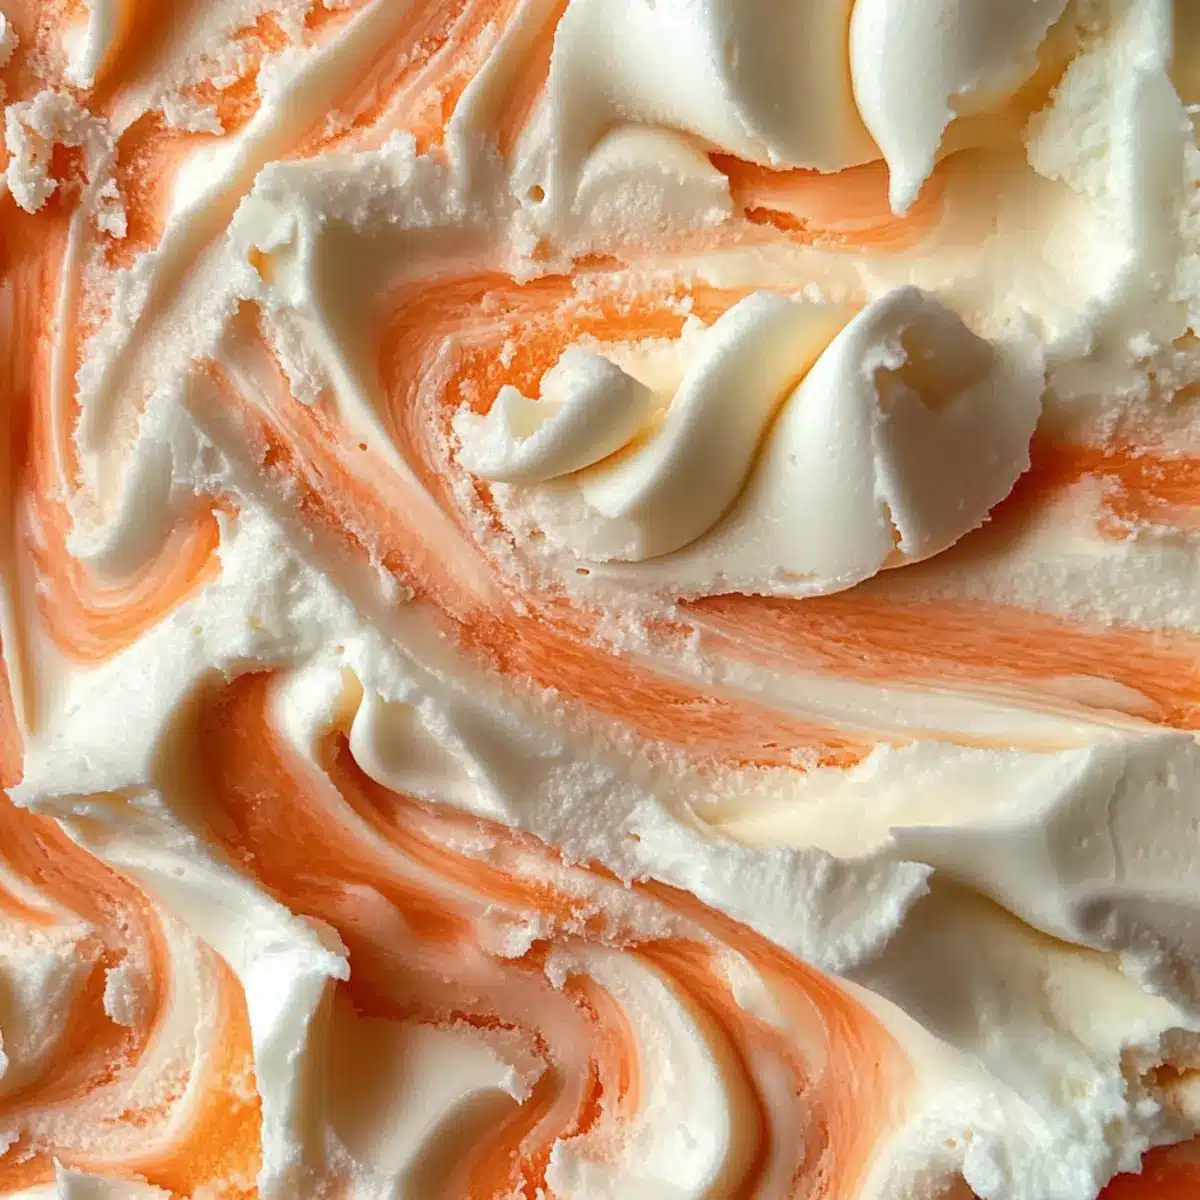
Pour the vibrant orange fudge mixture into the prepared pan, spreading it evenly. Then, dollop spoonfuls of the reserved white mixture across the top. Using a knife or skewer, gently swirl the two mixtures together, creating a marbled effect that adds visual appeal to your Orange Dreamsicle Fudge.
Step 6: Chill the Fudge
Carefully place the pan in the refrigerator, allowing the fudge to chill for at least 2 hours, or until it is fully set. This step is crucial for achieving the perfect consistency, so avoid cutting into it too early to maintain the fudge’s creaminess.
Step 7: Slice and Serve
Once set, use the parchment paper to lift the fudge out of the pan. Place it on a cutting board and slice it into squares. Now your lovely Orange Dreamsicle Fudge is ready to be served! Share this delightful treat at gatherings, or savor the delicious nostalgia by yourself.
Orange Dreamsicle Fudge Variations
Feel free to jazz up your Orange Dreamsicle Fudge with these delightful twists that will make your taste buds dance!
-
Chocolate-Orange: Mix in cocoa powder for a rich, marbled effect that adds a delightful twist to the classic flavors. The chocolate brings a new depth that makes this fudge irresistible!
-
Citrus Burst: Swap in lemon or lime extract to introduce a zesty punch, transforming your fudge into a bright, refreshing treat that’s perfect for summer.
-
Nutty Crunch: Add in some chopped almonds or walnuts for an unexpected crunch that balances the creamy texture, elevating your fudge to a whole new level of deliciousness.
-
Fun Sprinkles: Toss in colorful sprinkles before chilling for a festive touch that brightens up the fudge, making it perfect for celebrations and gatherings.
-
Coconut Dream: Replace some white chocolate chips with shredded coconut for a tropical vibe that feels like a mini-vacation with every bite.
-
Zesty Zing: Incorporate fresh orange zest along with the extract to boost the citrus flavor significantly; it’s an extra layer of sweetness that can take you back to sunny days.
-
PB Swirl: Fold in some creamy peanut butter into the fudge mixture for an unforgettable salty-sweet combination that will have everyone asking for seconds.
-
Spicy Surprise: For a unique kick, add a hint of cayenne or chili powder to the orange mixture to create a fudge that dances on the palette; it’s a bold choice that intrigues the taste buds!
Once you’ve chosen your variation, you can serve this delightful fudge alongside a refreshing Cranberry Orange Layer for a delightful dessert duo! Don’t forget to experiment and make it your own with these fun ideas.
Storage Tips for Orange Dreamsicle Fudge
Room Temperature: Keep the fudge in an airtight container at room temperature for up to 3 days, but it’s best enjoyed chilled for maximum flavor and texture.
Fridge: Store the Orange Dreamsicle Fudge in an airtight container in the refrigerator for up to 2 weeks. This helps maintain its creamy consistency and taste.
Freezer: For longer storage, wrap portions of fudge tightly in plastic wrap, then place in a freezer-safe container. It can be frozen for up to 3 months.
Reheating: If you prefer a softer texture, let the fudge sit at room temperature for about 15-20 minutes before serving.
What to Serve with Orange Dreamsicle Fudge?
As you indulge in this creamy, nostalgic treat, consider these delightful pairings to elevate your dessert experience.
-
Refreshing Fruit Salad: A mix of seasonal fruits balances the sweetness of the fudge, adding a burst of fresh flavors. The bright colors and textures create a beautiful contrast on your plate.
-
Fluffy Vanilla Ice Cream: The creamy ice cream melts beautifully over the fudge, enhancing its richness while adding a chilly, contrasting texture. A perfect accompaniment for hot summer days!
-
Sparkling Citrus Drink: A zesty soda or sparkling water infused with orange or lemon cuts through the sweetness, providing a refreshing sip after each bite of fudge.
-
Graham Cracker Crust: Crushed graham crackers as a base add a delightful crunch, bringing a s’mores-esque element to the experience. It’s a playful touch that shifts the traditional fudge enjoyment.
-
Chocolate Dipped Strawberries: The sweet yet tart strawberries dipping into a chocolate shell add an elegant touch to your dessert table. This pairing complements the smoothness of the fudge while introducing a fruity flavor burst.
-
Chocolate Milkshake: Thick, rich, and oh-so-decadent, a chocolate milkshake harmonizes beautifully with the creamy fudge, creating an indulgent treat worthy of any celebration.
Explore these pairings and immerse yourself in a delightful dessert experience!
Make Ahead Options
Perfect for busy home cooks, you can prepare components of the Orange Dreamsicle Fudge up to 24 hours in advance! Start by cooking the fudge base (combine heavy cream, sugar, and butter) and allow it to cool before adding the marshmallow cream and white chocolate. You can refrigerate this base mixture, tightly covered, until you’re ready to finish the fudge. When you’re ready to serve, simply reheat the cooled mixture gently on the stove until warm, then proceed with adding the orange extract and food coloring, layer, and swirl the fudge as directed. This way, you’ll enjoy a delightful, creamy fudge that’s just as delicious and perfect for sharing, all while saving yourself precious time during a busy week!
Expert Tips for Orange Dreamsicle Fudge
-
Temperature Matters: Ensure your mixture reaches 235°F; not hitting this mark can result in grainy fudge. Use a candy thermometer for perfect accuracy.
-
Avoid Overmixing: Once you incorporate the white chocolate and marshmallow cream, mix just until smooth. Overmixing can cause sugar crystallization and ruin the texture of your Orange Dreamsicle Fudge.
-
Cooling Time: Patience is key! Let the fudge chill for at least 2 hours to achieve the right firmness. Cutting it too soon can lead to a gooey mess instead of the perfect fudge.
-
Experiment with Flavors: Don’t hesitate to try your own variations! Adding fresh zest or using flavored extracts can elevate your Orange Dreamsicle Fudge to new levels of deliciousness.
-
Use Fresh Ingredients: Opt for high-quality white chocolate and real orange extract for the best flavor. Sometimes, simple ingredients make all the difference!
Orange Dreamsicle Fudge Recipe FAQs
How do I choose ripe ingredients for this recipe?
Absolutely! When selecting oranges for your Orange Dreamsicle Fudge, look for firm, fragrant fruits that are free from blemishes or dark spots. The perfect orange should feel heavy for its size, indicating juiciness. For the best flavor, use fresh oranges to extract zest, as it adds a natural brightness to the fudge compared to bottled extracts.
How should I store my Orange Dreamsicle Fudge?
The fudge can be stored in an airtight container at room temperature for up to 3 days, but to maintain its creamy consistency, refrigerate it! Keep it chilled in the fridge for up to 2 weeks. Be sure to place parchment paper between layers to prevent sticking and maintain its lovely texture.
Can I freeze Orange Dreamsicle Fudge?
Absolutely, you can freeze it! Wrap the fudge tightly in plastic wrap and place it in a freezer-safe container. It can be stored in the freezer for up to 3 months. To enjoy the fudge after freezing, simply take it out and let it sit at room temperature for about 15-20 minutes before serving for a delightful soft texture.
What if my fudge doesn’t set properly?
No worries! If your fudge seems to be too soft after chilling, it could be due to not reaching the proper temperature during cooking. To salvage it, you can reheat the fudge mixture gently over low heat until it reaches 235°F, then pour it back into the pan to chill again. This should help firm it up for a perfect creamy bite!
Is Orange Dreamsicle Fudge safe for pets or those with allergies?
Very! While the fudge is gluten-free, it contains dairy and sugar, so be cautious if your loved ones have lactose intolerance or specific allergies. It’s best to keep it away from pets, particularly dogs, as some ingredients like chocolate can be harmful to them. Always check your pantry for allergens before sharing!
Can I substitute any ingredients for dietary needs?
Yes, indeed! For a dairy-free fudge, swap heavy cream with coconut cream and use margarine instead of butter. You can also replace white chocolate chips with dark chocolate chips. This way, you still enjoy a delicious, creamy treat without compromising on your dietary needs. Enjoy experimenting!
Creamy Orange Dreamsicle Fudge for Nostalgic Summer Bliss
Ingredients
Equipment
Method
- Prepare the Pan: Grease a 9x13-inch baking pan with butter or non-stick spray, and line with parchment paper.
- Cook the Base Ingredients: In a saucepan, combine unsalted butter, heavy cream, and granulated sugar. Stir for 5-7 minutes until melted and smooth.
- Incorporate the Final Ingredients: Once at 235°F, remove from heat and stir in marshmallow cream and white chocolate chips until fully melted.
- Color and Divide Mixture: Separate 1 cup of fudge and set aside. Mix orange extract and food coloring into the rest.
- Layer and Swirl the Fudge: Pour orange mixture into the pan and dollop reserved white mixture. Swirl together.
- Chill the Fudge: Refrigerate for at least 2 hours until fully set.
- Slice and Serve: Lift fudge out using parchment, slice into squares, and serve.
Leave a Reply