
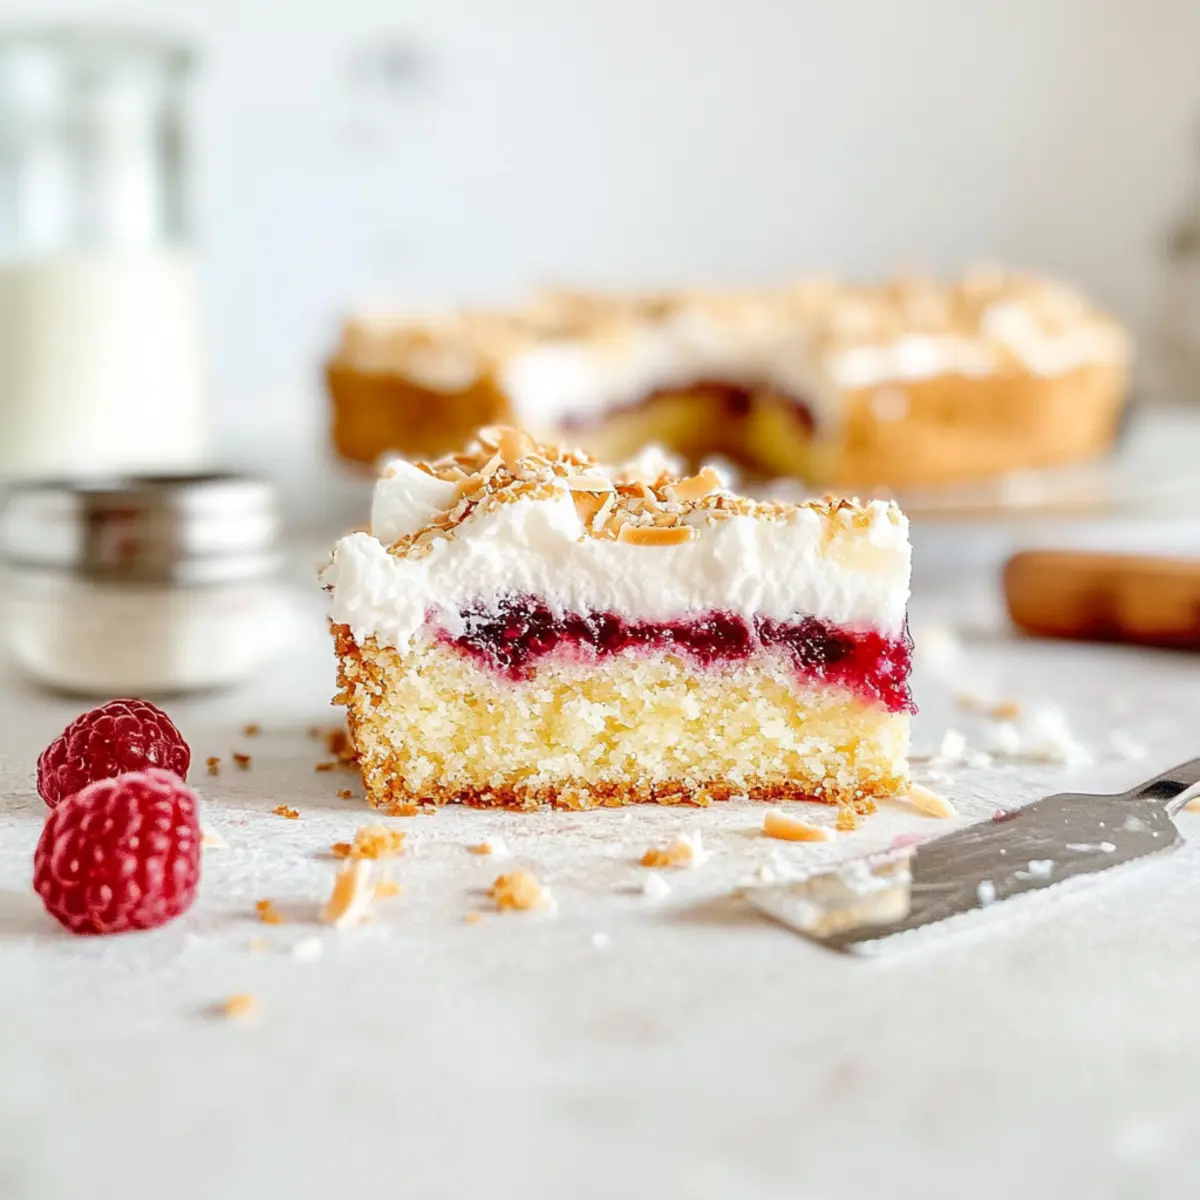
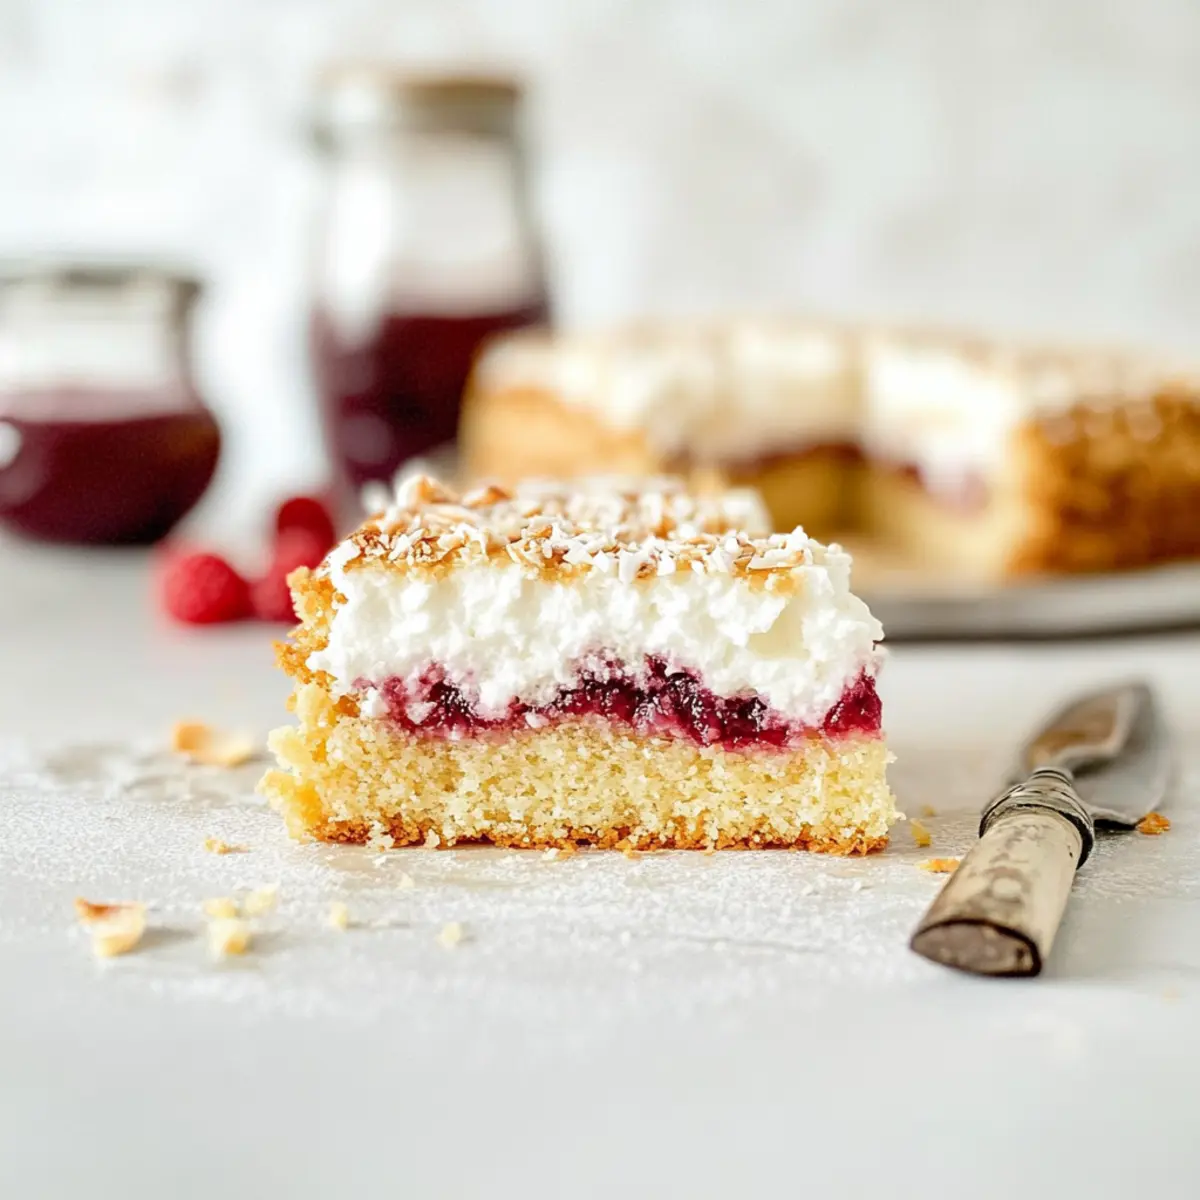
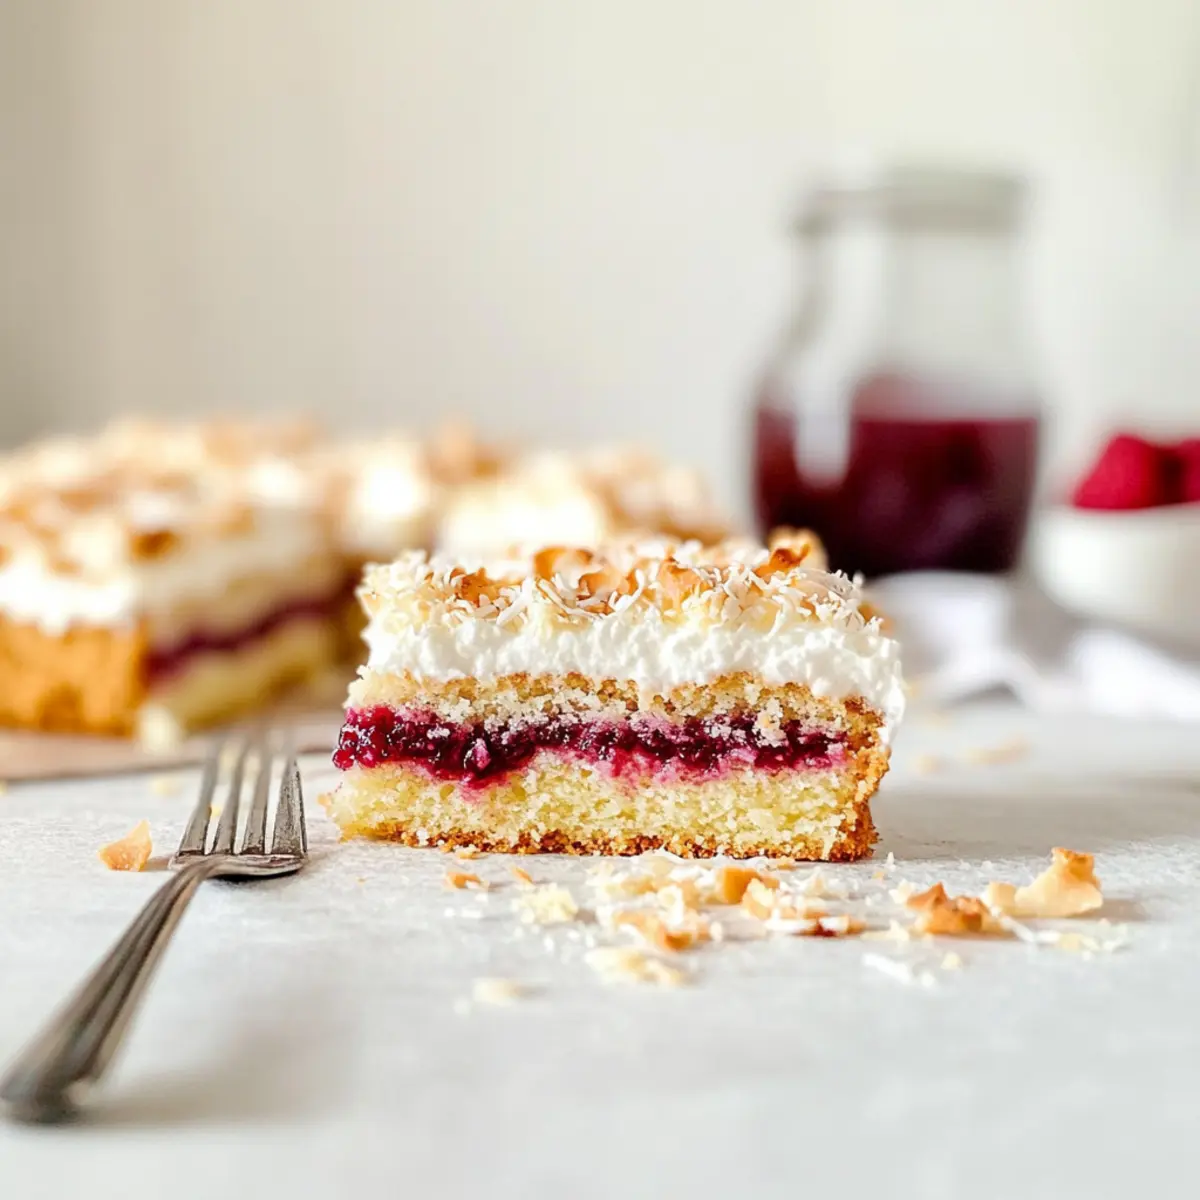
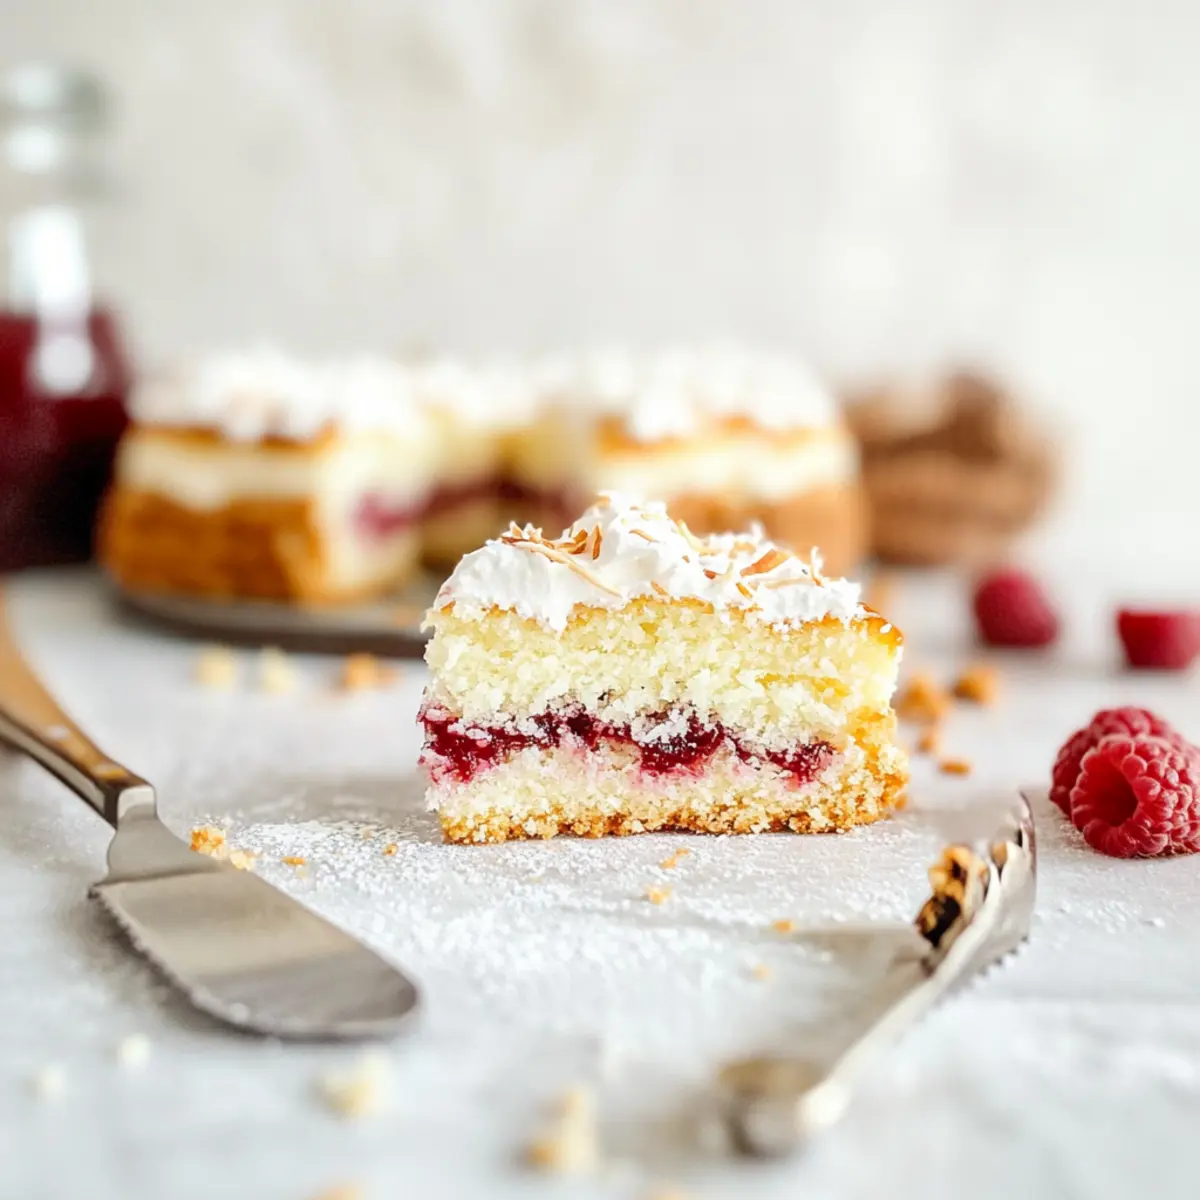
“Did you hear that divine scent wafting through my kitchen? That’s the aroma of a Classic New Zealand Louise Cake baking to perfection! This delightful treat features a buttery shortbread base topped with tangy raspberry jam and crowned with a fluffy coconut Swiss meringue. Making this cake is not only a breeze, but it’s also a true crowd-pleaser, perfect for any gathering or simply as a comforting afternoon snack. The best part? You can easily adapt it for gluten-free diets or switch up the jam flavor to suit your taste. So grab your apron and join me on this sweet journey—are you ready to whip up something extraordinary?”
Why is Louise Cake so irresistible?
Nostalgic Flavors: This cake captures the heart of Classic New Zealand baking, offering a cozy taste reminiscent of home.
Easy to Make: With straightforward steps, you’ll have a delicious dessert ready in no time—perfect for busy days!
Customizable Delight: Swap in your favorite jams or even go gluten-free without losing the delightful taste that everyone loves.
Versatile Presentation: Whether enjoyed with whipped cream or fresh berries, it’s a stunning centerpiece for any occasion.
Crowd-Pleasing Treat: This dessert has a wonderful appeal that makes it suitable for both casual gatherings and special celebrations—everyone will want a bite!
Enjoy exploring this delightful Louise Cake recipe and elevate your baking repertoire today!
Louise Cake Ingredients
• Dive into this delightful recipe with the essential ingredients for making a perfect Louise Cake!
For the Shortbread Base
- All-Purpose Flour – Provides structure to the buttery shortbread base, but you can substitute with gluten-free flour if needed.
- Unsalted Butter – Adds richness and flavor; if unavailable, opt for salted butter and reduce any added salt.
- Sugar (Caster or Granulated) – Sweetens the mixture and helps achieve a delicate texture; ensure it dissolves well for the best results.
- Salt – Enhances the flavors in the shortbread; adjust based on your preference and the type of salt used.
For the Jam Layer
- Raspberry Jam – Offers the perfect blend of sweetness and tartness; feel free to use any preferred fruit jam for a personal twist.
For the Swiss Meringue
- Eggs (Large) – Adds moisture and helps bind the ingredients together; for a lighter meringue, you can use only egg whites.
- Desiccated or Shredded Coconut – Provides lovely texture and flavor; shredded coconut lends a coarser texture, while desiccated works fine too.
Enjoy baking this scrumptious Louise Cake that’s sure to impress your family and friends!
Step‑by‑Step Instructions for Louise Cake
Step 1: Preheat and Prepare the Pan
Begin by preheating your oven to 350°F (175°C). While it warms up, line a 9-inch square baking pan with parchment paper, ensuring the paper hangs over the edges for easy removal later. This setup will help your delicious Louise Cake come out cleanly after baking.
Step 2: Cream Butter and Sugar
In a mixing bowl, combine 1 cup of unsalted butter and ¾ cup of sugar. Using an electric mixer, cream them together on medium speed until the mixture is light and fluffy, which should take about 3-5 minutes. This creates a rich base for your shortbread, so take your time to achieve the right texture.
Step 3: Combine Dry Ingredients
Next, sift in 2 cups of all-purpose flour along with a pinch of salt to the butter-sugar mixture. Mix on low speed until just combined to maintain the airiness. Be cautious not to overmix; you want a crumbly texture that holds together but isn’t dense.
Step 4: Press the Shortbread Mixture
Transfer the shortbread mixture into the prepared baking pan, using your fingers or the back of a spoon to press it evenly into the bottom. Aim for a smooth layer that reaches the corners of the pan. Once done, bake in the preheated oven for about 15-20 minutes or until the edges turn lightly golden.
Step 5: Spread the Raspberry Jam
While the shortbread base is baking, take 1 cup of raspberry jam and prepare to spread it evenly over the warm shortbread as soon as it comes out of the oven. The warmth will help the jam adhere better. Use a spatula to distribute the jam for a lovely, even layer that adds tanginess to your Louise Cake.
Step 6: Prepare the Swiss Meringue
For the meringue, in a heatproof bowl, combine 4 egg whites and 1 cup of sugar. Place the bowl over a saucepan of simmering water, whisking constantly until the sugar is fully dissolved and the mixture is warm, about 4-5 minutes. This gentle heating helps stabilize the meringue.
Step 7: Whip the Meringue
Once dissolved, remove the bowl from heat and use an electric mixer to whip the egg white mixture until stiff peaks form, taking about 5-7 minutes. The result should be glossy and smooth. Gently fold in 1 cup of shredded coconut to add texture and the signature flavor to your Louise Cake.
Step 8: Bake the Meringue Topping
Spread the coconut meringue mixture over the jam layer with an offset spatula, ensuring it covers the entire surface. Return the pan to the oven for an additional 10-15 minutes or until the meringue is lightly browned and puffed. This step creates a beautiful golden top for your delightful Louise Cake.
Step 9: Cool and Slice
After baking, remove the cake from the oven and allow it to cool in the pan completely. Once cooled, use the parchment paper to lift the cake out, transferring it to a cutting board. Slice into squares or rectangles; this lovely Louise Cake is ready for serving and sure to impress everyone!
Storage Tips for Louise Cake
- Room Temperature: Store the cake in an airtight container at room temperature for up to 3 days for the best taste and texture.
- Fridge: If you prefer, you can store polished slices in the fridge for up to 5 days, but this may affect the crispiness of the meringue.
- Freezer: The Louise Cake can be frozen for up to 2 months. Wrap slices tightly in plastic wrap and foil to prevent freezer burn before placing in an airtight container.
- Reheating: To revive the meringue’s texture, place individual slices in an oven at 300°F (150°C) for about 5 minutes before serving, ensuring a delicious experience!
Expert Tips for Louise Cake
- Perfect Shortbread Base: Ensure your butter is at room temperature for a creamy texture that helps your shortbread bake evenly, avoiding a tough crust.
- Sugar Dissolution: For a stable meringue, make sure the sugar is completely dissolved before whipping; this prevents any gritty texture in your Louise Cake.
- Coconut Choice: Use shredded coconut for a coarser texture, which complements the meringue beautifully. If you choose desiccated coconut, consider adding a bit more for flavor.
- Meringue Timing: Keep an eye on the meringue while baking it; if it browns too quickly, lower your oven temperature to ensure it cooks evenly without burning.
- Cooling Tip: Let the cake cool completely before slicing to avoid cracking the meringue top. It helps maintain that delightful presentation!
What to Serve with Classic New Zealand Louise Cake
Imagine the warmth of a sunny afternoon, where every bite of this luscious cake brings dreamy enchantment to your taste buds.
- Whipped Cream: A dollop of fluffy whipped cream adds a creamy touch that perfectly complements the tangy raspberry layer.
- Fresh Berries: Raspberries or strawberries provide a refreshing burst of flavor, balancing the sweetness of the cake wonderfully.
- Ice Cream: A scoop of vanilla or coconut ice cream creates a delightful contrast with the warm cake, making every mouthful divine.
- Herbal Tea: A soothing cup of chamomile or mint tea meshes beautifully with the cake, enhancing its tropical vibe and providing a cozy experience.
- Sparkling Water: For a light and refreshing pairing, serve with sparkling water garnished with a slice of lemon or mint sprig to cleanse the palate.
- Fruit Salad: A colorful fruit medley adds a crisp, fresh texture that enhances the overall harmony of the meal.
- Chocolate Sauce: Drizzling some rich chocolate sauce over the cake elevates it with decadence, creating an indulgent treat that chocolate lovers will adore.
- Savory Cheese Platter: Pair it with creamy brie or tangy goat cheese; it contrasts the sweetness beautifully and adds complexity to your dessert table.
Indulge in these pairings and create a delightful experience that showcases your love for homemade desserts!
Make Ahead Options
These delightful Louise Cake squares are perfect for meal prep, allowing you to create a luscious dessert with minimal last-minute effort! You can prepare the shortbread base up to 24 hours in advance; simply press it into the pan and refrigerate it until you’re ready to bake. The raspberry jam layer can also be spread over the shortbread and stored together for up to 3 days in the fridge, ensuring it’s ready to go. However, for the best meringue texture, it’s recommended to whip and bake the meringue just before serving since it’s best enjoyed fresh and crispy. With these make-ahead tips, you’ll have a fabulous Louise Cake that is just as delicious and impressively easy to serve!
Louise Cake Variations & Substitutions
Feel free to personalize your Louise Cake, transforming it into your own unique delight that will tantalize your taste buds!
-
Gluten-Free: Substitute all-purpose flour with a gluten-free blend, ensuring everyone can enjoy this treat without worry.
-
Fruit Jam Swap: Swap raspberry jam for apricot, strawberry, or even a tangy lemon curd for a refreshing twist that excites your palate.
-
Meringue Flexibility: For a lighter meringue, reduce the egg whites to three while maintaining the same sugar quantity—this creates a fluffy topping that still dazzles.
-
Flavor Boost: Add a splash of vanilla or almond extract to the shortbread base for an aromatic kick that beautifully complements the raspberry jam.
-
Chocolate Lovers: Drizzle a little melted chocolate over the meringue before it sets for a decadent addition that adds richness to each bite.
-
Coconut Alternative: Experiment with other nuts, such as toasted almonds or chopped pecans, in place of coconut for a delightful crunch and a different flavor profile.
-
Nut-Free Version: If you need to keep it nut-free, use sunflower seeds instead of coconut, providing a crunchy texture without the allergens.
-
Citrus Zing: Mix in some lemon or orange zest into the shortbread for added brightness that lifts the flavors of this classic treat.
For more delightful baking ideas, consider trying the flavors of a Christmas Tree Cake or the warmth of a Spiced Gingerbread Wreath Cake. Let your creativity shine in the kitchen!
Louise Cake Recipe FAQs
How do I select the best ingredients for my Louise Cake?
Absolutely! For the best flavor, choose ripe, high-quality raspberry jam. If making it from scratch, look for berries that are plump and juicy without dark spots. For flour, high-protein all-purpose flour is ideal as it helps create a sturdy base, but if gluten-free, opt for a good-quality gluten-free flour blend.
How should I store my Louise Cake?
I recommend storing your Louise Cake in an airtight container at room temperature for up to 3 days. This keeps the shortbread base and meringue fresh. If you store it in the fridge, it can last up to 5 days, although the meringue may lose its crispness.
Can I freeze leftovers of the Louise Cake?
Absolutely! To freeze your Louise Cake, slice it into individual portions, then wrap each piece tightly in plastic wrap followed by aluminum foil. This will keep it fresh for up to 2 months. When you’re ready to enjoy, just thaw in the fridge overnight and reheat in a 300°F (150°C) oven for about 5 minutes to refresh the meringue.
What should I do if my meringue doesn’t form stiff peaks?
Very! If your meringue isn’t forming stiff peaks, it could be due to a few reasons. Ensure that no yolk has mixed with your egg whites, as fat can prevent proper whipping. Also, make certain your bowl and whisk are perfectly clean—any grease will affect the egg whites. If you notice that the sugar hasn’t fully dissolved, gently heat the bowl over simmering water again and whisk until it’s warm and smooth before attempting to whip it again.
Can I adapt Louise Cake for dietary restrictions?
Yes! If you’re serving someone with nut allergies, the classic ingredients pose no risk, as the recipe doesn’t include nuts. To accommodate gluten-free diets, simply swap the all-purpose flour for a gluten-free blend. Those who are watching their sugar intake can try using sugar alternatives like stevia or erythritol, though this may alter the cake’s texture slightly.
What is the best way to cut my Louise Cake?
One of my favorite tips! After allowing your cake to cool completely, use a sharp knife warmed under warm water to cut through the meringue smoothly. This will help avoid cracking while providing a clean slice. If the meringue has set too hard, you can let it sit at room temperature for a few minutes to soften slightly before cutting. Enjoy!
Delightful Louise Cake: A Tropical Twist with Coconut Meringue
Ingredients
Equipment
Method
- Preheat your oven to 350°F (175°C) and line a 9-inch square baking pan with parchment paper.
- Cream together 1 cup of unsalted butter and ¾ cup of sugar until light and fluffy, about 3-5 minutes.
- Sift in 2 cups of all-purpose flour and a pinch of salt, mixing on low speed until just combined.
- Press the shortbread mixture evenly into the prepared pan and bake for 15-20 minutes until lightly golden.
- Spread 1 cup of raspberry jam over the warm shortbread base immediately after it comes out of the oven.
- Combine 4 egg whites and 1 cup of sugar in a heatproof bowl and place over simmering water, whisking until sugar dissolves.
- Remove from heat and whip the egg white mixture until stiff peaks form, about 5-7 minutes; fold in 1 cup of shredded coconut.
- Spread the coconut meringue mixture over the jam layer and return to the oven for an additional 10-15 minutes until lightly browned.
- Allow the cake to cool completely in the pan before lifting out and slicing into squares.
Leave a Reply