
As I stirred the creamy concoction in my pot, a wave of nostalgia washed over me, transporting me back to childhood afternoons spent in my grandmother’s kitchen. That’s right—I’m talking about Homemade Vanilla Pudding, the kind of dessert that not only fills your belly but also warms your heart. This delightful treat is so easy to make from scratch that it leaves those boxed mixes in the dust. With just a handful of simple ingredients, you can whip up a pudding that’s indulgently creamy and perfectly sweet, making it a fun project for both kids and adults. Whether you’re looking for a comforting after-dinner dessert or a luscious filling for cake layers, this homemade version elevates any occasion. So why settle for store-bought when you can recreate this classic with a personal touch? What flavor twists will you add to your creamy masterpiece?
Why is Homemade Vanilla Pudding so special?
Irresistibly Creamy: Experience the rich, velvety texture that only homemade can deliver—far surpassing any boxed alternative.
Quick and Easy: With just a few pantry staples, you can whip up this delightful dessert in no time, making it perfect for busy evenings.
Kid-Friendly Fun: This recipe is a great way to involve children in the kitchen, turning cooking into a fun, shared experience.
Versatile Delight: Whether enjoyed on its own or as a decadent filling for desserts, this pudding adapts beautifully to your culinary whims.
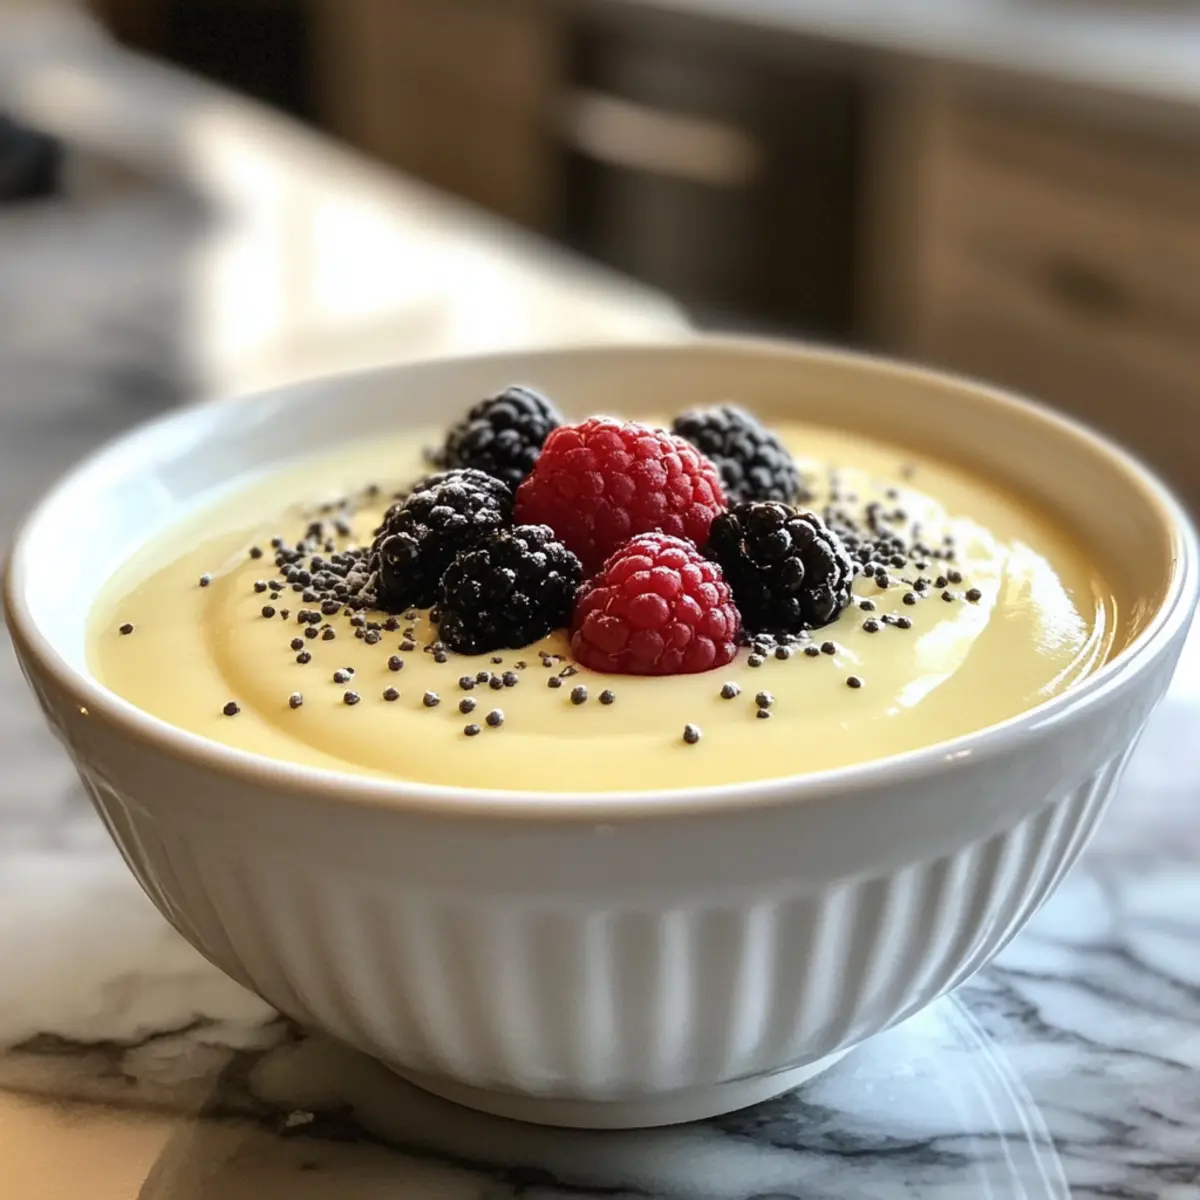
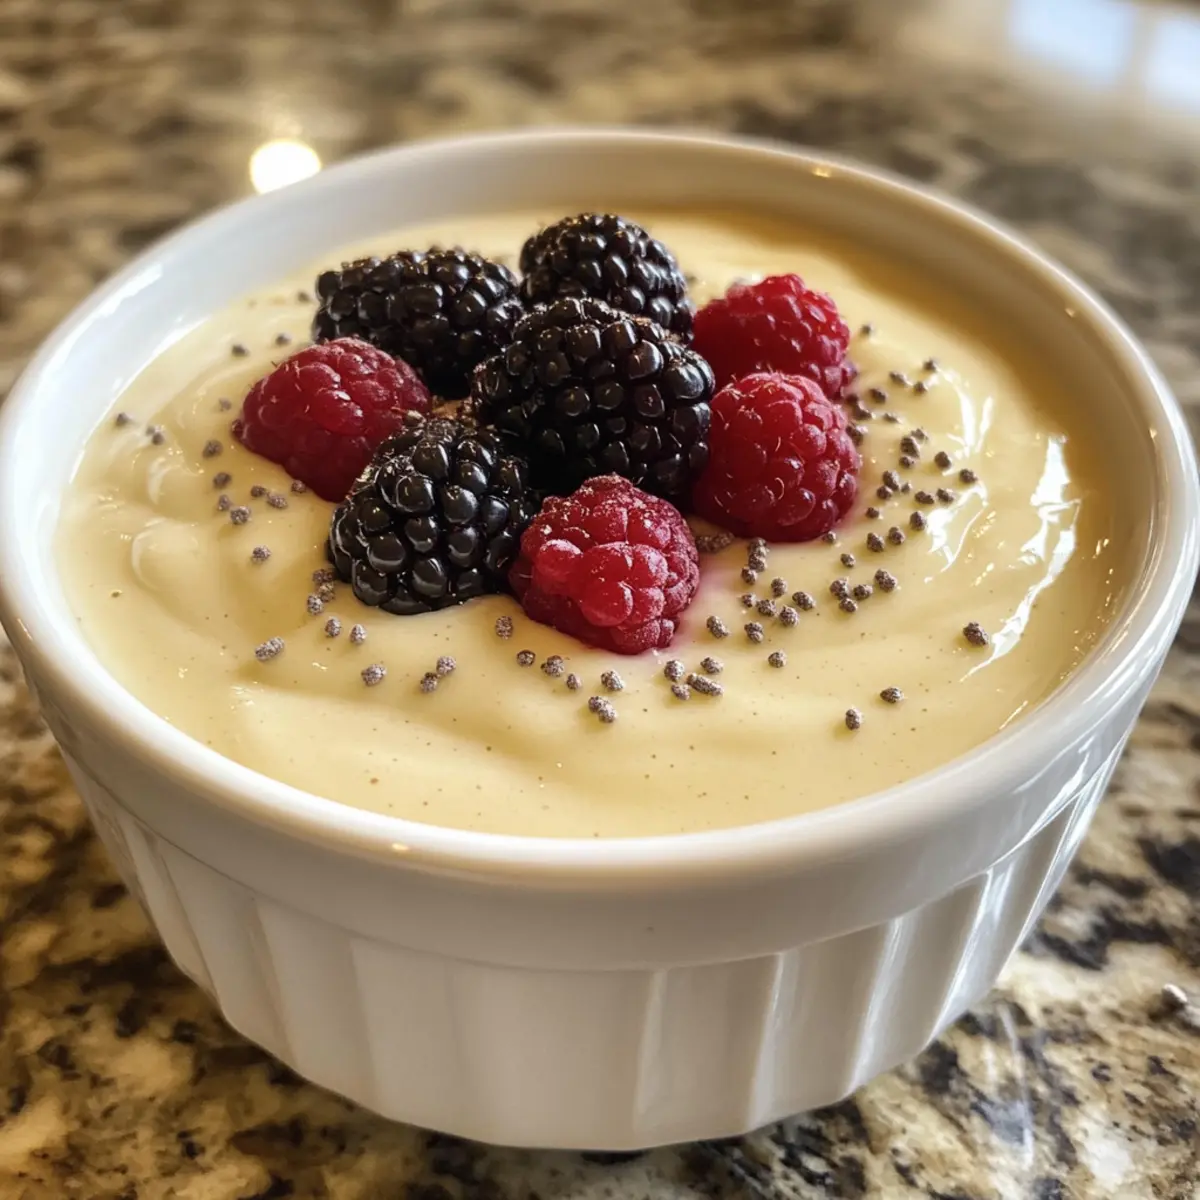
Flavor Packed: Fresh vanilla extract brings an authentic taste that makes every spoonful a nostalgic trip down memory lane. Try it as a delightful centerpiece in a pudding parfait topped with fresh berries or whipped cream to impress your guests!
Homemade Vanilla Pudding Ingredients
• To make this creamy dessert, gather simple ingredients for a delicious result!
For the Pudding Base
- Whole Milk – Provides creaminess and a smooth texture; try using a non-dairy milk for a dairy-free version, but it may change the flavor.
- Granulated White Sugar – Adds sweetness; swap it with brown sugar for a richer taste, though it will slightly tint the pudding.
- Cornstarch – Acts as a thickening agent to give the pudding its signature texture; substitutes like flour may work but can alter consistency.
- Egg Yolks – Enriches the pudding with a custardy flavor; use silken tofu for a non-egg twist, but expect a different texture.
- Vanilla Extract – Essential for that authentic vanilla flavor; enhance it further with vanilla bean or paste for a deeper taste.
- Salted Butter – Adds richness and smoothness; unsalted butter is a fine substitute—just add a pinch of salt to maintain balance.
For Serving Suggestions
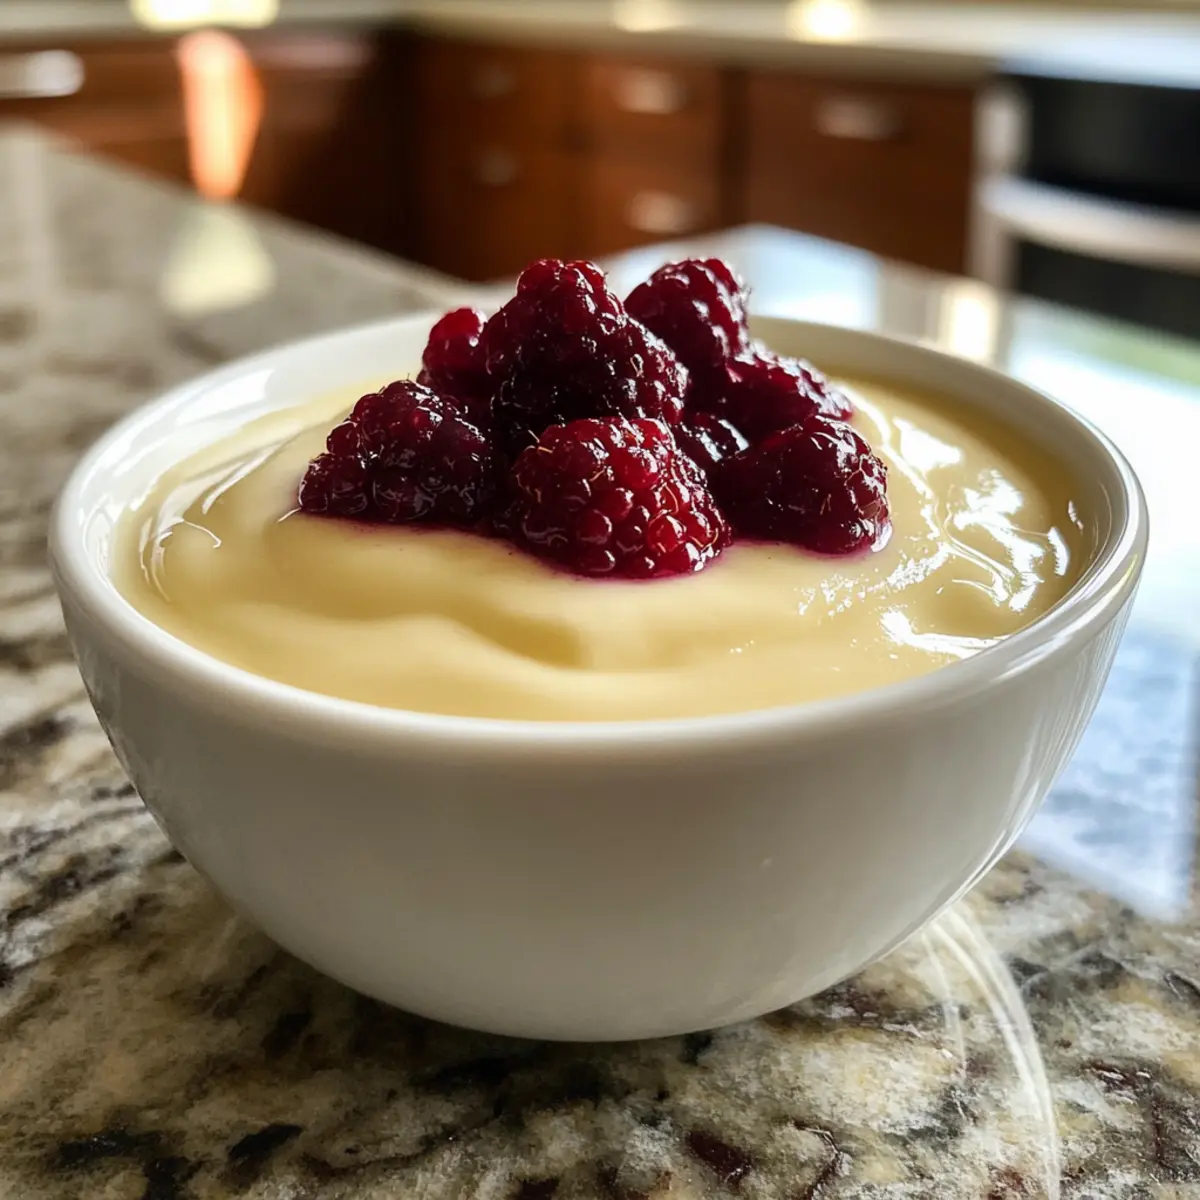
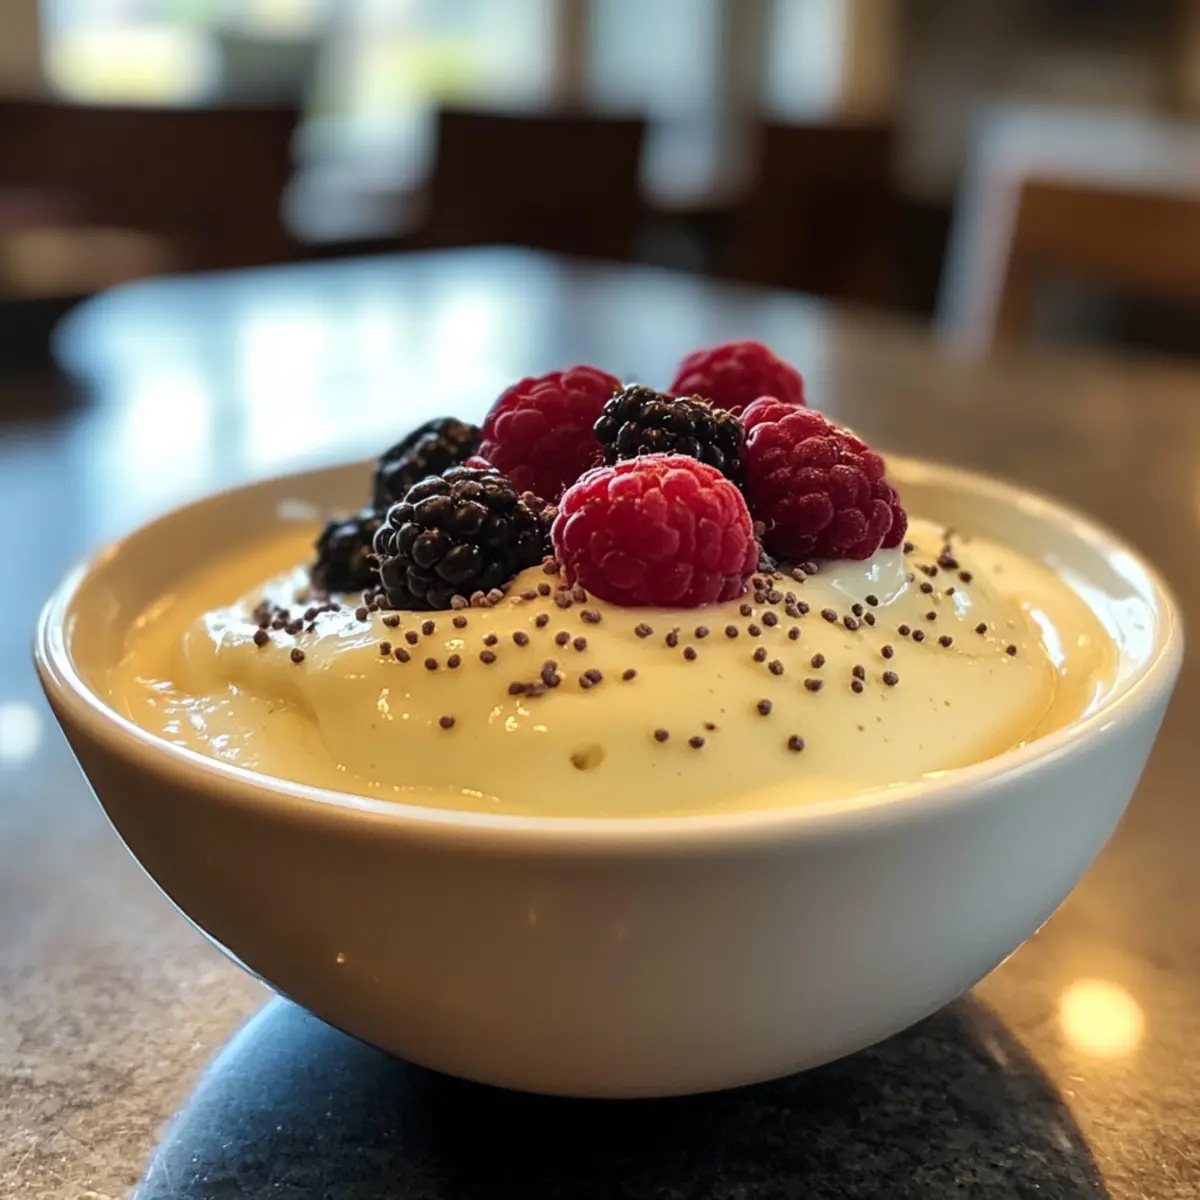
- Fresh Berries – Use seasonal berries to brighten and complement the pudding beautifully.
- Whipped Cream – A dollop on top creates an elegant finish and a luscious mouthfeel.
This gathering of Homemade Vanilla Pudding ingredients ensures a satisfying and unforgettable dessert experience!
Step‑by‑Step Instructions for Homemade Vanilla Pudding
Step 1: Whisk the Dry Ingredients
In a small pot, combine 2 cups of whole milk, ½ cup of granulated sugar, and ¼ cup of cornstarch. Use a whisk to blend these ingredients together thoroughly until there are no lumps. This mixture forms the base of your homemade vanilla pudding, and it should have a smooth consistency that’s reminiscent of creamy milk.
Step 2: Heat the Mixture
Place the pot over medium heat and continue stirring the mixture gently but constantly. Keep an eye on it as it begins to thicken, which should take about 5–7 minutes. You’ll know it’s ready when the pudding bubbles gently and becomes noticeably thicker, showcasing beautiful, smooth texture changes.
Step 3: Prepare the Egg Yolks
In a separate bowl, lightly whisk together 3 egg yolks until they are pale and frothy, indicating they’re well mixed. Gradually pour in about ½ cup of the hot pudding mixture while whisking continuously to temper the yolks. This step prevents the eggs from scrambling and ensures a creamy texture for your homemade vanilla pudding.
Step 4: Combine and Cook
Carefully stir the tempered egg yolk mixture back into the pot with the remaining thickened pudding. Continue cooking over medium heat for an additional 1–2 minutes, stirring constantly. You’ll notice the pudding thickening further and achieving a rich, velvety texture—just the way homemade vanilla pudding should be!
Step 5: Add Flavorings
Once the pudding has reached your desired thickness, remove it from the heat. Stir in 2 teaspoons of pure vanilla extract and 2 tablespoons of salted butter until fully integrated. This will enhance the flavor and add luxurious creaminess to your delicious homemade vanilla pudding.
Step 6: Chill the Pudding
Pour the warm pudding into serving bowls or a large dish, smoothing the surface as needed. To prevent a skin from forming, cover the pudding with plastic wrap, ensuring it touches the surface. Place it in the refrigerator to chill for at least 2 hours. This cooling step allows the flavors to meld beautifully and the pudding to set perfectly.
Step 7: Serve and Enjoy
After chilling, remove the homemade vanilla pudding from the fridge. Give it a gentle stir and serve it with fresh berries or a dollop of whipped cream for added indulgence. This sumptuous dessert is perfect for any occasion and will be a joy to savor!
Tips for the Best Homemade Vanilla Pudding
-
Stir Constantly: Always stir the pudding mixture while heating to prevent it from sticking to the pot and burning. This ensures a smooth, creamy texture.
-
Medium Heat Only: Keep the heat at medium to gradually thicken the pudding. High heat can cause it to burn and ruin the delightful flavor of your homemade vanilla pudding.
-
Tempering Technique: When adding egg yolks, do it gradually. This step is crucial to prevent the eggs from scrambling, yielding a silky finish in your pudding.
-
Chill Properly: Cover the pudding with plastic wrap directly touching the surface while it cools. This prevents a skin from forming, keeping it creamy and delicious.
-
Taste as You Go: Don’t hesitate to taste your pudding before chilling; adjust sweetness and vanilla according to your preference to achieve the perfect flavor balance!
What to Serve with Creamy Homemade Vanilla Pudding
Savor the sweet, silky delight of homemade vanilla pudding as part of a charming dessert spread.
-
Fresh Berries: Juicy strawberries, raspberries, or blueberries add a vibrant burst of flavor that balances the pudding’s creaminess beautifully. They also bring a fresh, fruity contrast that elevates every bite.
-
Whipped Cream: A light, fluffy dollop on top creates an indulgent finish, bringing airiness and richness that perfectly complements this classic treat.
-
Chocolate Shavings: For a touch of elegance, sprinkle chocolate shavings on top. Their rich, decadent bite enhances the sweet vanilla flavor and adds a delightful crunch.
-
Shortbread Cookies: Crunchy shortbread cookies serve as a delightful spoon for the pudding, offering a buttery flavor that pairs perfectly with the creamy texture.
-
Caramel Sauce: Drizzle warm caramel over the pudding for a sweet and salty twist. The rich flavor of caramel intertwines beautifully with vanilla, making every spoonful a joyous bite.
-
Chocolate Cake Layers: Use the pudding as a luscious filling in between chocolate cake layers. The combination of rich chocolate and smooth vanilla creates a dessert that is truly irresistible and memorable.
-
Almond Biscotti: Crunchy and slightly sweet, almond biscotti makes for a perfect dipping companion, providing texture and a nutty depth that enhances the pudding experience.
-
Espresso or Coffee: A warm cup of espresso or freshly brewed coffee can balance the sweetness of the pudding, enhancing its flavors while providing a comforting finish to the meal.
Let your imagination run wild as you create the dessert experience of your dreams!
Homemade Vanilla Pudding Variations
Feel free to let your creativity shine as you customize this classic dessert in delightful new ways!
- Dairy-Free: Swap whole milk for creamy almond or coconut milk for a lighter twist that still packs flavor.
- Chocolatey Delight: Introduce chocolate by mixing in unsweetened cocoa powder along with the dry ingredients for a rich, decadent option.
- Caramel Swirl: Fold in soft caramel sauce before chilling to create a luscious, sweet dimension to the pudding’s flavor.
- Berry Bliss: Top with fresh strawberries, blueberries, or raspberries for a pop of color and a refreshing contrast to the creamy pudding.
- Pudding Parfait: Layer your pudding with crushed cookies and whipped cream for a fun dessert parfait that’s pleasing to the eye and the palate.
- Spiced Flavor: Sprinkle in a dash of cinnamon or nutmeg for warmth and an aromatic hint that elevates the flavor profile beautifully.
- Nutty Twist: Stir in finely chopped nuts like pecans or almonds for an added crunch that complements the luscious pudding texture.
- Zesty Lemon: Add a teaspoon of lemon zest to the mix to give your pudding a bright, citrusy kick that livens up every spoonful.
Whether you stick to the classics or venture into these tempting variations, your homemade vanilla pudding will be an unforgettable treat!
Storage Tips for Homemade Vanilla Pudding
Fridge: Store your homemade vanilla pudding in an airtight container for up to 5-7 days. This keeps it fresh and prevents it from absorbing any unwanted odors.
Freezer: It’s not recommended to freeze the pudding due to potential texture changes. Freezing can cause the pudding to become grainy or watery when thawed.
Reheating: If you prefer to enjoy your pudding warm, gently reheat it on the stove over low heat, stirring frequently to restore its creamy consistency without burning.
Serving Suggestions: Always cover the pudding with plastic wrap while chilling to avoid a skin forming on top, ensuring a smooth and luxurious finish.
Make Ahead Options
Prepare your Homemade Vanilla Pudding to make your busy weeknights a breeze! You can whisk together the milk, sugar, and cornstarch mixture, then refrigerate it for up to 24 hours. When ready to finish, simply heat the mixture, add in the tempered egg yolks, and continue with the recipe. Additionally, once cooked, the pudding can be cooled and stored in individual bowls with plastic wrap directly touching the surface for up to 3 days—this prevents a skin from forming. Rest assured, your pudding will be just as delightful when served as if made fresh! Serve it chilled, topped with whipped cream and berries, and enjoy this classic comfort with minimal effort.
Homemade Vanilla Pudding Recipe FAQs
What kind of milk should I use for the best flavor?
Absolutely! Whole milk is ideal for that rich, creamy texture and flavor. However, if you’re looking for a non-dairy option, you can use almond or oat milk. Just keep in mind that the flavor may vary slightly.
How should I store leftover Homemade Vanilla Pudding?
Store your pudding in an airtight container in the refrigerator for up to 5–7 days. This ensures it stays fresh and retains its delicious taste. Just remember to cover it well to prevent it from absorbing any fridge odors!
Can I freeze the homemade pudding?
Not recommended! Freezing can alter the texture of the pudding, making it grainy or watery when thawed. Instead, try making smaller batches to enjoy fresh or store in the fridge for later days.
What if my pudding doesn’t thicken?
If your pudding isn’t thickening, you may not have cooked it long enough. Make sure to stir continuously over medium heat until it bubbles and thickens. If you suspect it’s too thin after cooking, try mixing a little bit of cornstarch with cold milk separately, then gradually whisk that into the pudding while simmering for a few more minutes!
Are there any dietary concerns with this recipe?
Of course! This recipe does include dairy and eggs, making it unsuitable for vegans or those with egg allergies. You could use silken tofu as an egg substitute and a non-dairy milk for a lactose-free version. Always check for allergies, especially with toppings like whipped cream and berries!
How can I enhance the flavor of my vanilla pudding?
To elevate the flavor of your Homemade Vanilla Pudding, consider adding a pinch of salt to balance the sweetness, or use pure vanilla bean paste instead of extract for a richer vanilla flavor. You can even fold in melted chocolate or a caramel sauce for a unique twist!
Irresistibly Creamy Homemade Vanilla Pudding Recipe
Ingredients
Equipment
Method
- In a small pot, combine 2 cups of whole milk, ½ cup of granulated sugar, and ¼ cup of cornstarch. Whisk until smooth.
- Place the pot over medium heat and stir gently but constantly for about 5-7 minutes until it thickens and bubbles gently.
- In a separate bowl, whisk together 3 egg yolks until pale. Gradually mix in about ½ cup of the hot pudding mixture to temper the yolks.
- Stir the tempered egg yolks back into the pot with the remaining pudding. Cook for an additional 1-2 minutes, stirring constantly.
- Remove from heat and mix in 2 teaspoons of vanilla extract and 2 tablespoons of butter until fully combined.
- Pour the pudding into serving bowls, cover with plastic wrap, and refrigerate for at least 2 hours.
- Serve chilled with fresh berries or whipped cream.
Leave a Reply