
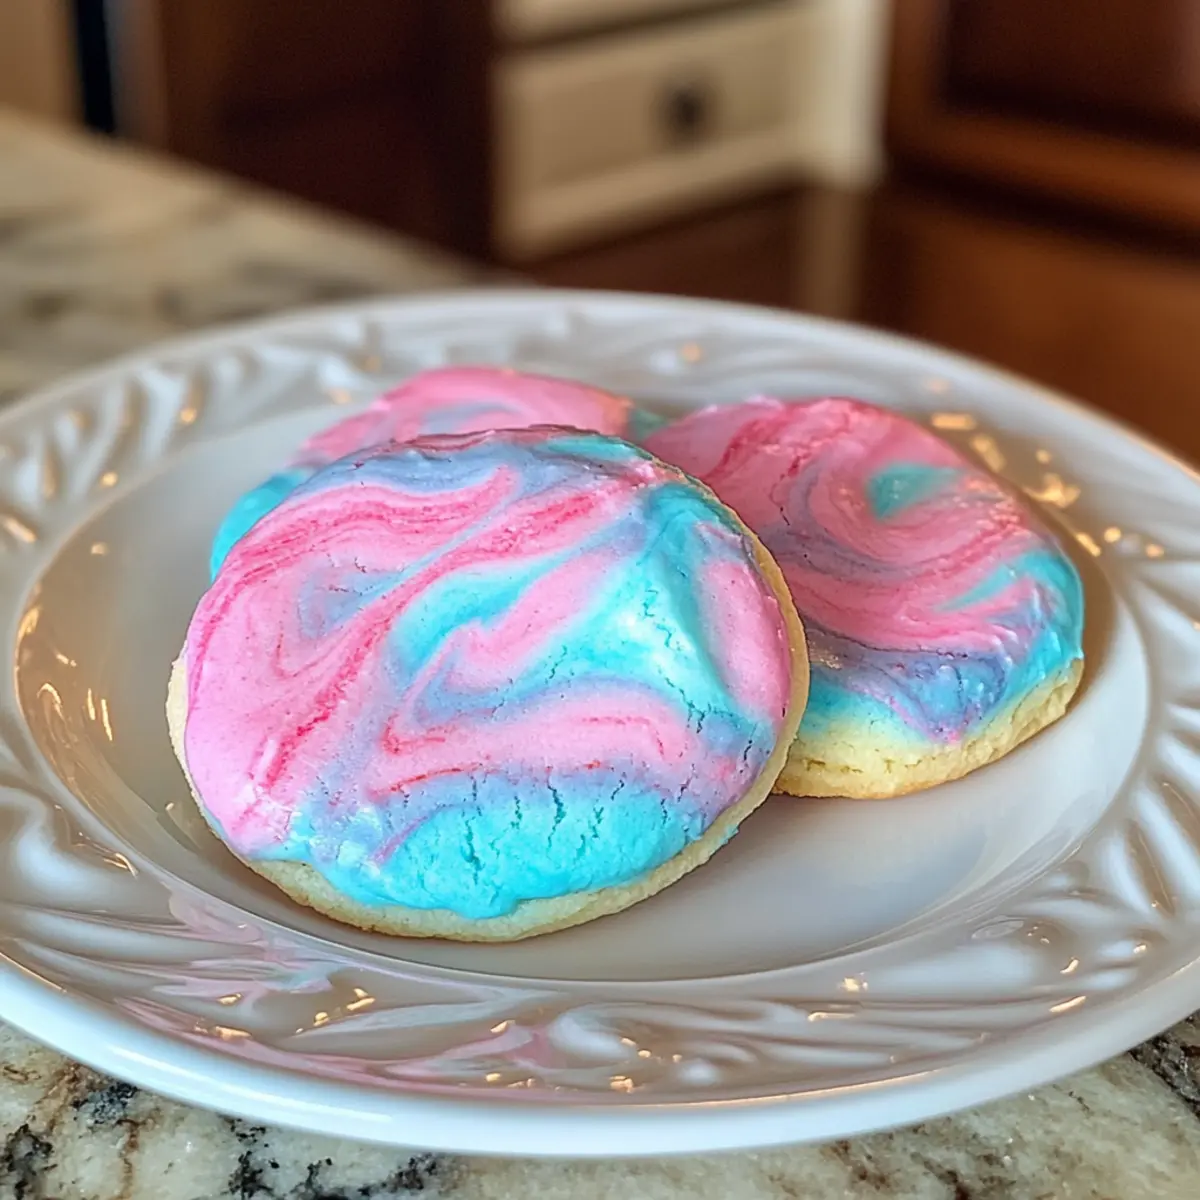
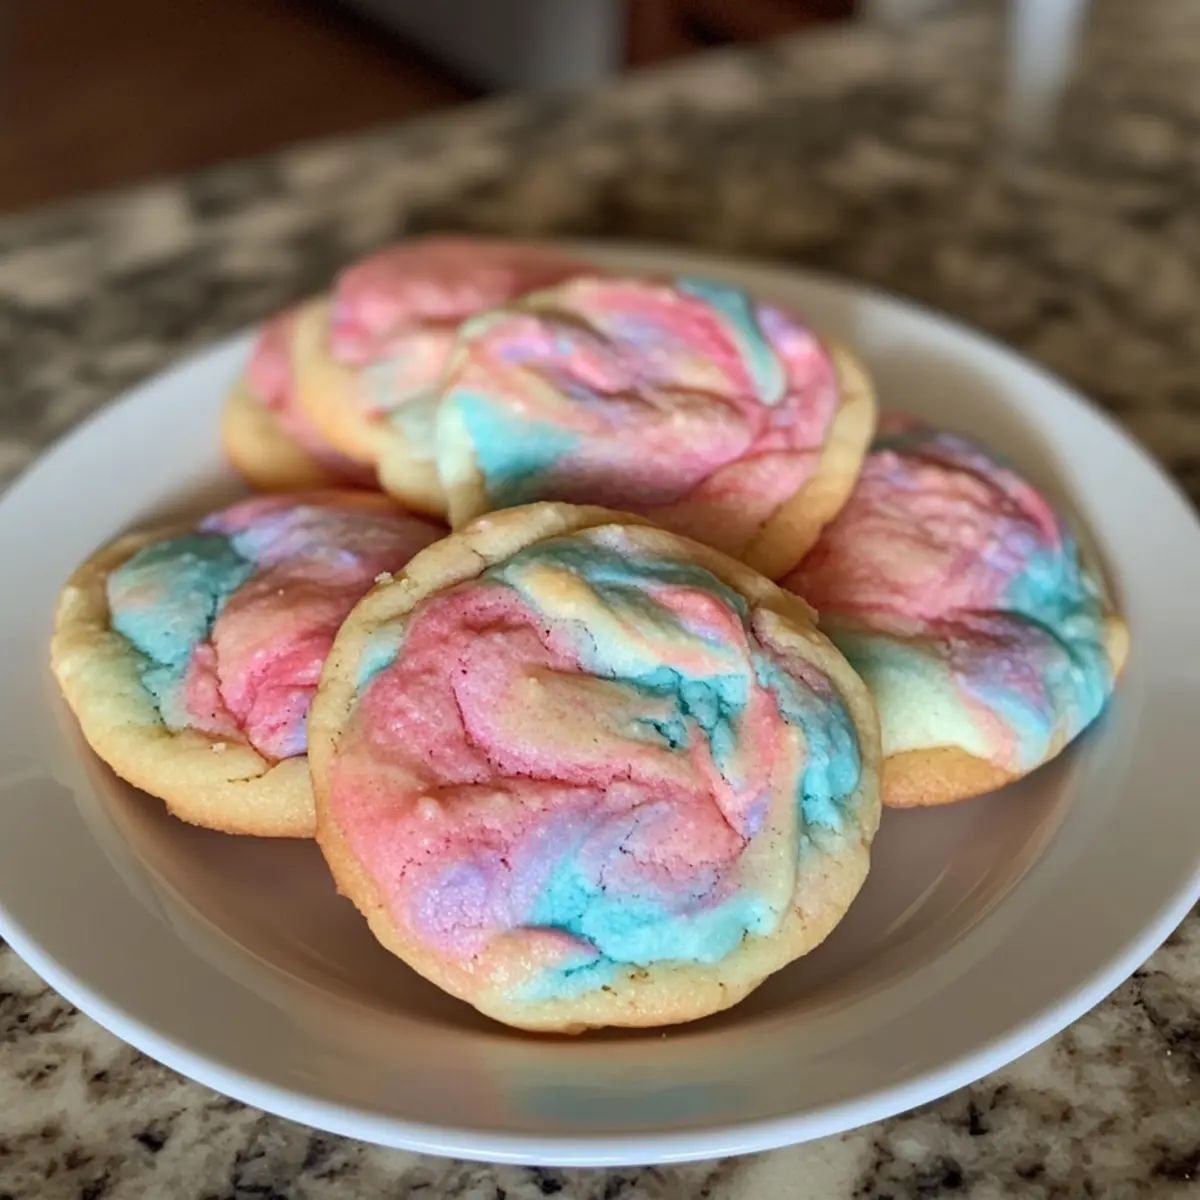
As I flipped through old photo albums, a familiar scent wafted into the air, transporting me back to summer fairs filled with laughter and cotton candy clouds. If you’re ready to recreate that delightful nostalgia, these Cotton Candy Cookies are your ticket! These fun, colorful treats not only capture the whimsical spirit of childhood but are also effortlessly adaptable for both dairy-free and gluten-free diets, making them perfect for everyone. The chewy, melt-in-your-mouth texture is bound to spark joy, whether you’re throwing a vibrant birthday party or simply indulging in a sweet moment at home. Are you ready to embrace the whimsy and add a splash of color to your baking adventures? Let’s dive in!

Why are Cotton Candy Cookies a Must-Try?
Joyful Nostalgia: Each bite of these cookies whisks you away to carefree carnival days filled with laughter and sweetness.
Vibrant Colors: These delightful treats burst with pastel hues that make your dessert table pop and captivate the eye.
Chewy Goodness: The airy, melt-in-your-mouth texture combines perfectly with the nostalgic flavor, ensuring they’ll be a hit at any gathering.
Adaptable Delight: Easily modify this recipe to be gluten-free or dairy-free, accommodating all your friends and family. Looking for more sweet inspiration? You might also enjoy these Gingerbread Thumbprint Cookies during the holiday season!
Easy to Make: With straightforward instructions, even novice bakers can whip these up in no time, making them a perfect bonding activity for the whole family.
Crowd-Pleasing Treat: Perfect for parties, birthday celebrations, or even just a cozy night at home—everyone will love these whimsical cookies!
Cotton Candy Cookies Ingredients
For the Dough
• All-Purpose Flour – Provides structure and texture; gluten-free flour can be used for a different take.
• Granulated Sugar – Adds sweetness and consistency to each cookie.
• Baking Powder – Acts as a leavening agent, making your cookies light and fluffy.
• Baking Soda – Enhances browning and contributes to texture.
• Salt – Balances sweetness while enhancing overall flavor.
• Unsalted Butter (softened) – Ensures a rich, tender cookie; can be substituted with vegan margarine for a dairy-free option.
• Buttermilk – Adds moisture; substitute with a milk-lemon juice mixture for a lighter touch.
• Large Egg – Binds ingredients together and adds moisture; a flaxseed or chia egg works for a vegan version.
• Vanilla Extract – Infuses a delicious depth of flavor.
• Gel Food Coloring (pink and blue) – Achieves vibrant colors that elevate the cookie’s visual appeal.
• Cotton Candy Flavoring (optional) – A whimsical enhancement that adds an irresistible nostalgic burst to your cookies.
These Cotton Candy Cookies are not only fun and colorful but also cater to various dietary preferences, making them a wonderful addition to any celebration or home indulgence!
Step‑by‑Step Instructions for Cotton Candy Cookies
Step 1: Preheat Your Oven
Begin your delightful journey by preheating your oven to 350°F (175°C). While the oven warms up, line a baking sheet with parchment paper to ensure your Cotton Candy Cookies don’t stick during baking. This sets the stage for your colorful treats, preparing them for a smooth ride from dough to delicious.
Step 2: Mix the Dry Ingredients
In a medium mixing bowl, whisk together 2 cups of all-purpose flour, 1 teaspoon of baking powder, ½ teaspoon of baking soda, and a pinch of salt. This step aerates the flour and combines the leavening agents, ensuring even distribution. You should see a light, fluffy mixture ready to enhance the texture of your Cotton Candy Cookies.
Step 3: Cream Butter and Sugar
In a separate large bowl, use an electric mixer to beat ¾ cup of softened unsalted butter and 1 cup of granulated sugar together until the mixture is light and fluffy, approximately 2 to 3 minutes. The color should become pale and creamy, indicating that air has been incorporated, contributing to those melt-in-your-mouth cookie vibes.
Step 4: Add the Wet Ingredients
With the mixer on low speed, slowly add in one large egg, 1 teaspoon of vanilla extract, and ½ cup of buttermilk. Mix until just combined and smooth. The batter should be rich and velvety, filled with the comforting scents of vanilla and butter, setting the stage for those nostalgic flavors in your Cotton Candy Cookies.
Step 5: Combine Mixtures
Gradually incorporate the dry mixture into the wet ingredients using a spatula to avoid overmixing. Mix until the dough just comes together; it should look cohesive but still slightly sticky. This gentle folding ensures a tender texture in the final Cotton Candy Cookies, as overmixing can lead to a tough result.
Step 6: Color the Dough
Once combined, divide the dough evenly into two portions. Use gel food coloring to color one half pink and the other blue, kneading small amounts of color into the dough. Aim for vibrant hues that reflect the whimsical spirit of cotton candy, making the cookies not just tasty but also a feast for the eyes.
Step 7: Shape the Cookies
To create a fun marbled effect, mix small amounts of both colored dough together gently, then roll the mixture into balls about 1 inch in diameter. Place them on the prepared baking sheet, spacing each ball about 2 inches apart. This allows the Cotton Candy Cookies to spread during baking, resulting in perfectly shaped, delightful treats.
Step 8: Bake the Cookies
Slide the baking sheet into your preheated oven and bake the cookies for 10 to 12 minutes. Keep an eye on them; they’re ready once the edges are lightly golden, while the centers may appear soft and puffy. This visual cue is crucial for achieving that wonderful chewy texture synonymous with Cotton Candy Cookies.
Step 9: Cool and Serve
After baking, remove the cookies from the oven and allow them to cool on the baking sheet for about 5 minutes. Then transfer them to a wire rack to cool completely. This step is essential for letting the cookies set perfectly, ensuring that they maintain their airy and delightful texture before you dive into the whimsical sweetness of your Cotton Candy Cookies.
What to Serve with Cotton Candy Cookies
Pair your colorful confectionery with these delightful additions for a full, whimsical experience.
-
Glass of Milk: The classic pairing! Rich and creamy milk balances the sweetness of the cookies and is sure to bring back childhood memories.
-
Fruit Skewers: Fresh, juicy fruit adds a refreshing contrast. The vibrant colors of berries and melons complement the cookies’ visual appeal perfectly.
-
Ice Cream Sundae: Create a magical dessert bowl by topping vanilla or cotton candy-flavored ice cream with cookie crumbles. The combination is indulgent and visually stunning!
-
Sparkling Lemonade: A refreshing drink with a hint of sweet citrus that cuts through the richness of the cookies, making each bite vibrant and zesty.
-
Colorful Sprinkles: Serve cookies alongside a bowl of sprinkles. Guests can add their topping—fun, interactive, and visually striking!
-
Cotton Candy Fluff: Keep the theme alive with spun sugar! This nostalgic treat is not only perfect for a carnival vibe but also complements the flavor of the cookies.
Enjoy these wonderful pairings that enhance the joyful nature of your Cotton Candy Cookies, of course!
Storage Tips for Cotton Candy Cookies
Room Temperature: Store leftover cookies in an airtight container at room temperature for up to 1 week to maintain their delightful chewiness.
Fridge: For longer freshness, you can refrigerate the cookies; they’ll stay nice and soft for up to 2 weeks when placed in an airtight container.
Freezer: For extended storage, freeze the cookies in an airtight container or freezer bag for up to 3 months. Thaw at room temperature before enjoying.
Reheating: If you prefer warm cookies, pop them in the microwave for about 10-15 seconds, bringing back that fresh-baked goodness and nostalgic flavor of Cotton Candy Cookies.
Make Ahead Options
These Cotton Candy Cookies are a fantastic choice for meal prep, allowing you to create delightful treats without last-minute stress! You can prepare the cookie dough and refrigerate it up to 3 days ahead of baking. Simply mix the dough and roll it into balls, then store them in an airtight container in the fridge to maintain that delightful chewiness. When you’re ready to bake, just preheat your oven and bake the chilled dough directly—no need to thaw! For longer storage, freeze the rolled dough for up to 3 months. This way, you can enjoy fresh, whimsical cookies anytime with minimal effort, perfect for busy weeknights or spontaneous gatherings!
Expert Tips for Cotton Candy Cookies
Avoid Tough Cookies: Don’t overmix the dough; mix just until combined for the perfect chewy texture.
Choose Gel Colorings: Opt for gel food coloring to achieve vibrant shades without altering the cookie consistency.
Watch the Baking Time: Keep an eye on baking—cookies should be lightly golden at the edges and soft in the center to ensure a melt-in-your-mouth experience.
Chill Your Dough: If the dough feels too soft to shape, chill it in the refrigerator for 30 minutes to make rolling easier.
Experiment with Flavoring: For a nostalgic twist, consider adding cotton candy flavoring, but be cautious with the quantity to avoid overpowering the cookies.
Cotton Candy Cookies Variations & Substitutions
Feel free to sprinkle your own magic into these whimsical treats by exploring delightful twists and swaps!
-
Dairy-Free: Substitute buttermilk with your favorite plant-based milk like almond or oat milk, and use vegan margarine instead of butter for a creamy, dairy-free delight.
-
Gluten-Free: Swap all-purpose flour with a gluten-free blend to create cookies that everyone can enjoy without compromising on flavor or texture. You can still have fun and flavorful treats for all to share!
-
Flavor Boost: Add a teaspoon of cotton candy flavoring to the dough for an extra layer of nostalgic sweetness that’ll transport you straight to the fair. Go ahead and take your taste buds on that fun ride!
-
Sparkling Touch: Enhance your Cotton Candy Cookies’ visual appeal by adding edible glitter or colorful sprinkles right before the last minute of baking. This festive touch makes every cookie a party!
-
Nutty Add-In: For a delightful texture twist, consider folding in chopped nuts like macadamia or pecans. This adds a satisfying crunch and balances the sweetness perfectly.
-
Chocolate Chips: Mix in mini chocolate chips or white chocolate chips to create a rich flavor contrast that will melt beautifully as the cookies bake, giving you a sweet surprise in every bite.
-
Zesty Lemon: A splash of lemon zest will brighten the flavor profile, adding a refreshing zing that perfectly complements the sweetness of the cotton candy.
-
Spicy Kick: For those who enjoy a little heat, try adding a pinch of cayenne or cinnamon to the dough for an unexpected spicy twist that pairs interestingly with the sweetness.
Once you’ve whipped up these colorful treats, consider pairing them with a refreshing glass of milk or serving them alongside these delightful Gingerbread Thumbprint Cookies for an unforgettable dessert table!

Cotton Candy Cookies Recipe FAQs
How do I select ripe ingredients for Cotton Candy Cookies?
Absolutely! The most important ingredient to consider here is the butter. Ensure you choose softened unsalted butter that is creamy yet firm to the touch, as it helps create a tender cookie. For flour, look for all-purpose flour without any dark spots or unusual odors, which indicates freshness.
How should I store leftover Cotton Candy Cookies?
Stored properly, these cookies can stay fresh for up to a week in an airtight container at room temperature. If you want them to last longer, feel free to refrigerate them; they can be kept in the fridge for up to two weeks. Just remember to use an impactful container to maintain that delightful chewiness!
Can I freeze Cotton Candy Cookies? If so, how?
Yes! These cookies freeze beautifully. To store them, simply place the cooled cookies in an airtight container or freezer bag, making sure to separate layers with parchment paper to prevent sticking. They can be frozen for up to three months. When you’re ready to enjoy, let them thaw at room temperature or pop them in the microwave for about 10-15 seconds for that fresh-baked goodness!
What should I do if the dough is too soft to shape?
If you find your dough becoming too soft to handle, don’t worry! Simply chill the dough in the refrigerator for about 30 minutes. This will firm it up and make it easier to roll into those cute cookie balls. Remember, a little patience goes a long way in baking!
Are there any dietary considerations with Cotton Candy Cookies?
Very! This recipe is quite adaptable. For a dairy-free option, you can replace the unsalted butter with vegan margarine and use plant-based milk instead of buttermilk. If gluten is a concern, simply swap all-purpose flour with a gluten-free baking blend. This way, everyone can enjoy these whimsical cookies without worry!
Delightful Cotton Candy Cookies That Spark Pure Joy
Ingredients
Equipment
Method
- Preheat your oven to 350°F (175°C) and line a baking sheet with parchment paper.
- In a medium mixing bowl, whisk together flour, baking powder, baking soda, and salt.
- In a large bowl, cream together the softened butter and sugar until light and fluffy.
- Add in the egg, vanilla extract, and buttermilk, mixing until just combined.
- Gradually incorporate the dry mixture into the wet ingredients until just combined.
- Divide the dough in half and color one half pink and the other blue with gel food coloring.
- Mix small amounts of both colored dough together and roll into balls about 1 inch in diameter.
- Place the dough balls on the prepared baking sheet, spacing them 2 inches apart.
- Bake for 10 to 12 minutes until edges are lightly golden and centers are soft.
- Cool on the baking sheet for 5 minutes before transferring to a wire rack to cool completely.
Leave a Reply