
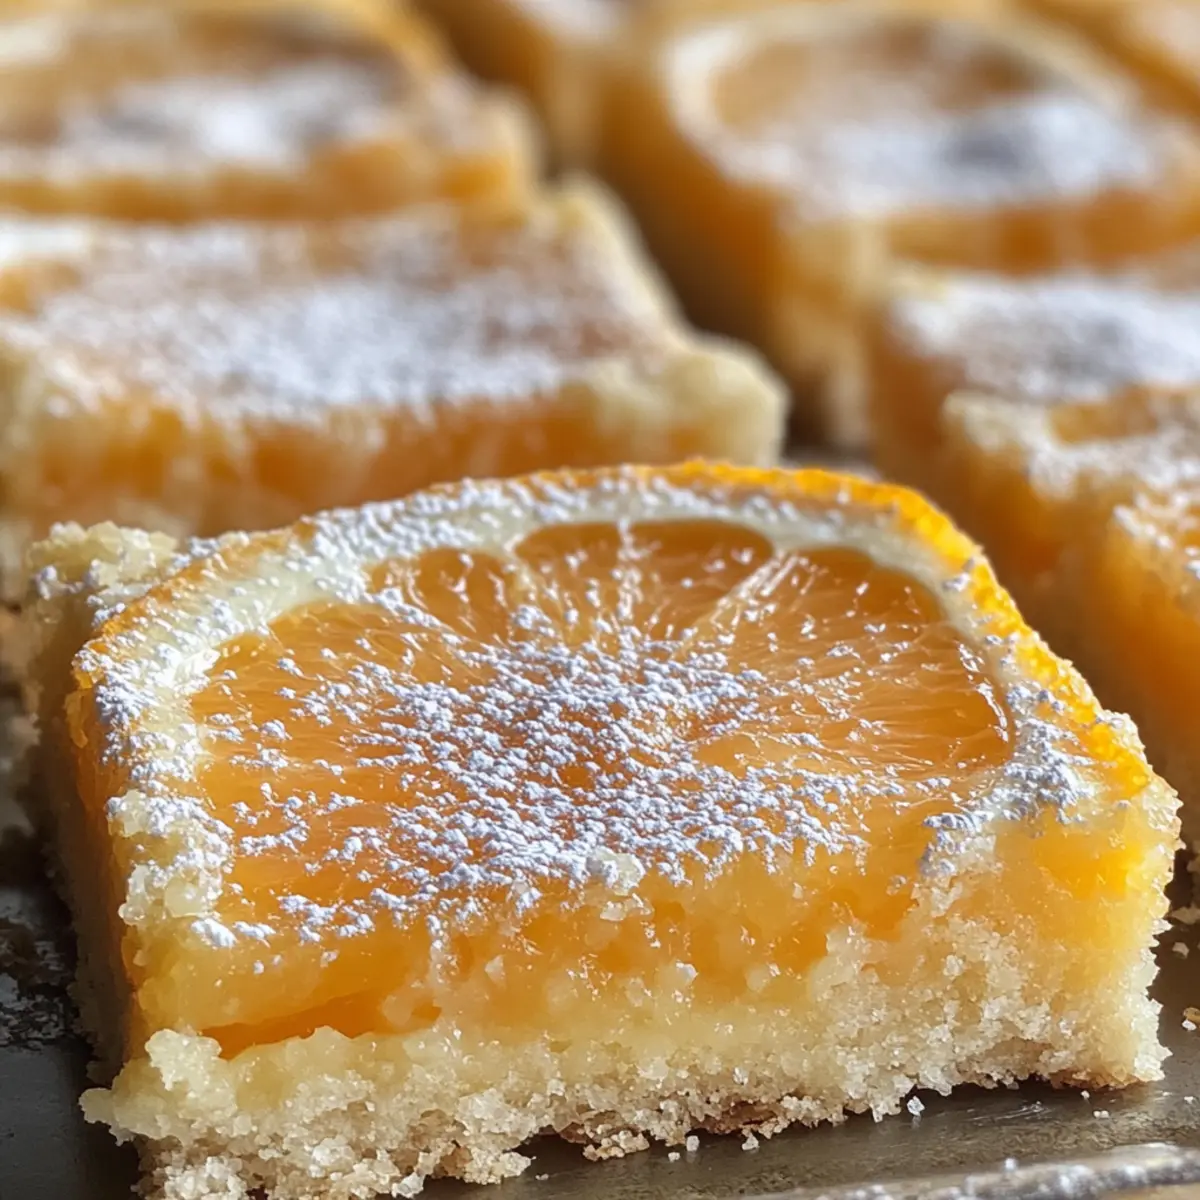
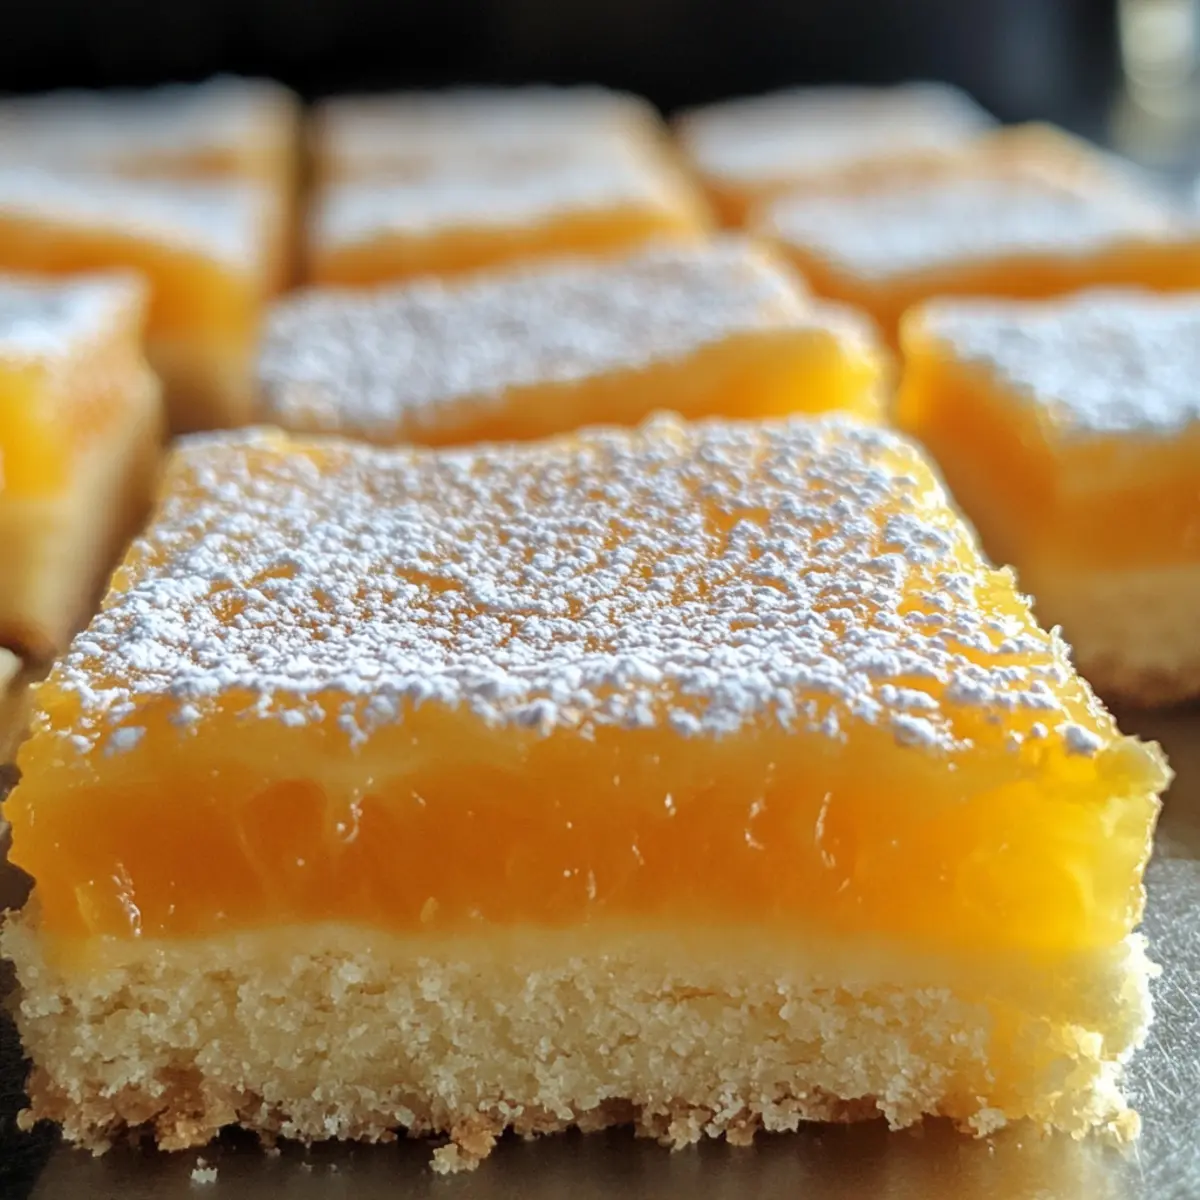
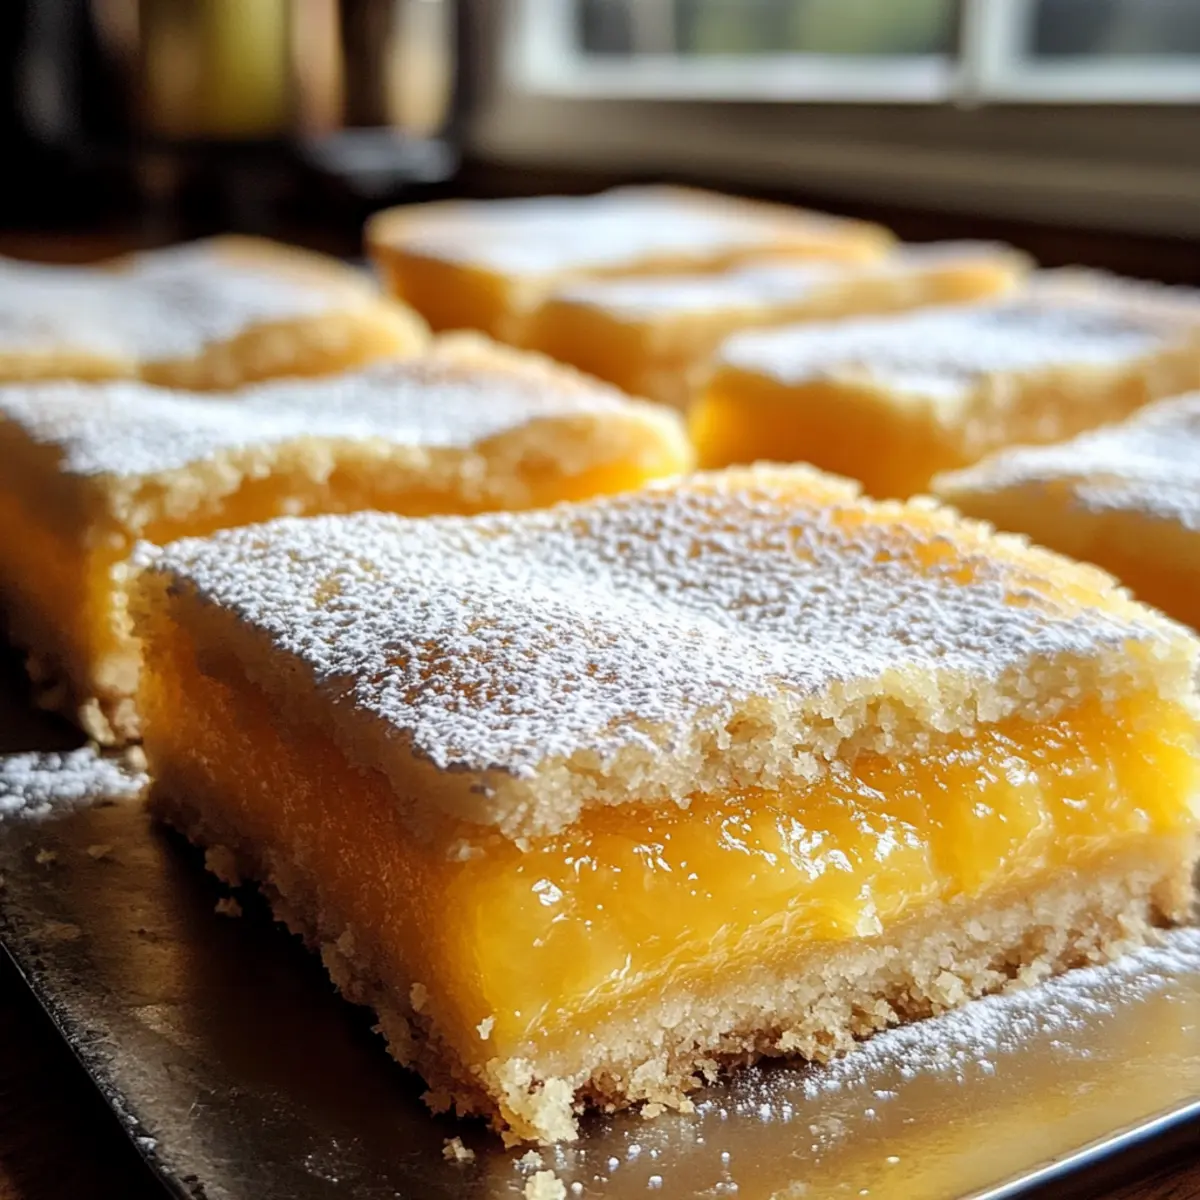
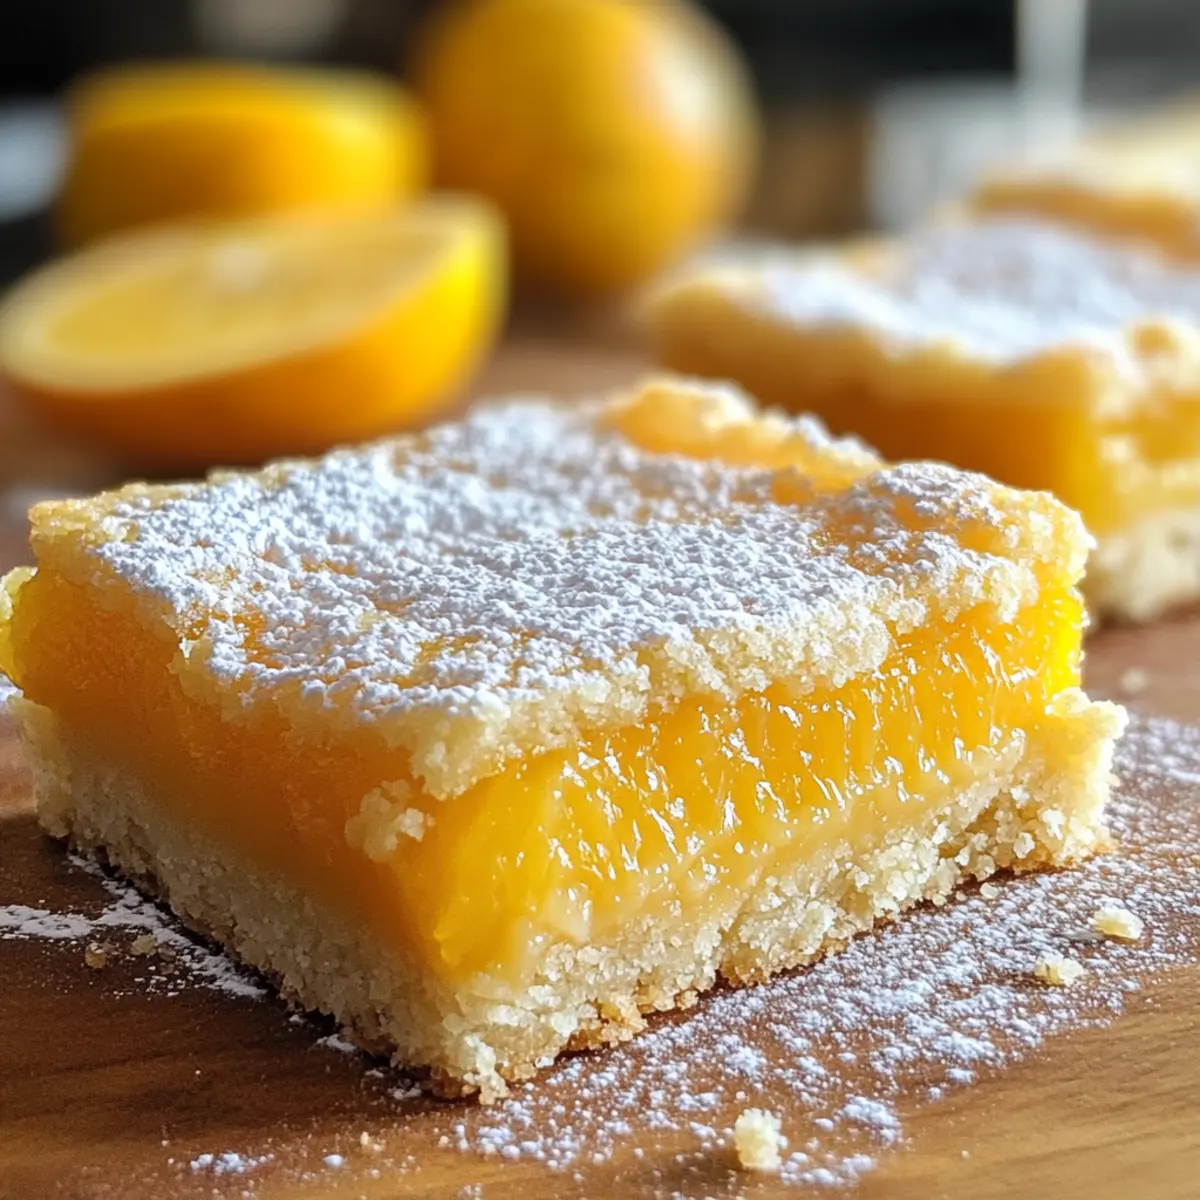
As I was setting the table for a sunny afternoon gathering, I couldn’t help but reminisce about my first bite of Orange Bars. With their buttery shortbread crust topped by a vibrant citrus filling, these bars are the perfect blend of tangy and sweet. My recipe for Bright and Tangy Orange Bars is incredibly easy to make, making them a go-to dessert whether for a potluck or simply to brighten a weekday afternoon. Not only are they delightfully refreshing, but they also offer a gluten-free option, so everyone can indulge. Imagine the joy of sharing these treats, a gentle nod to the sunshine in every bite. Curious about how to whip up this simple yet impressive dessert that will have everyone asking for seconds? Let’s dive in!
Why are Orange Bars a Must Try?
Simplicity at Its Finest: This delightful recipe requires just a handful of ingredients, making it perfect for both novice and seasoned bakers alike.
Bright Flavor Explosion: The combination of fresh orange juice and zest provides a bright, tangy flavor that’s hard to resist.
Gluten-Free Option: Easily swap in a gluten-free flour blend to share these treats with everyone, regardless of dietary needs.
Perfect for Any Occasion: Whether you’re hosting a garden party or enjoying a cozy night in, these Orange Bars are sure to impress.
Make-Ahead Convenience: Prepare them a day in advance to ensure a stress-free, delicious dessert that gets better as it chills.
Looking for more citrus inspiration? Check out my refreshing Cranberry Orange Prosecco for your next gathering!
Orange Bars Ingredients
For the Shortbread Crust
- Unsalted Butter – Provides a rich flavor and buttery texture. Substitution: Use coconut oil for a dairy-free option.
- Granulated Sugar – Adds sweetness and helps in browning the crust. No direct substitutions recommended for sugar in this recipe.
- All-Purpose Flour – Forms the foundation of the shortbread crust. Substitution: Use a 1:1 gluten-free flour blend for gluten-free bars.
- Salt – Enhances flavor and balances sweetness. No substitutions needed.
- Vanilla Extract – Adds depth of flavor to the crust. Optional: Use almond extract for a different flavor profile.
For the Orange Filling
- Eggs – Provide structure and stability to the filling. Substitution: Flax eggs for a vegan alternative (1 flax egg = 1 tablespoon ground flaxseed + 2.5 tablespoons water).
- Cornstarch – Helps to thicken the filling and gives it a smooth texture. No direct substitutions recommended.
- Fresh Orange Juice – Primary flavor component, giving the dessert its signature citrusy taste. Substitution: Bottled juice can be used in a pinch but fresh is best for flavor.
- Orange Zest – Amplifies the orange flavor and adds aroma. Ensure to use fresh zest for optimal flavor.
- Almond Extract – Complements the orange flavor with a subtle nuttiness. Optional: Vanilla extract can be used instead if desired.
For Garnishing
- Powdered Sugar – For garnishing and a sweet finishing touch. Optional: Omit if not desired.
Step‑by‑Step Instructions for Orange Bars
Step 1: Preheat & Prepare
Preheat your oven to 350°F (175°C) while you prepare your baking dish. Line a 9×13-inch baking dish with parchment paper, allowing some overhang for easy removal later. This simple step ensures that your Orange Bars will come out perfectly and keep their delightful shape.
Step 2: Make Shortbread Crust
In a mixing bowl, combine melted unsalted butter, granulated sugar, vanilla extract, all-purpose flour, and salt. Stir until the mixture is smooth and well blended. Press this buttery mixture firmly into the bottom of the prepared dish, using your fingers or a spatula to create an even layer. Prick the crust with a fork and bake for 15 to 18 minutes until lightly golden around the edges.
Step 3: Prepare Orange Filling
While the crust bakes, whisk together eggs, granulated sugar, cornstarch, fresh orange juice, orange zest, and almond extract in a separate bowl. Continue whisking until you achieve a smooth consistency, ensuring there are no lumps. This vibrant filling is key to the tangy delight of your Orange Bars, so mix well for a perfectly creamy texture.
Step 4: Combine Layers
As soon as the crust is baked, remove it from the oven and immediately pour the orange filling over the hot crust. This step is essential for achieving a beautiful melded texture, as the warm crust helps activate the filling for a perfect bake. Spread the filling evenly across the crust with a spatula.
Step 5: Bake Filling
Return the dish to the oven and bake for an additional 20 to 22 minutes. Keep an eye on the filling; it should be set around the edges and slightly jiggly in the center. This slight jiggle suggests that the filling will firm up upon cooling, creating the delightful custard-like texture of your Orange Bars.
Step 6: Cooling
Once baked, take the dish out of the oven and allow it to cool at room temperature for about 30 minutes. Once cooled, transfer the dish to the refrigerator and let it chill for at least 2 hours. This chilling period helps the layers to set properly and enhances the flavors.
Step 7: Serve
After resting, remove the Orange Bars from the refrigerator. To serve, gently lift them out of the dish using the parchment paper. Cut into squares using a sharp knife, cleaning the blade between cuts for neat edges. If desired, dust the top with powdered sugar for an elegant finishing touch that beautifully contrasts with the tangy orange flavor.
Make Ahead Options
These Bright and Tangy Orange Bars are fantastic for meal prep enthusiasts! You can prepare the shortbread crust up to 24 hours in advance by baking it and letting it cool completely, then simply wrap it tightly in plastic wrap to maintain freshness. The orange filling can also be made ahead and stored in an airtight container in the refrigerator for up to 3 days; just give it a good whisk before pouring it over the crust. When you’re ready to complete the recipe, pour the chilled filling over your crust and bake as directed. This advance preparation ensures that you can enjoy a delectable dessert with minimal effort on the day of your gathering!
What to Serve with Bright and Tangy Orange Bars
Indulging in a vibrant slice of orange delight opens the door to a world of flavor pairings that can elevate your dessert experience.
-
Creamy Vanilla Ice Cream: The rich creaminess of vanilla ice cream provides a delightful contrast to the tangy citrus flavors, creating a silky mouthfeel.
-
Fresh Berries: Juicy strawberries or blueberries enhance the freshness of the orange bars, adding a burst of color and natural sweetness to each bite.
-
Coconut Whipped Cream: Light and fluffy, coconut whipped cream adds a tropical flair that pairs beautifully with the citrus, making each bite even more refreshing.
-
Mint Tea: A warm cup of mint tea complements the bright flavors of orange bars, providing a soothing balance after the tangy dessert.
-
Chocolate Drizzle: A rich chocolate drizzle adds a decadent touch, harmonizing the sweetness of the orange while creating an intriguing flavor contrast.
-
Almond Biscotti: Crunchy almond biscotti offers a crunchy texture that pairs well with the soft filling of orange bars, making for a delightful textural contrast.
-
Caramel Sauce: Drizzling a bit of caramel sauce introduces a sweet, buttery twist that accentuates the orange’s tartness, enhancing the overall flavor experience.
-
Sparkling Water with Citrus Slices: Refreshing sparkling water with a splash of citrus keeps the theme alive while cleansing the palate between each tangy bite.
These pairing suggestions foster a balanced meal experience and invite your guests to savor every moment with your delightful orange bars!
How to Store and Freeze Orange Bars
Fridge: Store orange bars in an airtight container in the refrigerator for up to 1 week. The flavors meld beautifully as they chill, making them even tastier.
Freezer: For longer storage, orange bars can be frozen for up to 3 months. Wrap each bar tightly in plastic wrap and then place in a freezer-safe container to prevent freezer burn.
Thawing: When ready to enjoy, transfer the frozen orange bars to the fridge for several hours or overnight to thaw slowly. For a quick option, allow them to sit at room temperature for about 30 minutes.
Reheating: While typically enjoyed cold, you can reheat in a preheated oven at 350°F (175°C) for about 10 minutes if you prefer them warm, but note that the ideal texture is straight from the fridge.
Variations & Substitutions for Orange Bars
Feel free to get creative and customize these Orange Bars to fit your taste—every twist makes them even more delightful!
-
Gluten-Free: Use a 1:1 gluten-free flour blend instead of all-purpose flour for a delicious gluten-free version. Enjoy all the flavors without worrying about gluten!
-
Dairy-Free: Substitute unsalted butter with coconut oil for a dairy-free treat without sacrificing that rich buttery flavor. The hint of coconut will surprise you!
-
Citrus Swap: For a different tangy taste, replace the fresh orange juice with lemon or lime juice. The vibrant zest of these citrus fruits offers a delightful twist that’s equally refreshing.
-
Almond Joy: Add a layer of flaked or shredded coconut to the filling for added texture and a tropical flair. This burst of coconut will remind you of sunny days by the beach.
-
Fruity Garnish: Top your Orange Bars with zest from other citrus fruits, like grapefruit, for an unexpected, unique flavor. It adds a beautiful color contrast and enhances the citrus aroma.
-
Spice It Up: Consider mixing in a pinch of cayenne pepper or a dash of ginger for a subtle kick. The warmth of these spices can beautifully balance the tartness of the orange.
-
Extra Creaminess: For an added layer of creamy flavor, include a dollop of cream cheese or mascarpone cheese mixed with the filling. It creates a rich, velvety texture that elevates these bars!
-
Sugary Touch: If you’re feeling indulgent, drizzle a bit of honey or maple syrup over the bars before serving. This added sweetness pairs perfectly with the tanginess of the orange.
If you’re looking for more refreshing ideas, try serving these bars alongside a delightful Cranberry Orange Layer cake for a harmonious citrus-themed dessert spread!
Expert Tips for Orange Bars
Crust Baking: Ensure the crust is fully baked before adding the filling. Undercooking can lead to a soggy base and ruin the texture.
Cooling Time: Allow enough chilling time for the layers to set properly—two hours is a minimum for optimal flavor and firmness.
Cutting Technique: Use a sharp knife to cut, and wipe the blade between slices. This will help you achieve clean, neat squares of orange bars.
Fresh Juice Preference: For the best flavor in your orange bars, opt for fresh-squeezed orange juice instead of bottled. It elevates the citrus notes beautifully.
Ingredient Substitution: If you’re making them gluten-free, be sure to use a quality 1:1 gluten-free flour blend to maintain the desired texture in your orange bars.
Orange Bars Recipe FAQs
How do I choose ripe oranges for the best flavor?
When selecting oranges for your Orange Bars, look for fruits that are firm and heavy for their size, with smooth, unblemished skin. Brightly colored oranges, free of dark spots and blemishes, will yield the most vibrant flavor. I also recommend picking ones with a sweet aroma, indicating the natural sugars within.
What is the best way to store leftover Orange Bars?
To store your Orange Bars, place them in an airtight container in the refrigerator. They can last up to a week, and the flavors continue to deepen as they chill. Make sure they are fully cooled before sealing them, which helps retain their fresh taste and texture.
Can I freeze Orange Bars, and how do I do it?
Absolutely! Orange Bars can be frozen for up to 3 months. Start by cutting the bars into squares. Then, wrap each piece tightly in plastic wrap and place them all in a freezer-safe container to avoid freezer burn. When you’re ready to enjoy them, just move the bars to the fridge for several hours or overnight to thaw them slowly. If you’re in a hurry, allowing them to sit at room temperature for about 30 minutes also works!
What should I do if my filling is not setting?
If your filling is still jiggly after baking, it may need more time in the oven. Every oven can vary, so I recommend adding increments of 3-5 minutes until it firms up but remains slightly jiggly in the center. Remember, it will continue to set as it cools in the fridge, so don’t overbake, as that can lead to a dry texture.
Are there any dietary considerations I should be aware of?
Yes! If you’re making these Orange Bars for guests, be sure to ask about allergies—especially to eggs or gluten. For a gluten-free option, simply swap out the all-purpose flour with a 1:1 gluten-free flour blend, and to accommodate vegans, you can substitute flax eggs by mixing 1 tablespoon of ground flaxseed with 2.5 tablespoons of water, letting it sit for about 5 minutes to thicken before using it in the recipe.
Can I use bottled orange juice instead of fresh?
While you can use bottled orange juice in a pinch, I always recommend fresh-squeezed juice for the best flavor in your Orange Bars. Fresh juice provides a vibrant sweetness and tang that bottled varieties often lack, giving your dessert the delightful and bright citrus flavor it deserves!
Zesty Orange Bars: A Simple Citrus Delight at Home
Ingredients
Equipment
Method
- Preheat your oven to 350°F (175°C) and prepare a 9x13-inch baking dish by lining it with parchment paper.
- Combine melted unsalted butter, granulated sugar, vanilla extract, all-purpose flour, and salt in a mixing bowl. Press the mixture into the prepared dish and prick with a fork. Bake for 15 to 18 minutes until golden.
- Whisk together eggs, cornstarch, fresh orange juice, orange zest, and almond extract in a separate bowl until smooth.
- Once the crust is baked, pour the orange filling over the hot crust and spread evenly with a spatula.
- Return to the oven and bake for an additional 20 to 22 minutes until set around the edges and slightly jiggly in the center.
- Allow the dish to cool at room temperature for 30 minutes, then refrigerate for at least 2 hours to chill.
- Once chilled, lift the bars out using the parchment paper, cut into squares, and dust with powdered sugar if desired.
Leave a Reply