
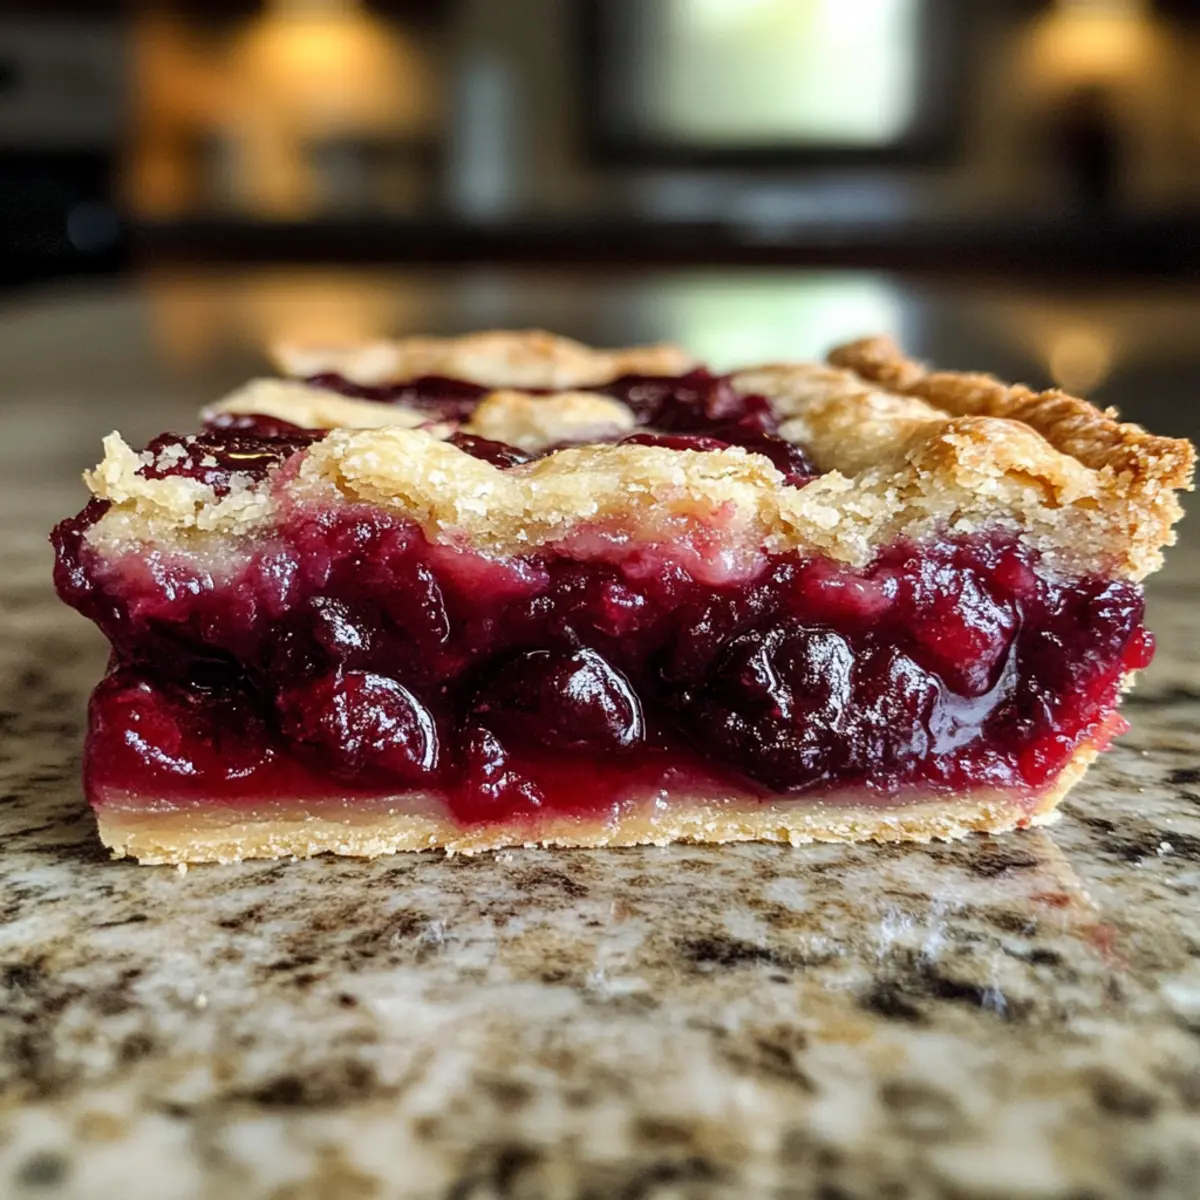
As the warm summer sun shines through the kitchen window, I find myself daydreaming about the sweet, juicy bursts of cherry flavor that fill every bite of homemade dessert. Today, I’m excited to share my recipe for Easy Cherry Pie Bars—a delightful treat that combines the comfort of a classic cherry pie with the convenience of bar form. Perfect for both beginners and seasoned bakers, these bars are quick to whip up and can easily be made ahead for gatherings or simply to savor at home. Imagine cutting into a soft, buttery crust that seamlessly cradles a slightly tart cherry filling, making them an instant crowd-pleaser. Whether you’re hosting family around the dinner table or indulging in a sweet moment by yourself, these Cherry Pie Bars are sure to satisfy your craving. So, ready to dive into a fun baking adventure?
Why are Cherry Pie Bars a must-try?
Easy to Make: This recipe is perfect for any skill level, allowing even beginner bakers to shine in the kitchen.
Flavor Explosion: The sweet and tart cherries, combined with rich almond extract, deliver a scrumptious taste that will have everyone asking for seconds.
Versatile Variations: Feel free to personalize these bars by adding fresh lemon juice or even increasing the cherry filling for a more intense flavor!
Make-Ahead Friendly: These bars are ideal for prepping in advance, making them a convenient option for busy lifestyles. Store them easily for up to two months!
Crowd-Pleasing Delight: Whether it’s for a family gathering or a potluck, these Easy Cherry Pie Bars are guaranteed to impress your guests. Try pairing them with a scoop of fresh cherry sorbet for an unforgettable dessert experience!
Cherry Pie Bars Ingredients
• Unleash the flavor with these must-have ingredients!
For the Crust and Filling
- Real Butter – Provides richness and a flaky crust; margarine can be used as a substitute if needed.
- Sugar – Sweetens the crust, creating a delicious balance; no substitutions recommended.
- Eggs – Adds structure and moisture; you can reduce richness by using just one.
- Pure Almond Extract – Enhances cherry flavor with a nutty aroma; omit for nut-free variations or substitute with vanilla extract.
- Vanilla Extract – Complements the buttery and almond flavors beautifully; no substitutions recommended.
- All-Purpose Flour – Forms the base of the crust; you can experiment with gluten-free flour blends if required.
- Salt – Enhances the flavors, rounding out the sweetness; no substitutions recommended.
- Cherry Pie Filling – Provides the primary flavor and moisture; opt for premium varieties with real cherries for the best results.
With these delicious ingredients, you’re all set to create your easy Cherry Pie Bars that everyone will love!
Step‑by‑Step Instructions for Easy Cherry Pie Bars
Step 1: Prepare the Dough
Begin by creaming together 1 cup of softened real butter and 1 cup of sugar in a large mixing bowl until the mixture is light and fluffy, about 2-3 minutes. Then, beat in 2 eggs along with 1 teaspoon of almond extract and 1 teaspoon of vanilla extract, mixing until well combined and smooth.
Step 2: Combine Dry Ingredients
Next, gradually add 2 ½ cups of all-purpose flour and ½ teaspoon of salt to the wet mixture, stirring until a soft dough forms. The dough should be slightly sticky but still manageable. Make sure it’s well blended, then prepare your baking pan for the next step.
Step 3: Assemble the Bars
Take a greased 15×10 inch baking pan and press half of the dough evenly into the bottom to create a solid base. Spread 1 can of cherry pie filling evenly over the crust, ensuring it reaches the edges for even flavor. Crumble the remaining dough over the top of the cherry filling, creating a rustic, textured layer.
Step 4: Bake the Bars
Preheat your oven to 350°F (175°C). Place the assembled cherry pie bars in the oven and bake for 35-40 minutes, or until the crust turns golden brown and the cherry filling begins to bubble. Keep an eye on the edges to ensure they don’t over-brown.
Step 5: Cool and Glaze
Once baked to perfection, remove the cherry pie bars from the oven and set them aside to cool completely in the pan. Meanwhile, whisk together 1 cup of confectioners’ sugar, ½ teaspoon of almond extract, ½ teaspoon of vanilla extract, and a splash of milk until smooth to create a glaze. Drizzle this glaze over the cooled bars to enhance their flavor and appearance.
How to Store and Freeze Cherry Pie Bars
Room Temperature: Store your Cherry Pie Bars covered at room temperature for up to 3 days to maintain freshness and flavor.
Fridge: If you prefer, these bars can be refrigerated in an airtight container for up to 5 days, ensuring they remain delicious and moist.
Freezer: For longer storage, freeze the bars in an airtight container or wrap them tightly in plastic wrap for up to 2 months. Thaw overnight in the refrigerator before serving.
Reheating: To enjoy a warm treat, reheat the bars in the microwave for about 15-20 seconds or in a preheated oven at 350°F (175°C) for a few minutes until warmed through.
Make Ahead Options
These Easy Cherry Pie Bars are a fantastic choice for meal prep, allowing you to enjoy delicious treats with minimal last-minute effort. You can prepare the dough and store it in the refrigerator for up to 24 hours before baking, which helps solidify the flavors. Additionally, you can assemble the bars entirely and refrigerate them for up to 3 days before baking; just be sure to cover them with plastic wrap to maintain moisture. If you want to prepare even further ahead, freeze the unbaked bars for up to 2 months. When ready to serve, simply bake them straight from the freezer but add a few extra minutes to the baking time. Enjoy the delightful convenience of having these scrumptious Cherry Pie Bars at your fingertips, perfect for busy weeknights!
What to Serve with Easy Cherry Pie Bars
These delightful dessert bars are perfect for creating a memorable meal experience that tantalizes the taste buds.
- Vanilla Ice Cream: The creamy richness of vanilla ice cream complements the tart cherry flavor perfectly, creating a delightful contrast.
- Fresh Whipped Cream: Light and airy, whipped cream adds a touch of sweetness and elevates the dessert to another level of indulgence.
- Coffee or Espresso: A warm cup of coffee balances the sweetness of the bars, making each bite even more satisfying as you sip.
- Almond Biscotti: The nutty crunch of biscotti pairs beautifully with the cherry filling, adding an exciting texture to your dessert experience.
- Chocolate Drizzle: For a modern twist, drizzle melted dark chocolate over the bars. The rich chocolate enhances the fruity flavors splendidly.
- Charming Fruit Salad: A fresh and vibrant fruit salad featuring seasonal berries and mint brings a refreshing brightness, perfectly complementing the dessert’s flavor profile.
- Cherry Sorbet: For a fruity twist, serve a scoop of cherry sorbet on the side for a refreshing palate cleanser that amplifies the cherry flavor.
- Sparkling Water: A bubbly beverage with a hint of lemon offers a refreshing and light pairing that cleanses the palate between bites.
- Caramel Sauce: Drizzling warm caramel sauce over the bars introduces a rich sweetness that pairs wonderfully with the cherry filling for those seeking extra decadence.
Expert Tips for Easy Cherry Pie Bars
-
Room Temperature Ingredients: Ensure that your butter and eggs are at room temperature for better emulsification, leading to a smoother dough.
-
Quality Filling Matters: Always opt for premium cherry pie filling with real cherries. It significantly enhances the flavor of your cherry pie bars.
-
Enhance Flavor: Consider letting the bars sit overnight before serving; this resting time allows the flavors to meld beautifully.
-
Storage Solutions: These bars can easily be stored at room temperature for up to 3 days or frozen for up to 2 months. Just thaw them before serving!
-
Perfect Pan Size: Use a 15x10x1 inch pan for even baking and manageable portions—this size is ideal for making your cherry pie bars just right!
Cherry Pie Bars Variations & Substitutions
Feel free to let your creativity flow as you tailor this delightful recipe to suit your taste and dietary needs!
-
Citrusy Boost: Add fresh lemon juice to the filling for a bright, zesty flavor that beautifully complements the cherries.
Juicy and refreshing, this twist enhances the overall taste and makes each bite bloom with sunshine. -
Extra Cherry: Increase the amount of cherry pie filling for a more fruit-forward taste that brings a burst of flavor in every mouthful.
More cherries mean more sweetness, making this a truly irresistible treat! -
Thicker Bars: Consider using a smaller baking pan for thicker, more indulgent bars that pack in even more cherry goodness.
These hearty squares will satisfy any sweet tooth while still offering the classic flavor you love. -
Gluten-Free: Swap all-purpose flour with a gluten-free blend to make these bars suitable for those with dietary restrictions.
You won’t lose any of the delicious taste; the same buttery goodness awaits! -
Nut-Free: Simply omit the almond extract and use vanilla extract instead for a nut-free variation that still delights.
Your loved ones with nut allergies can enjoy these bars without any worry! -
Spiced Delight: Add a pinch of cinnamon or nutmeg to the crust for a warm, inviting flavor that enhances the overall taste.
This subtle spice can transform your cherry pie bars into a cozy treat perfect for gatherings or quiet evenings at home. -
Chocolate Touch: Drizzle melted chocolate over the top for an indulgent twist that chocolate lovers will adore.
The rich chocolate complements the cherries wonderfully, making for a sensational dessert experience.
For those looking to explore even more delicious options, you can check out these delightful recipes like the comforting Meat Pie Comforting or the sweet and savory Mini Pecan Pie. Enjoy customizing your cherry pie bars!
Easy Cherry Pie Bars Recipe FAQs
What is the best way to select ripe cherries for pie filling?
Absolutely! When choosing cherries, look for ones that are firm and shiny with deep color. Avoid cherries with dark spots or wrinkling, as these may be overripe. Locally sourced or freshly picked cherries often have the best flavor, so hit the farmers’ market if you can!
How should I store leftover Cherry Pie Bars?
The more the merrier! Store your Cherry Pie Bars covered at room temperature for up to 3 days, or in the fridge for up to 5 days in an airtight container. If you like them a bit chilled, go for the fridge option!
Can I freeze Cherry Pie Bars for later?
Absolutely! To freeze, wrap the bars tightly in plastic wrap and place them in an airtight container. They can be stored in the freezer for up to 2 months. When you’re ready to enjoy, just thaw them in the refrigerator overnight before serving.
What should I do if the crust feels too dry or crumbly?
If your dough seems dry, try kneading it just a bit more to incorporate the moisture. You can also add a teaspoon of water or additional egg to bring it together. Remember, the dough should be slightly sticky but not overly wet for the best results.
Can I make these Cherry Pie Bars nut-free?
Very! To make your Cherry Pie Bars nut-free, simply omit the almond extract and replace it with an equal amount of vanilla extract. The bars will still taste delicious and maintain that lovely cherry flavor without any nut components!
Irresistible Cherry Pie Bars for Easy Family Desserts
Ingredients
Equipment
Method
- Cream together 1 cup of softened real butter and 1 cup of sugar until light and fluffy, about 2-3 minutes. Beat in 2 eggs, 1 teaspoon of almond, and 1 teaspoon of vanilla extract until smooth.
- Gradually add 2.5 cups of all-purpose flour and 0.5 teaspoon of salt to the wet mixture, stirring until a soft dough forms.
- Press half of the dough into a greased 15x10 inch baking pan. Spread 1 can of cherry pie filling evenly over the crust, then crumble remaining dough over the top.
- Preheat oven to 350°F (175°C). Bake for 35-40 minutes until golden brown and filling bubbles.
- Once baked, cool in the pan. Whisk 1 cup of confectioners’ sugar, 0.5 teaspoon of almond extract, 0.5 teaspoon of vanilla extract, and a splash of milk for glaze, drizzle over bars.
Leave a Reply