
As I emerged from the kitchen, flour dusting my cheeks and a heady aroma enveloping me, I couldn’t help but feel a surge of excitement. Today, I’m sharing my cherished Oreo Cupcakes—a delightful fusion of chocolatey goodness and creamy indulgence that’s sure to win over even the most discerning of dessert lovers. Each bite unravels a swirl of rich flavors, beautifully complemented by a dreamy Oreo buttercream frosting. These cupcakes are not just easy to make, but they also bring a sense of joy to any gathering, transforming ordinary moments into sweet celebrations. Whether you’re hosting a party or simply seeking a delicious treat to brighten your day, these Oreo Cupcakes are here to impress. Curious about how to create this scrumptious experience? Let’s dive right in!
Why Are Oreo Cupcakes So Irresistible?
Decadent, Indulgent Treat: These Oreo Cupcakes are not just another dessert; they’re a celebration of flavors that pair deliciously with any occasion. Simple Process: With straightforward steps, even novice bakers can whip up these delights in no time. Crowd-Pleasing Magic: Their rich cocoa essence and creamy frosting make them a hit with friends and family alike. Versatility at its Best: Whether as a birthday treat or a cozy evening indulgence, they fit every scenario! Impressive Presentation: Topped with Oreos and extra crumbs, these cupcakes are visually enticing and ready to wow your guests. Try them with a glass of milk for the ultimate experience!
Oreo Cupcake Ingredients
For the Cupcakes
- Boiling Water – Helps bloom the cocoa, enhancing the chocolate flavor.
- Granulated Sugar – Adds sweetness and structure to the cupcakes.
- Dutch Processed Cocoa Powder – Provides a rich chocolate flavor and deep color.
- All-Purpose Flour – Creates the structure base for the cupcakes.
- Instant Espresso Powder – Enhances the chocolate flavor; it’s optional but highly recommended.
- Baking Powder – Acts as a leavening agent, helping the cupcakes rise.
- Baking Soda – Works with acidic ingredients to create lift.
- Salt – Balances sweetness and elevates flavors.
- Sour Cream – Adds moisture and tenderness to the cupcakes.
- Vegetable Oil – Keeps the cupcakes moist and tender.
- Large Eggs – Bind the ingredients together, contributing richness.
- Vanilla Extract – Adds a layer of depth to the overall flavor.
- Oreo Cookies (for Buttercream) – Provides a distinct Oreo flavor when crushed.
For the Buttercream Frosting
- Butter – The creamy base for the frosting, ensuring smoothness.
- Powdered Sugar – Sweetens the buttercream, achieving a luscious texture.
- Whole Milk – Adjusts consistency for easy piping.
- Oreos for Decoration – Enhances visual appeal and flavor on top of the cupcakes.
Step‑by‑Step Instructions for Oreo Cupcakes
Step 1: Preheat the Oven
Start by preheating your oven to 160ºC (320ºF) to ensure it’s ready for baking. While the oven heats, grab a 12-cup cupcake tin and line it with vibrant cupcake liners. This step not only makes clean-up easier but also adds a fun pop of color to your delicious Oreo Cupcakes.
Step 2: Mix the Dry Ingredients
In a large mixing bowl, combine all the dry ingredients: granulated sugar, Dutch processed cocoa powder, all-purpose flour, baking powder, baking soda, instant espresso powder, and salt. Whisk these together thoroughly until the mixture is smooth and well blended, allowing the cocoa to bloom and intensifying the rich chocolate flavor.
Step 3: Combine the Wet Ingredients
In a separate bowl, whisk together your wet ingredients, including sour cream, vegetable oil, large eggs, boiling water, and vanilla extract. Blend these until thoroughly combined, ensuring a smooth consistency. The boiling water should have cooled slightly to prevent cooking the eggs, resulting in a tender cupcake base as you incorporate it.
Step 4: Mix Wet and Dry Ingredients
Gradually pour the wet mixture into the bowl with dry ingredients, stirring gently until just combined. It’s important to avoid overmixing here; you want a smooth batter without lumps to make the most delicious Oreo Cupcakes. This delicate mixture is the key to achieving the perfect cupcake texture.
Step 5: Fill Cupcake Liners
Carefully divide the batter evenly among the prepared cupcake liners, filling each about two-thirds full. This will allow enough space for the cupcakes to rise beautifully during baking. A cookie scoop can help with this step, ensuring each cupcake is uniform in size and bakes evenly.
Step 6: Bake the Cupcakes
Place the cupcake tin in your preheated oven and bake for 20-23 minutes. Keep an eye on them towards the end; they are ready when a toothpick inserted into the center comes out clean. Once baked, let them cool in the pan for about 5 minutes before transferring them to a wire rack to cool completely.
Step 7: Prepare the Buttercream
For the Oreo buttercream, crush your Oreo cookies into fine crumbs using a food processor or by placing them in a zip-top bag and rolling over them with a rolling pin. In a stand mixer, beat softened butter until creamy, then gradually add powdered sugar and a splash of whole milk until you achieve a smooth and luscious consistency.
Step 8: Incorporate Oreo Crumbs
Gently fold the crushed Oreo cookies into the buttercream, mixing until evenly distributed. This will give your frosting that delightful Oreo flavor that pairs perfectly with your cupcakes. Taste your buttercream to ensure it’s just the right sweetness and consistency for piping.
Step 9: Frost the Cupcakes
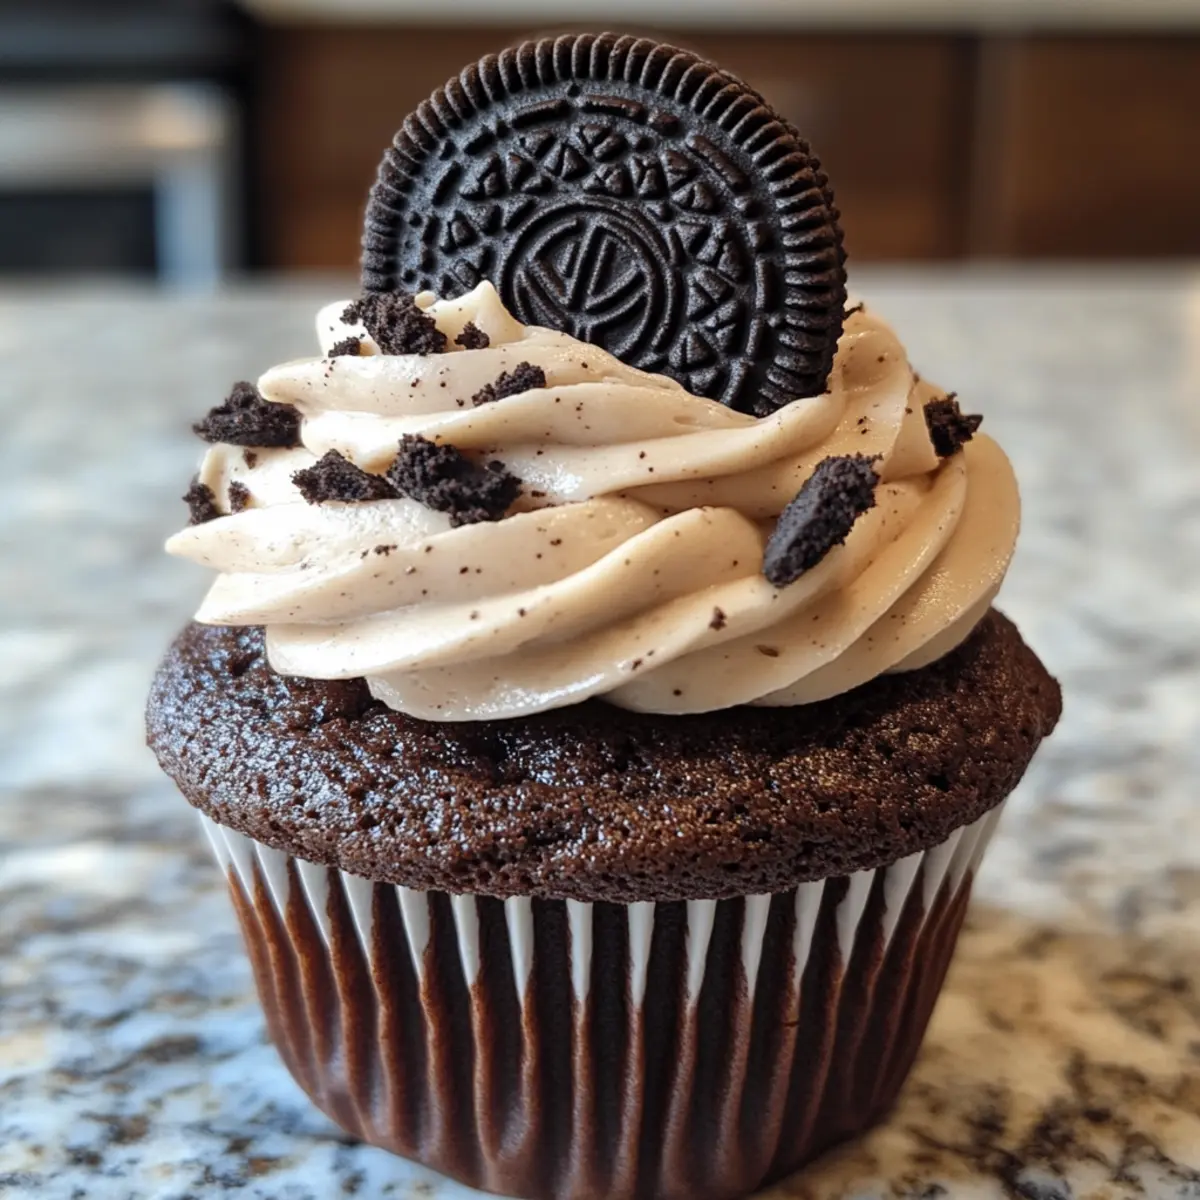
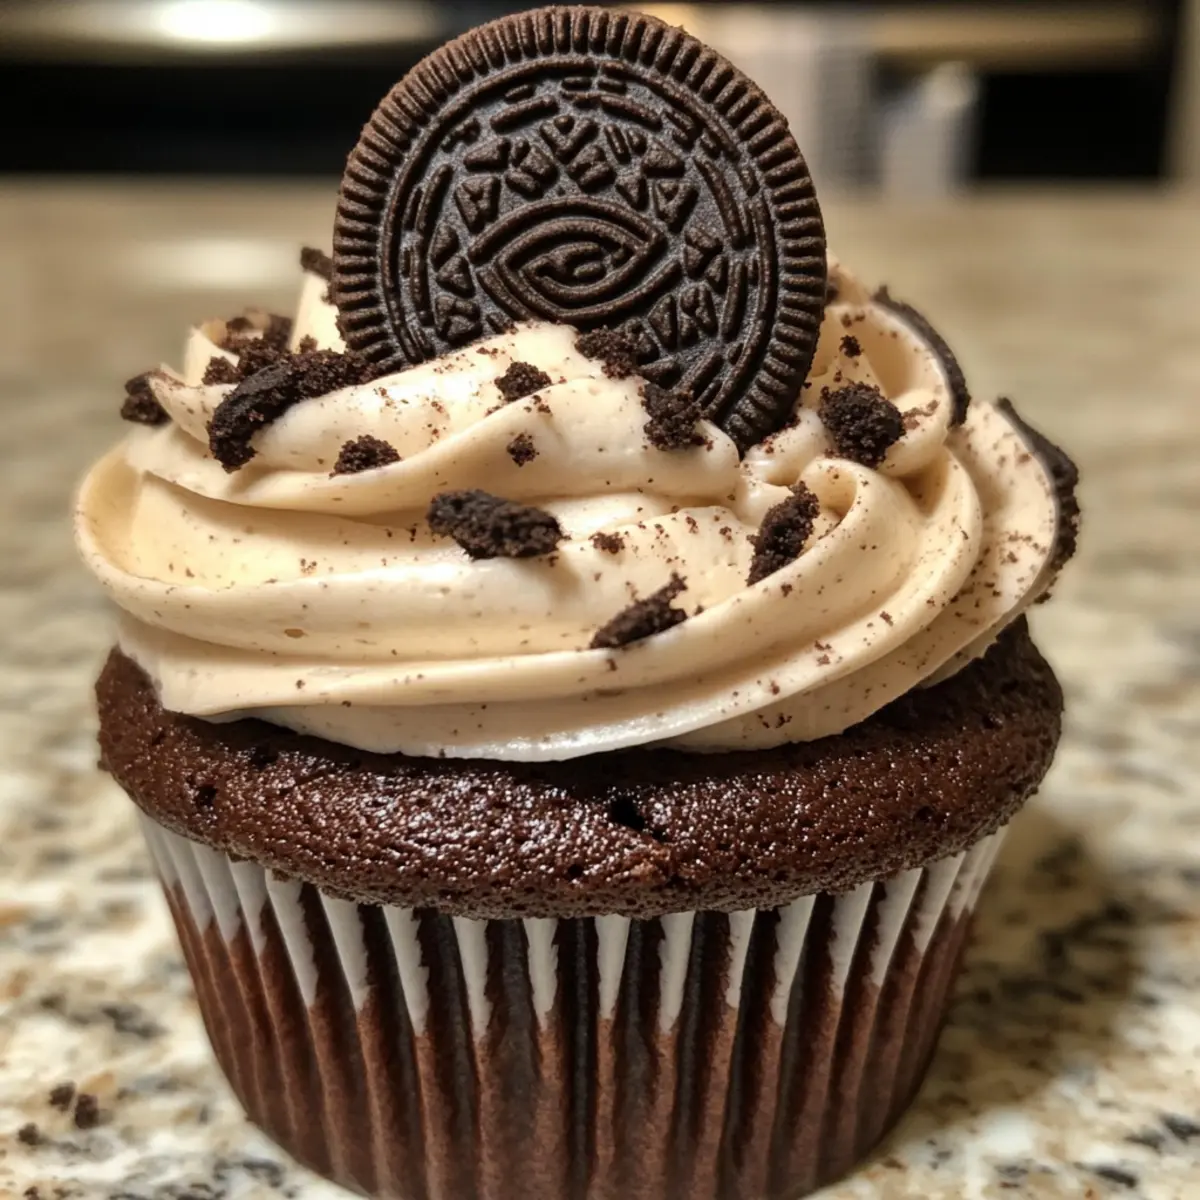
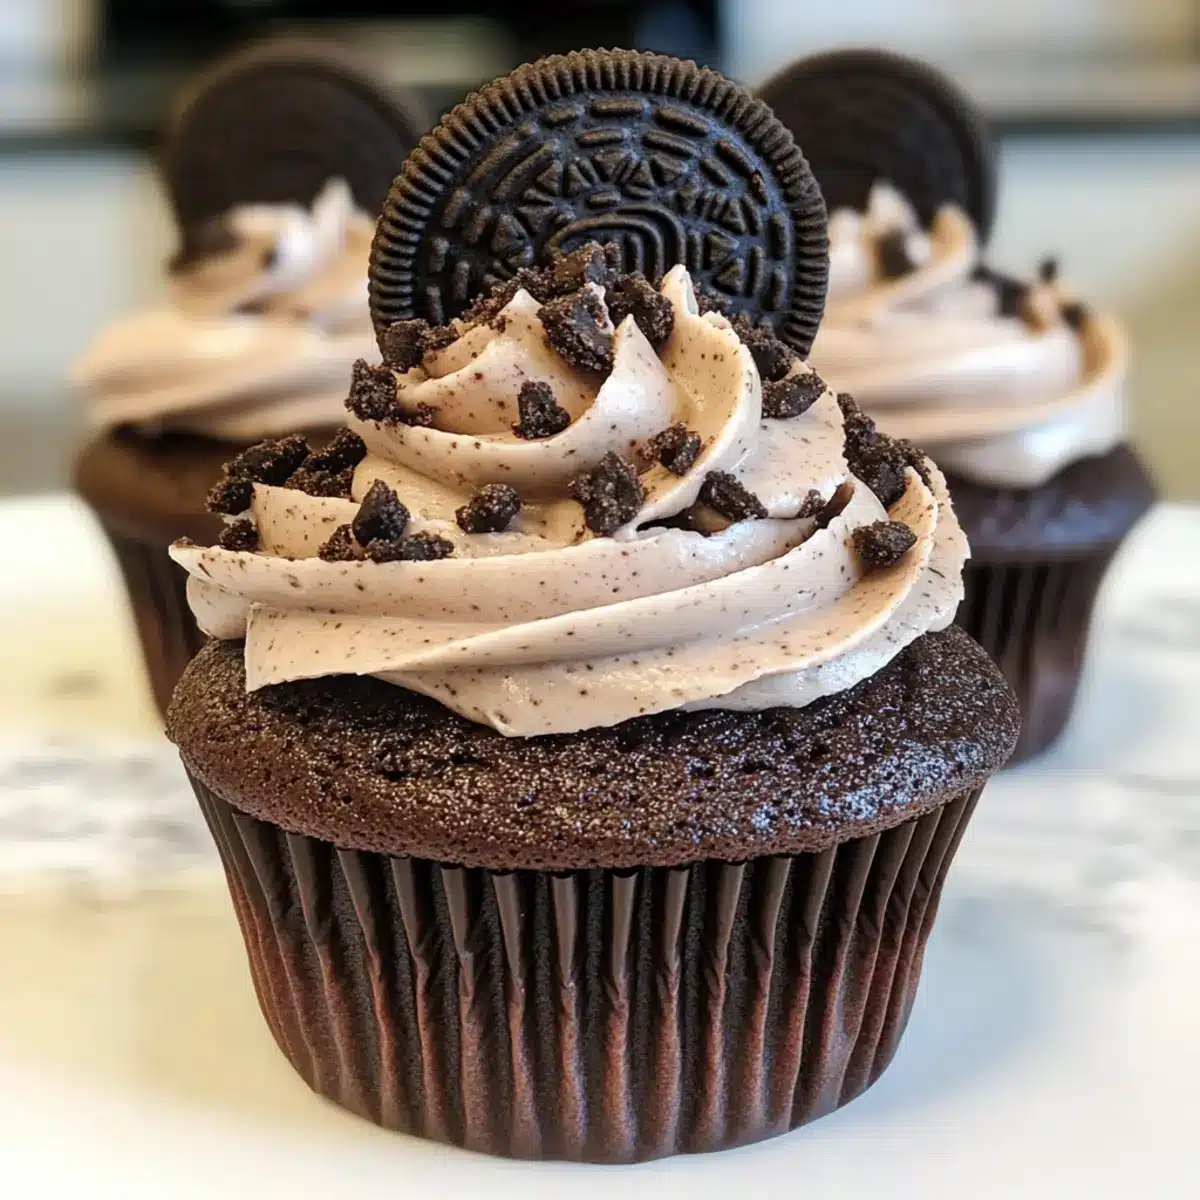
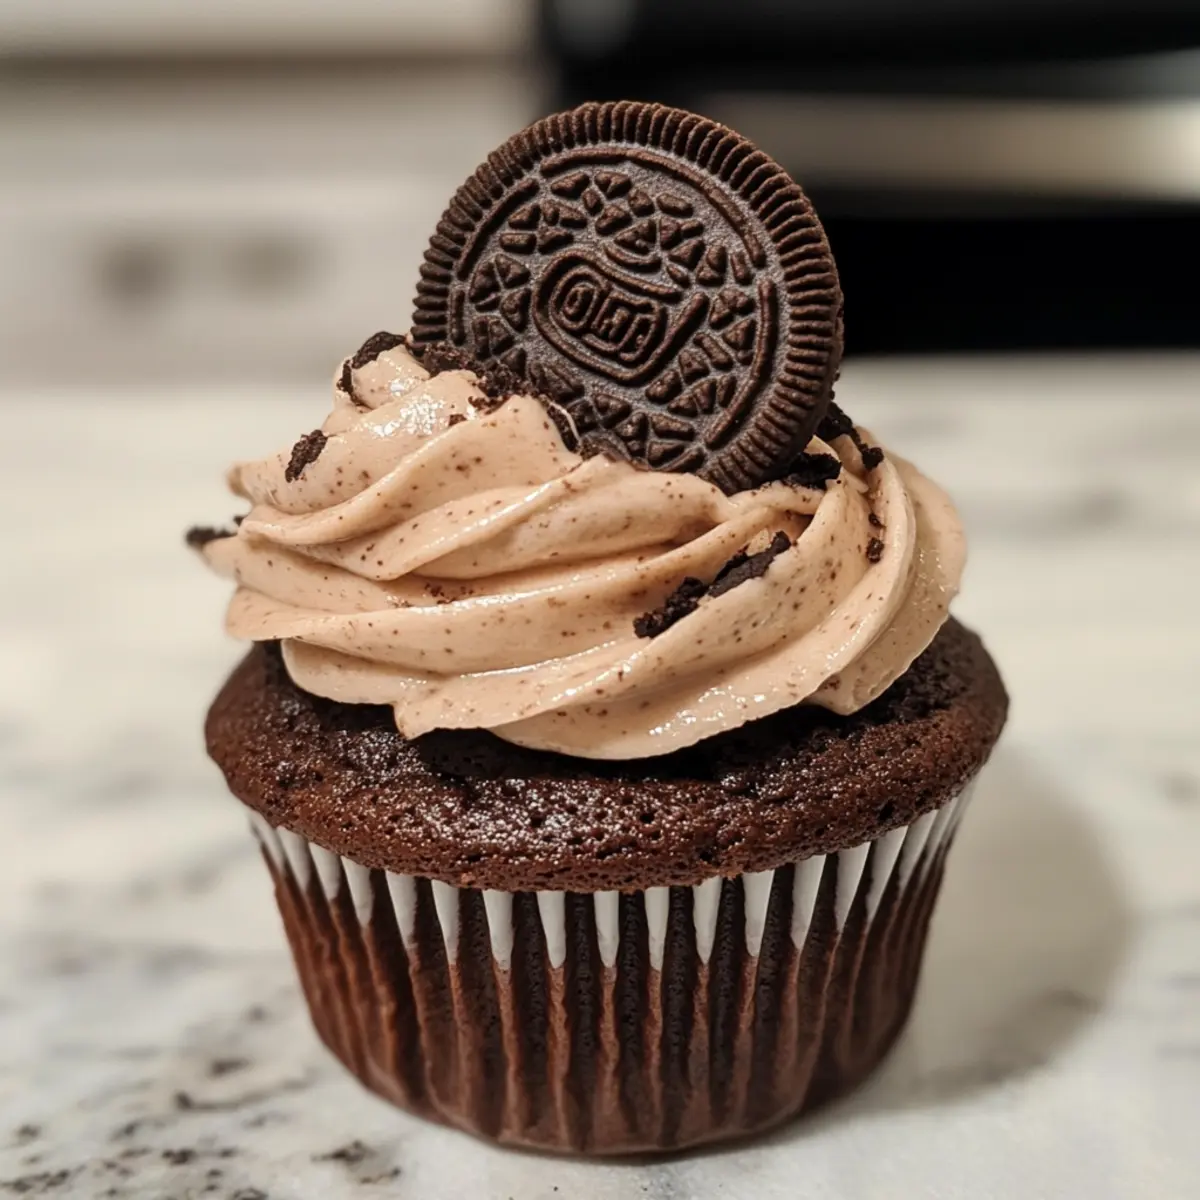
Once the cupcakes are completely cool, pipe the Oreo buttercream generously on top of each cupcake using a piping bag fitted with your favorite tip. Be sure to create swirls for a beautiful, tempting appearance. For a final touch, garnish each cupcake with a whole Oreo and a sprinkle of extra cookie crumbs for added charm and flavor.
Make Ahead Options
These delightful Oreo Cupcakes are perfect for meal prep, allowing you to enjoy the indulgence without the last-minute rush! You can prepare the cupcake batter up to 24 hours in advance by mixing the wet and dry ingredients separately and storing them in the fridge. Just remember to mix them together right before baking. Additionally, the cupcakes can be baked a day ahead and stored in an airtight container at room temperature to maintain their moist texture. When you’re ready to serve, simply whip up the Oreo buttercream (which can also be made up to 3 days in advance and stored in the fridge) and frost the cooled cupcakes. Just re-whip the buttercream for the freshest taste before piping! By prepping ahead, you’ll have beautifully decadent Oreo Cupcakes with minimal effort on the day of your celebration.
Storage Tips for Oreo Cupcakes
- Room Temperature: Store unfrosted Oreo Cupcakes in an airtight container at room temperature for up to 1-2 days to retain their moist texture.
- Fridge: If frosted, keep the cupcakes in an airtight container in the fridge for optimal freshness, enjoying them within 3-5 days.
- Freezer: For longer storage, freeze unfrosted cupcakes in a single layer on a baking sheet, then transfer to an airtight container for up to 3 months.
- Reheating: To enjoy frozen cupcakes, thaw them in the fridge overnight before serving; reheat in the microwave for a few seconds if desired.
Expert Tips for Oreo Cupcakes
- Cool the Water: Ensure the boiling water cools slightly before mixing with other wet ingredients to prevent cooking the eggs.
- Don’t Overmix: A gentle hand is key; overmixing can lead to dense cupcakes. Stop mixing as soon as the batter is smooth and lump-free.
- Test for Doneness: Use a toothpick to test the cupcakes; if it comes out clean, they’re done! Undercook slightly for extra moisture.
- Cool Completely: Let the cupcakes cool completely before frosting to avoid melting the buttercream. This helps maintain the beautiful shape.
- Storage Solutions: Store unfrosted cupcakes in an airtight container at room temperature for 1-2 days; frosted ones should go in the fridge for optimal freshness. Enjoy your delicious Oreo Cupcakes!
Oreo Cupcakes Variations & Substitutions
Feel free to have fun with these Oreo Cupcakes and make them your own with these delightful twists!
-
Buttermilk: Substitute sour cream with buttermilk for a tangy flavor that adds moisture and richness.
-
Unsalted Butter: Replace vegetable oil with unsalted butter for a deeper, richer taste in your cupcakes.
-
Espresso-Free: Omit the instant espresso powder for a caffeine-free yet still indulgent chocolate experience.
-
Dark Cocoa: Use dark cocoa powder instead of Dutch processed for an intense chocolate flavor and an unexpected twist.
-
Gluten-Free: Swap all-purpose flour with a 1-to-1 gluten-free flour blend to make these cupcakes perfect for gluten-sensitive friends.
-
Oreo Variants: Experiment with different Oreo flavors, like mint or peanut butter, in the frosting for unique variations.
-
Add-ins: Mix in chocolate chips or mini white chocolate chips into the batter for added gooeyness and texture.
-
Spicy Option: Add a pinch of cayenne or chili powder into the batter for a surprising hint of heat that pairs beautifully with the chocolate.
These variations can elevate your dessert to the next level and impress your guests. If you’re curious about more frosting techniques, check out how to pipe buttercream, or learn about delicious cupcake flavor combinations that can transform your baking game!
What to Serve with Oreo Cupcakes
Transform your sweet treat into a delightful feast with these tempting pairings that elevate the flavors of your Oreo Cupcakes.
-
Classic Milk: A chilled glass of milk is a nostalgic pairing, balancing the rich chocolate and creaminess of the buttercream perfectly.
-
Coffee Delight: A steaming cup of coffee amplifies the chocolate depth, enhancing each bite of your indulgent cupcakes while offering a comforting warmth.
-
Fruity Freshness: Serve alongside fresh raspberries or strawberries; their tartness cuts through the sweetness, providing a refreshing contrast that excites the palate.
-
Flavorful Ice Cream: A scoop of vanilla or cookies and cream ice cream adds an extra layer of creaminess, making for a decadent dessert combo. The cold melding beautifully with your cupcake’s warmth.
-
Chocolate Ganache Drizzle: Elevate your cupcakes further by drizzling them with warm chocolate ganache for a luxurious, indulgent finish that chocoholics will adore.
-
Decadent Whipped Cream: Light and fluffy whipped cream adds texture and a touch of ethereal sweetness to your cupcakes, making every bite feel like a celebration.
These pairings not only enhance the overall experience but also invite guests to indulge wholeheartedly in your baked creations.
Oreo Chocolate Cupcakes Recipe FAQs
How do I choose the best ingredients for Oreo Cupcakes?
Absolutely! For the best flavor, select Dutch processed cocoa powder, as it gives these cupcakes a deep chocolate intensity. When choosing your Oreo cookies, go for the classic version for the most authentic taste. Ensure your eggs are fresh and at room temperature for better mixing, contributing to a lighter cupcake texture.
What’s the best way to store Oreo Cupcakes?
I often recommend storing unfrosted Oreo Cupcakes in an airtight container at room temperature for up to 1-2 days. If you’ve already frosted them, keep these delectable treats in the fridge for optimal freshness, ideally consuming them within 3-5 days. This ensures they stay delicious and moist for your enjoyment!
Can I freeze my Oreo Cupcakes?
Yes, you can! To freeze unfrosted Oreo Cupcakes, place them in a single layer on a baking sheet until firm, then transfer them to an airtight container or freezer bag. This method keeps them safe for up to 3 months. When you’re ready to indulge, thaw the cupcakes in the fridge overnight and enjoy them cold or warm them slightly in the microwave for a few seconds.
What should I do if my cupcakes are dry?
If your Oreo Cupcakes turn out dry, it’s often due to overbaking or possible ingredient measurement errors. Try reducing your baking time, as even a minute can make a difference! Don’t hesitate to keep an eye on them, and do a toothpick test towards the end of baking. If they seem dry, enjoy them with a scoop of ice cream or drizzle with chocolate sauce for extra moisture!
Are there any dietary considerations when making Oreo Cupcakes?
When crafting your Oreo Cupcakes, keep an eye on allergies; these cupcakes contain eggs, dairy, and gluten, which can be problematic for some. For a vegan version, you can substitute eggs with flax eggs and use dairy-free butter in your frosting. Additionally, always check the ingredients in Oreos, as they can vary in formulations depending on the region.
Decadent Oreo Cupcakes That Will Wow Your Taste Buds
Ingredients
Equipment
Method
- Preheat your oven to 160ºC (320ºF) and line a 12-cup cupcake tin with colorful liners.
- In a large mixing bowl, combine granulated sugar, Dutch processed cocoa powder, all-purpose flour, baking powder, baking soda, instant espresso powder, and salt. Whisk together until smooth.
- In a separate bowl, whisk together sour cream, vegetable oil, eggs, boiling water, and vanilla extract until combined.
- Gradually pour the wet mixture into the dry ingredients, stirring gently until combined.
- Evenly divide the batter among the cupcake liners, filling each about two-thirds full.
- Bake for 20-23 minutes or until a toothpick comes out clean. Let them cool in the pan for 5 minutes before transferring to a wire rack.
- Crush the Oreo cookies into fine crumbs. Beat softened butter until creamy, then add powdered sugar and milk until smooth.
- Fold the crushed Oreo cookies into the buttercream until evenly distributed.
- Once the cupcakes are cool, pipe the Oreo buttercream on top and garnish with a whole Oreo and cookie crumbs.
Leave a Reply