
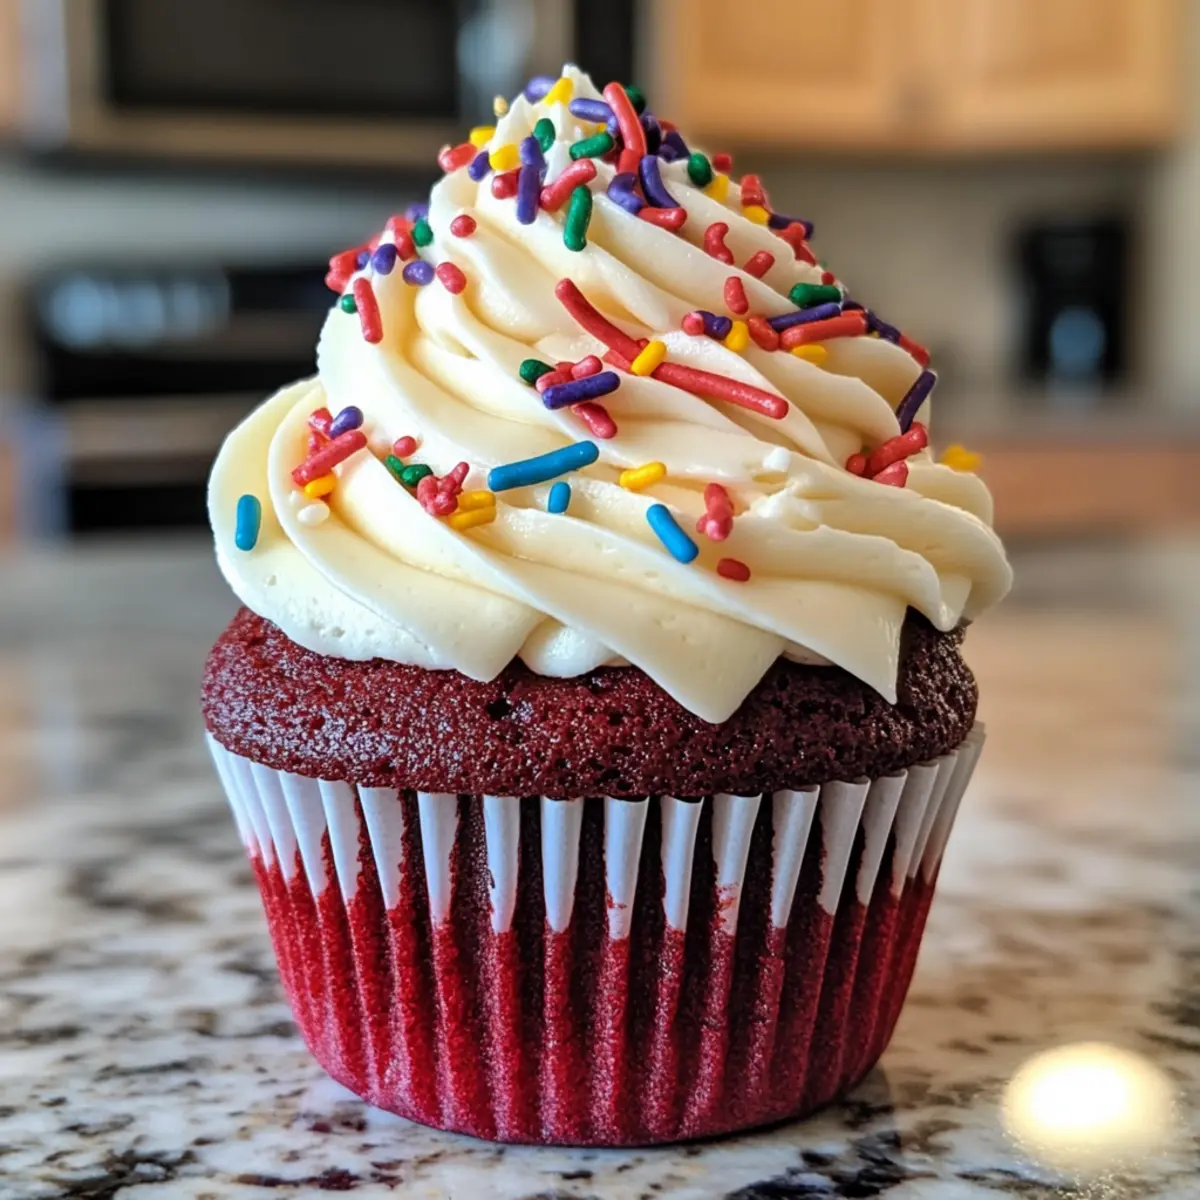
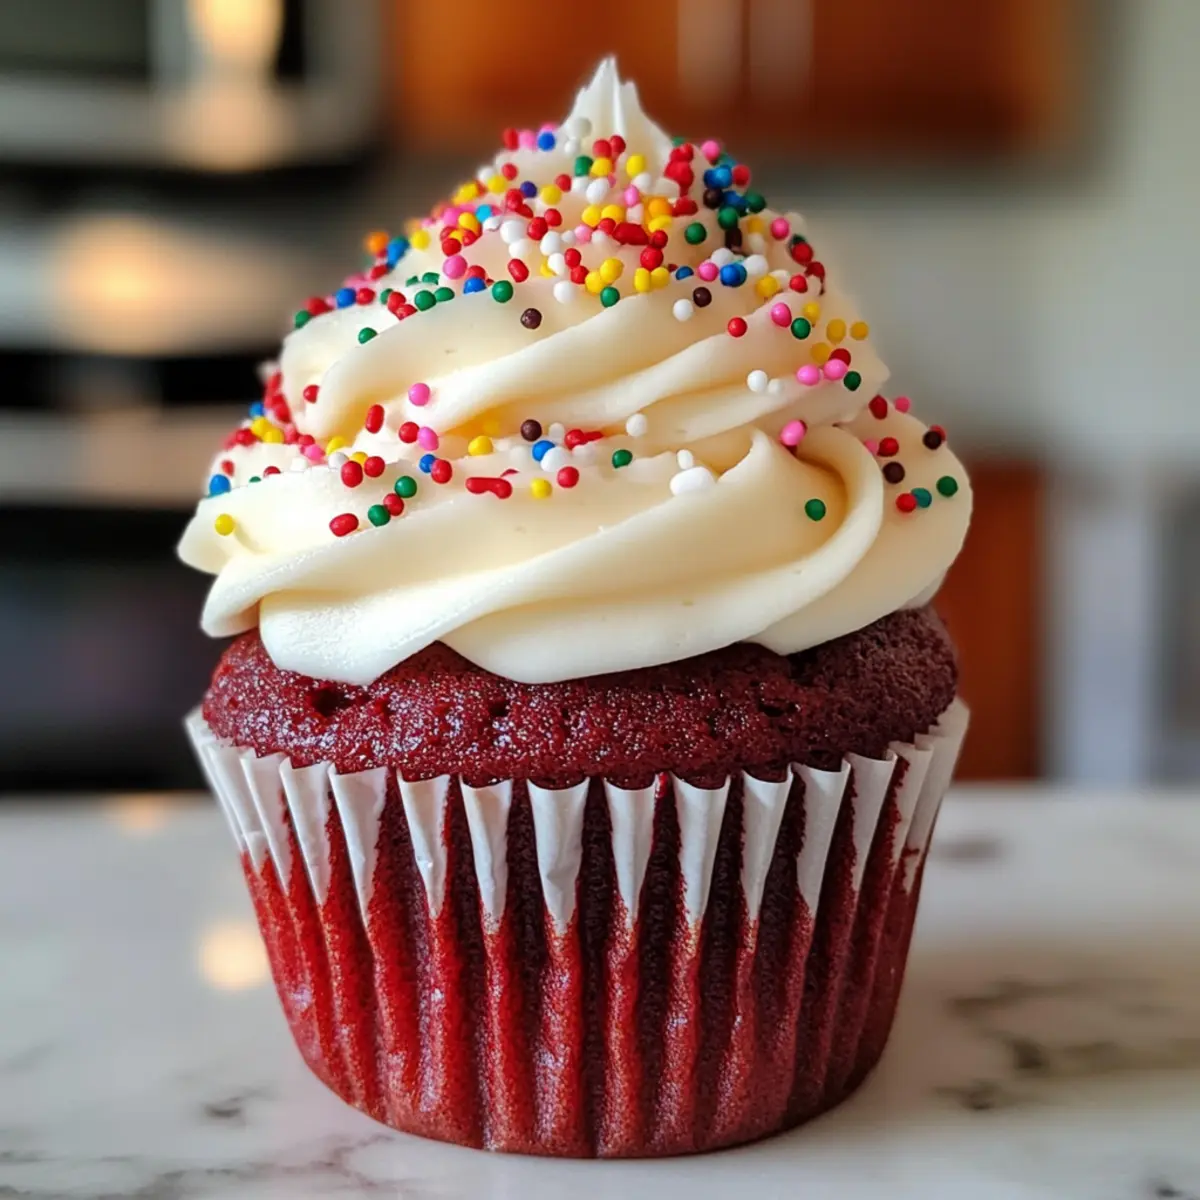
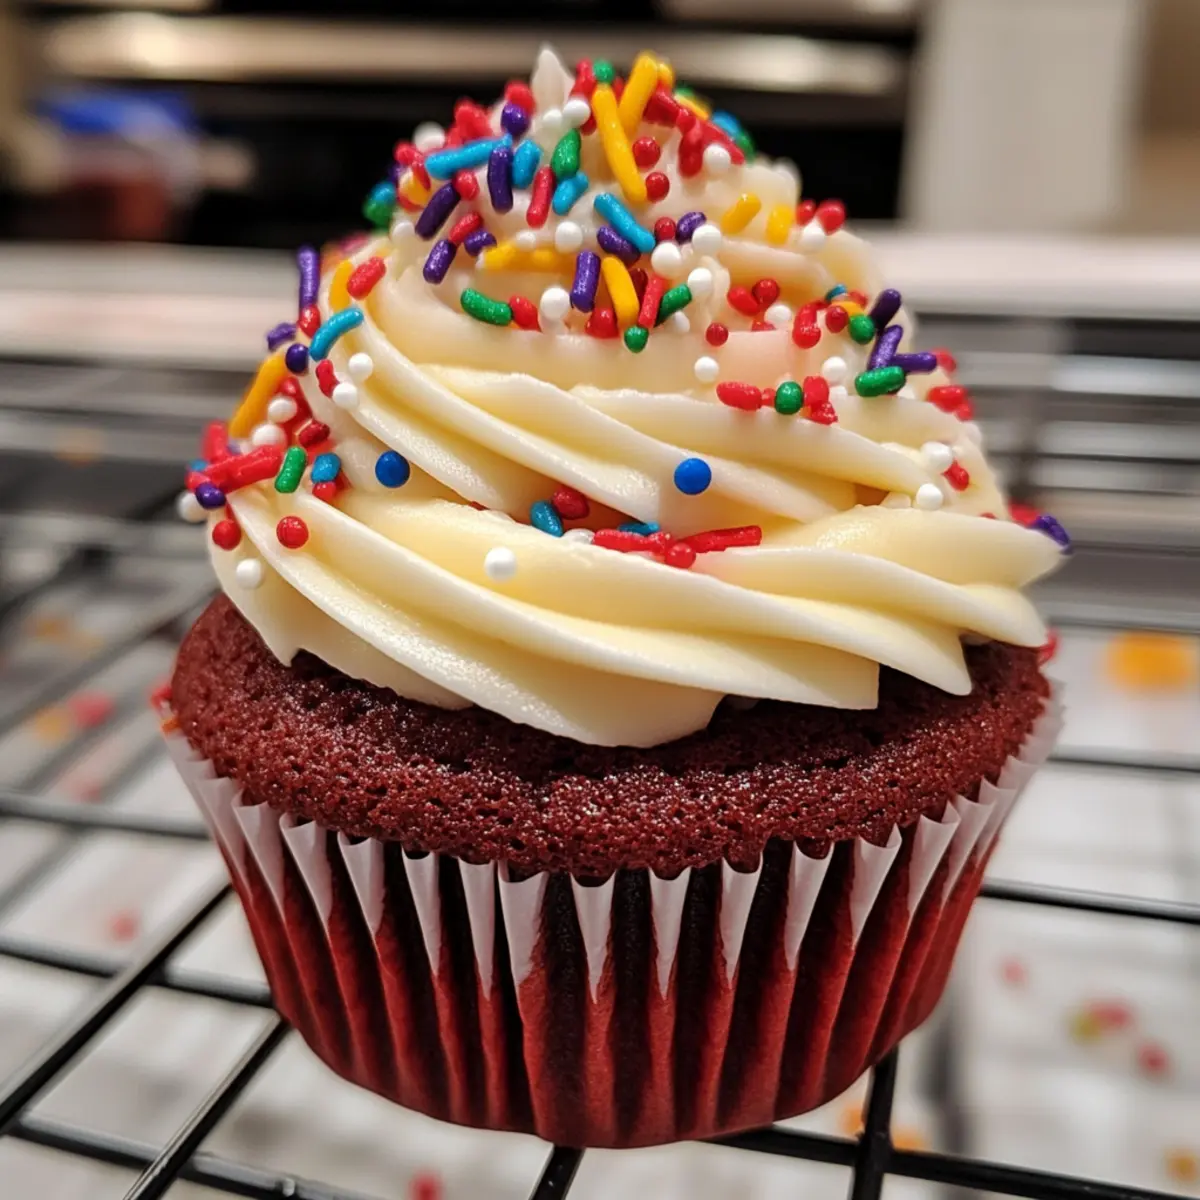
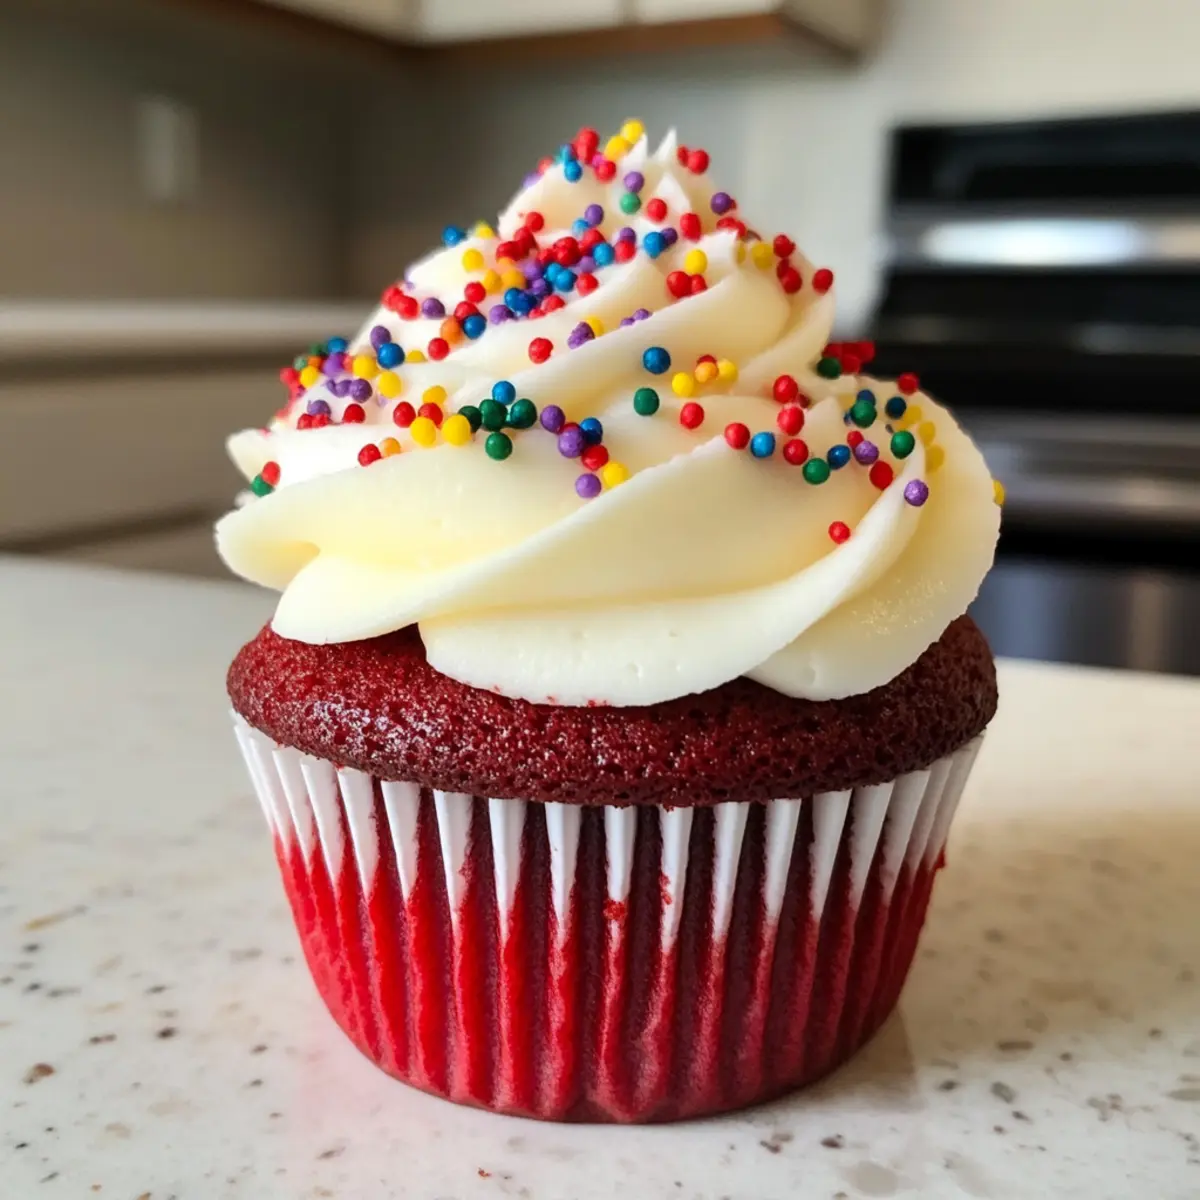
As I stood in my kitchen, surrounded by the warm, enticing aroma of freshly baked goods, I couldn’t help but reflect on how special treats can evoke cherished memories. Today, I’m excited to share my recipe for moist and delicious red velvet cupcakes with cream cheese frosting—an irresistible dessert that’s perfect for any celebration. Not only are these cupcakes incredibly soft and tender, but they also boast a delightful hint of cocoa that keeps you coming back for more. Whether you’re planning a festive gathering or simply craving something sweet, these red velvet cupcakes will impress every guest. Curious about how to make this enchanting treat? Let’s dive into the recipe and bring a touch of joy to your baking!
Why Are Red Velvet Cupcakes So Special?
Irresistible Flavor: These cupcakes offer a unique blend of cocoa and buttermilk, creating a taste that is both rich and subtly chocolaty.
Decadent Frosting: Topped with creamy cream cheese frosting, each bite melts in your mouth, delivering blissful indulgence.
Perfect for Any Occasion: From birthdays to holidays, these cupcakes are a show-stopper, adding a touch of elegance to any celebration.
Easy to Make: With straightforward steps, even novice bakers can create these delicious treats with confidence.
Customizable Delight: Feel free to experiment with toppings or mix-ins; chocolate chips or festive sprinkles can make each batch special. Discover how to complement these cupcakes with a side of Hot Buttered Rum or juicy Roasted Carrots Red for an unforgettable meal.
Red Velvet Cupcake Ingredients
Note: Gather these essential ingredients to make the most mouthwatering red velvet cupcakes!
For the Cupcakes
- All-Purpose Flour – Provides structure for the cupcakes; measure carefully to avoid excess.
- Cocoa Powder (Dutch Process) – Adds a mild chocolate flavor and deepens the red color; you can substitute it with regular cocoa powder if needed, though the hue may be less vibrant.
- Baking Powder – Gives lift to the cupcakes, ensuring they rise beautifully.
- Baking Soda – Aids in browning and further supports the rise.
- Salt – Balances the sweetness and enhances overall flavor.
- Unsalted Butter – Contributes richness and moisture; make sure it’s softened for easy mixing.
- Granulated Sugar – Sweetens the batter, contributing to its light and fluffy texture.
- Eggs (1 whole + 1 yolk) – Adds moisture, structure, and richness; ensure they are at room temperature for the best results.
- Vanilla Extract – Infuses depth of flavor into the cupcakes.
- Buttermilk – Offers moisture and acidity, leading to a tender crumb; use at room temperature. Note: Regular milk with a dash of vinegar can be a suitable substitute.
- Red Gel Food Coloring – Provides the iconic red hue for those classic red velvet cupcakes; gel coloring is preferred for its vibrancy.
For the Cream Cheese Frosting
- Unsalted Butter – Adds creaminess; remember to soften it for easier blending.
- Cream Cheese (cold) – Delivers that signature tangy flavor crucial to delicious cream cheese frosting; should be cold for optimal texture.
- Powdered Sugar – Sweetens and thickens the frosting; sift it before mixing to achieve a smooth consistency.
- Sprinkles (optional) – Add a fun decorative touch to your frosted cupcakes.
Step‑by‑Step Instructions for Red Velvet Cupcakes
Step 1: Preheat and Prepare
Begin by preheating your oven to 350°F (175°C) and lining a standard cupcake pan with 12 cupcake liners. This step is crucial for ensuring even baking and easy removal of your gorgeous red velvet cupcakes later. Make sure your oven is fully heated before placing the pan inside.
Step 2: Combine Dry Ingredients
In a medium-sized mixing bowl, whisk together 1 ½ cups of all-purpose flour, 1 tablespoon of cocoa powder, 1 teaspoon of baking powder, 1 teaspoon of baking soda, and ½ teaspoon of salt. This blend forms the dry mixture that will give the cupcakes structure. Set aside once well combined, allowing the flavors to meld.
Step 3: Cream Butter and Sugar
In a large mixing bowl, cream ½ cup of softened unsalted butter and 1 cup of granulated sugar together using an electric mixer. Beat on medium speed until the mixture is light and fluffy, about 1-2 minutes. This process incorporates air into the batter, resulting in tender cupcakes.
Step 4: Add Eggs and Flavoring
Next, add 1 whole egg, 1 egg yolk, and 1 teaspoon of vanilla extract to the butter-sugar mixture. Beat on medium speed until the mixture becomes pale and smooth, approximately 1-2 minutes. This step enriches the flavor and moisture of your red velvet cupcakes.
Step 5: Incorporate Dry Ingredients and Buttermilk
Alternately add the dry ingredients and 1 cup of room-temperature buttermilk to the wet mixture. Start with one third of the dry mix, followed by half of the buttermilk, and continue alternating until fully incorporated. Mix on low speed until just combined, then gently fold in 1 tablespoon of red gel food coloring for that iconic hue.
Step 6: Fill Cupcake Liners
Spoon the batter into the prepared cupcake liners, filling each about three-quarters full. Aim for uniformity to ensure even baking across your red velvet cupcakes. Then, tap the pan gently on the counter to release any air bubbles for a smoother finish.
Step 7: Bake the Cupcakes
Place the cupcake pan in the preheated oven and bake for 17-20 minutes, or until a toothpick inserted into the center comes out clean or with a few crumbs. Keep an eye on them during the last few minutes for perfect doneness, ensuring they don’t overbake.
Step 8: Cool and Transfer
Once baked, remove the pan from the oven and allow it to cool for about 10 minutes in the pan. After that, carefully transfer the cupcakes to a wire rack to cool completely. This step is essential for maintaining their moisture and texture before frosting.
Step 9: Prepare Cream Cheese Frosting
While the cupcakes cool, it’s time to make the frosting. In a mixing bowl, beat ½ cup of softened unsalted butter until pale and fluffy. Then, add 8 ounces of cold cream cheese and mix until smooth. Gradually sift in 4 cups of powdered sugar, beating until fluffy and spreadable.
Step 10: Frost and Decorate
Once the cupcakes are completely cooled, frost them generously with the cream cheese frosting using a spatula or piping bag for decorative flair. For a festive touch, you can sprinkle colorful sprinkles on top of each cupcake, adding a delightful finish to your red velvet cupcakes.
Make Ahead Options
These delightful red velvet cupcakes are a fantastic choice for meal prep! You can prepare the cupcake batter up to 24 hours in advance; simply store it in an airtight container in the refrigerator. For the cream cheese frosting, it can be made ahead and kept in the fridge for up to 3 days—just be sure to keep it covered to maintain its creamy texture. When you’re ready to bake, let the batter sit at room temperature for about 30 minutes before filling your cupcake liners. After baking, frost the cooled cupcakes, and they will be just as delicious as if made fresh! This time-saving approach ensures you can enjoy your sweet treats without the last-minute rush.
Tips for the Best Red Velvet Cupcakes
-
Measure Flour Properly: Always spoon flour into your measuring cup instead of scooping to ensure accurate measurements and prevent dense cupcakes.
-
Room Temperature Ingredients: Ensure all wet ingredients, like eggs and buttermilk, are at room temperature for a smoother batter that results in perfectly moist red velvet cupcakes.
-
Gel Food Coloring: Use red gel food coloring for vibrant cupcakes; it’s more concentrated compared to liquid color, ensuring that the iconic color shines through without affecting the batter’s consistency.
-
Cool Before Frosting: Let your cupcakes cool completely on a wire rack before frosting to prevent the cream cheese frosting from melting and losing its delightful texture.
-
Frosting Tip: For a sturdier cream cheese frosting, keep the cream cheese cold while letting the butter soften; this balance helps maintain the frosting’s shape.
-
Storage Guidance: Store any leftovers in an airtight container in the refrigerator for up to three days. Allow them to come to room temperature before serving for the best flavor and texture.
Red Velvet Cupcakes Variations & Substitutions
Feel free to explore these delightful alternatives and enhancements to make your red velvet cupcakes truly yours!
-
Gluten-Free: Use almond flour or a gluten-free all-purpose blend for a cake that everyone can enjoy without sacrificing flavor.
-
Dairy-Free: Swap buttermilk with a plant-based milk mixed with lemon juice, and use dairy-free butter and cream cheese for a lactose-free delight.
-
Chocolate Lovers: Fold in ½ cup of mini chocolate chips for an extra layer of sweetness and texture that complements the red velvet beautifully.
-
Nutty Twist: Add chopped walnuts or pecans to the batter for a delicious crunch, bringing an exciting texture to your cupcake experience.
-
Fruit Fusion: Try mixing in ½ cup of crushed raspberries or chopped strawberries for a fruity surprise that pairs perfectly with the chocolatey notes.
-
Spiced Version: Enhance the flavor profile by adding 1 teaspoon of cinnamon or nutmeg to the dry ingredients to bring warmth and depth to each bite.
-
Frosting Fun: Experiment with flavored extracts like almond or coconut in the cream cheese frosting for a unique twist that excites the taste buds.
-
Mini Cupcakes: Make bite-sized versions by using a mini muffin tin. Just reduce the bake time to about 12-15 minutes, perfect for parties!
Interested in serving these luscious cupcakes with a fresh side? Pair them with Hot Buttered Rum for a cozy combo or some delightful Roasted Carrots Red to balance out the sweetness. There’s so much to experiment with—let your creativity shine!
How to Store and Freeze Red Velvet Cupcakes
Fridge: Store your red velvet cupcakes in an airtight container in the refrigerator for up to 3 days. This helps to maintain their moist texture and rich flavor.
Freezer: For longer storage, wrap each cupcake individually in plastic wrap and place them in a freezer-safe bag or container. They can be frozen for up to 3 months.
Reheating: To enjoy your frozen cupcakes, thaw them in the fridge overnight or at room temperature for a few hours. For a special treat, warm them briefly in the microwave before serving.
Frosting Storage: If you have leftover cream cheese frosting, store it separately in an airtight container in the fridge for up to a week, allowing it to soften before using again.
What to Serve with Red Velvet Cupcakes
Indulging in the lusciousness of red velvet cupcakes opens the door to a delightful dining experience. Pair these sweet treats with complementary sides and drinks for a well-rounded meal.
- Creamy Vanilla Ice Cream: The cool, creamy texture of vanilla ice cream balances the rich flavors of the cupcakes, creating a harmonious dessert experience.
- Fresh Berries: A refreshing side of strawberries or raspberries adds a burst of tartness that beautifully contrasts the sweetness of the cupcakes.
- Chocolate Ganache Drizzle: Elevate your cupcakes with a silky chocolate ganache, enhancing their indulgent nature while adding a touch of decadence.
- Decadent Hot Chocolate: A warm cup of hot chocolate offers a comforting warmth, perfectly complementing the rich flavors of these delightful treats.
- Coffee or Espresso: The bold, rich taste of coffee enhances the cupcakes’ cocoa notes, making for an enjoyable balance of flavors.
- Caramel Sauce: Drizzle homemade caramel sauce over the cupcakes for a luxurious touch that adds sweetness and complexity.
- Sparkling Lemonade: A zesty and fizzy lemonade cuts through the richness, providing a refreshing contrast for your taste buds.
- Whipped Cream Topping: Add a dollop of whipped cream for a light and airy enhancement that pairs wonderfully with the cream cheese frosting.
- Mini Fruit Tarts: Consider offering mini fruit tarts for a fruity, fresh option that contrasts beautifully with the cupcakes’ sweetness, providing balance for guests.
- Chocolate Milkshake: For a childhood-inspired treat, serve chocolate milkshakes alongside for a fun and nostalgic twist that perfectly complements your cupcakes.
Red Velvet Cupcakes Recipe FAQs
What types of flour should I use for red velvet cupcakes?
I recommend using all-purpose flour for the best structure in your red velvet cupcakes. Make sure to measure it properly by spooning it into the measuring cup, which helps prevent excess that could lead to dense cupcakes.
How should I store leftover red velvet cupcakes?
To preserve their delightful moisture and flavor, store any leftover red velvet cupcakes in an airtight container in the refrigerator for up to 3 days. Allow them to come to room temperature before serving for the best experience.
Can I freeze red velvet cupcakes?
Absolutely! Wrap each cupcake individually in plastic wrap and place them in a freezer-safe bag or container. They can be frozen for up to 3 months. When you’re ready to enjoy one, simply thaw it in the fridge overnight or at room temperature for a few hours.
Why did my red velvet cupcakes not rise properly?
There could be a few factors. Ensure that your baking powder and baking soda are fresh and active, as these leavening agents are crucial for rise. Additionally, make sure not to overmix the batter after adding the dry ingredients, as this can lead to dense cupcakes. Finally, proper measurement of ingredients is vital—sifting the flour helps as well!
Is there a gluten-free option for red velvet cupcakes?
While this recipe isn’t gluten-free, you can use a gluten-free all-purpose flour blend as a substitute. Most gluten-free flours are designed to mimic regular flour, but make sure they contain xanthan gum or a similar ingredient to help with structure and texture.
Can dogs eat red velvet cupcakes?
It’s best to keep red velvet cupcakes away from dogs due to ingredients like cocoa powder and sugar, which can be harmful to pets. If you want to treat your furry friend, consider making a special dog-friendly version using safe ingredients for their consumption.
Decadent Red Velvet Cupcakes with Cream Cheese Frosting Bliss
Ingredients
Equipment
Method
- Preheat your oven to 350°F (175°C) and line a standard cupcake pan with 12 cupcake liners.
- In a medium-sized mixing bowl, whisk together the flour, cocoa powder, baking powder, baking soda, and salt.
- In a large mixing bowl, cream the softened butter and sugar together until light and fluffy.
- Add the whole egg, egg yolk, and vanilla extract to the butter-sugar mixture and beat until pale and smooth.
- Alternately add the dry ingredients and buttermilk to the wet mixture, then fold in the red gel food coloring.
- Spoon the batter into the cupcake liners, filling each about three-quarters full.
- Bake in the preheated oven for 17-20 minutes or until a toothpick comes out clean.
- Remove the pan from the oven and allow the cupcakes to cool for about 10 minutes.
- Prepare the cream cheese frosting by beating softened butter, then adding cream cheese, and gradually mixing in powdered sugar until smooth.
- Frost the cooled cupcakes generously and top with sprinkles if desired.
Leave a Reply