
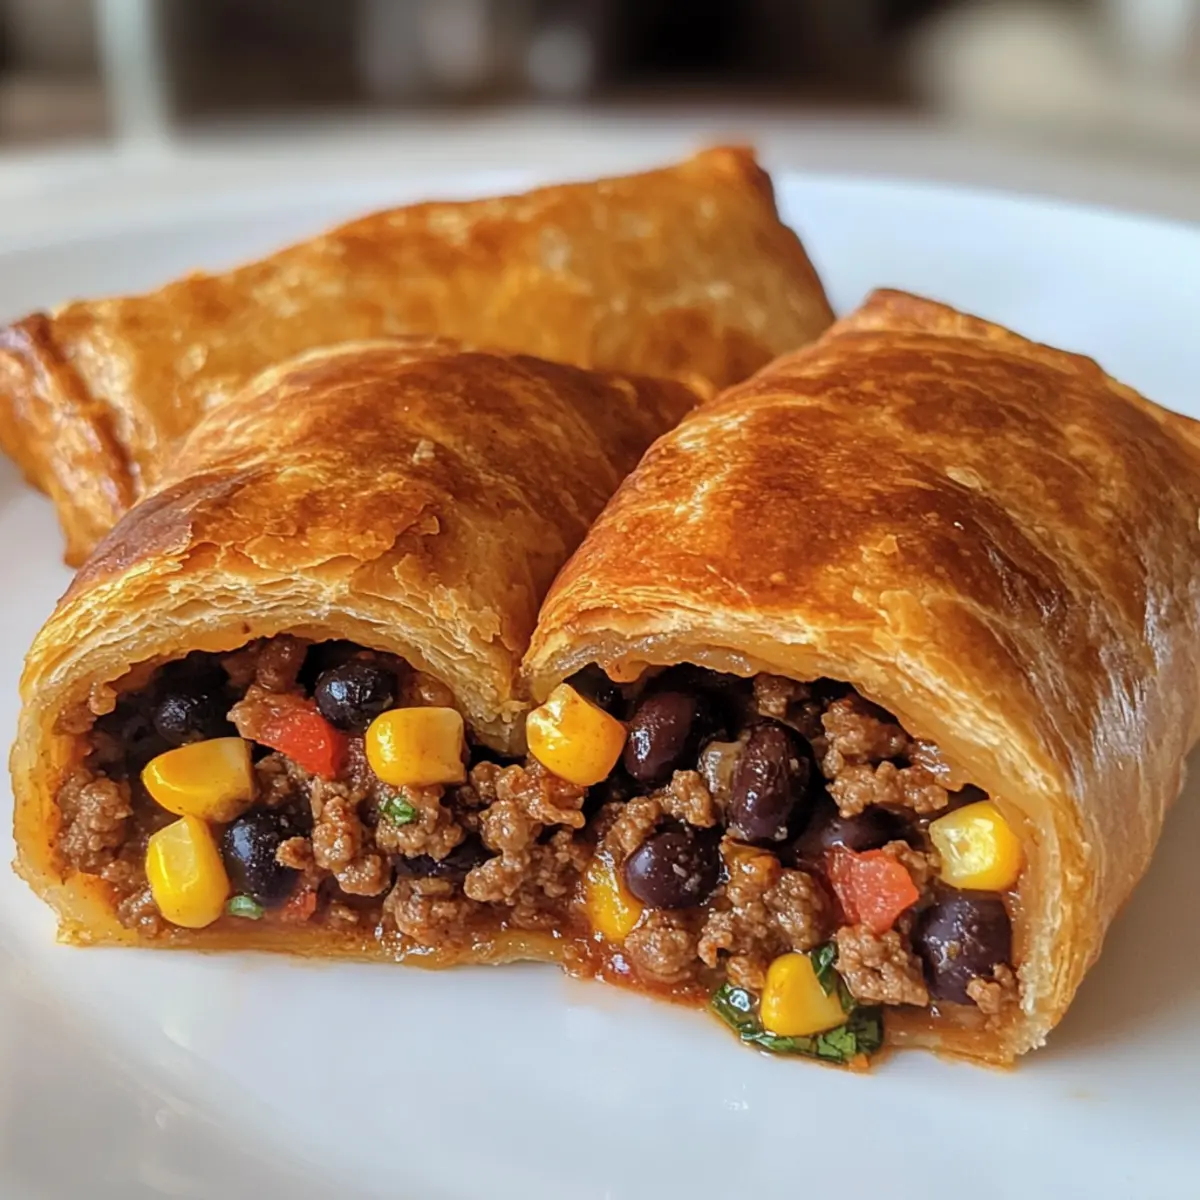
As I pulled out the baking sheet and caught sight of my golden-brown Loaded Cheesy Pocket Tacos, my heart skipped a beat. These delightful little pockets are a game-changer, merging the coziness of traditional tacos with a cheesy twist you just can’t resist. Perfect for busy weeknights or weekend gatherings, they come together in a flash, offering a customizable touch that caters to any taste preference – whether you’re a meat lover or a proud plant-based enthusiast. The beauty of these Cheesy Pocket Tacos is their versatility: loaded with your choice of fillings, they invite creativity while delivering that comforting Tex-Mex essence we all crave. Curious about how to make these irresistible treats your new favorite dinner idea? Let’s dive in!
Why are Cheesy Pocket Tacos a Must-Try?
Versatile Fillings: Customize your tacos with any combination of proteins or veggies, making them perfect for every taste.
Quick and Easy: You can whip these up in no time, making them ideal for busy weeknights or spontaneous gatherings.
Crowd-Pleasing: Whether you’re hosting friends or enjoying a family dinner, these cheesy delights are sure to impress everyone at the table.
Flavor Explosion: The melt-in-your-mouth cheese paired with expertly seasoned fillings provides a burst of Tex-Mex goodness that satisfies every craving.
Healthier Alternatives: With the option of gluten-free tortillas and vegan substitutions, you can enjoy a comforting meal that aligns with your dietary needs. For more crowd-friendly recipes, check out these Parmesan Cheeseburger Bombs or spice things up with Spicy Mexican Donkey!
Cheesy Pocket Tacos Ingredients
For the Filling
• Ground Beef or Turkey – A hearty primary protein source; for a vegan option, substitute with lentils or tofu.
• Taco Seasoning – Adds a rich depth of flavor; consider using homemade seasoning for a cleaner taste.
• Black Beans – Provides fiber and texture; any canned beans can work as a substitute.
• Corn Kernels – Adds sweetness and crunch; fresh or frozen works well, and skip if necessary.
• Diced Tomatoes – Introduces moisture and acidity; salsa can be used for an extra flavor kick.
For the Cheesy Blend
• Shredded Cheddar Cheese – Melts beautifully and adds sharpness; try using any melty cheese alternative for variety.
• Shredded Mozzarella Cheese – Offers the ultimate stretch and creaminess; can be easily swapped with your preferred cheese.
For the Shell
• Flour Tortillas – The perfect base for your cheesy pockets; switch to corn tortillas for a gluten-free version.
Finishing Touches
• Chopped Green Onions – Adds a fresh, mild onion flavor; use regular onions if green onions aren’t on hand.
• Sour Cream – Enhances creaminess; opt for cashew cream for a vegan twist.
• Chopped Fresh Cilantro – Boosts the flavor with a fresh touch; feel free to omit it if it’s not your favorite.
These Cheesy Pocket Tacos are a delightful blend of flavors, satisfying your cravings and accommodating various dietary preferences!
Step‑by‑Step Instructions for Cheesy Pocket Tacos
Step 1: Cook the Meat
In a large skillet, heat a drizzle of olive oil over medium heat. Add the ground beef or turkey, cooking for 7-10 minutes until the meat is browned and no longer pink. Stir in the taco seasoning and let it simmer for 3-4 minutes, allowing the flavors to meld and creating a rich filling for your Cheesy Pocket Tacos.
Step 2: Prepare Tortillas
Preheat your oven to 350°F (175°C). As the oven warms, take each flour tortilla and layer on the cooked meat mixture, followed by black beans, corn kernels, diced tomatoes, and a generous helping of both shredded cheddar and mozzarella cheese. This creative assembly is crucial to make your Cheesy Pocket Tacos truly delicious!
Step 3: Form Taco Pockets
Carefully fold each tortilla in half to form a pocket, gently pressing down to ensure they’re sealed without any fillings spilling out. This step is essential for keeping all those tasty ingredients tucked inside while cooking, making your Cheesy Pocket Tacos easy to handle and enjoy.
Step 4: Fry Taco Pockets
In the same skillet, add a bit more cooking spray or oil and heat it on medium. Place the taco pockets in the hot skillet and cook for 2-3 minutes on each side until they turn golden brown and crispy. Be sure to monitor closely; the crispy texture is what makes these Cheesy Pocket Tacos irresistible!
Step 5: Bake
Transfer the golden taco pockets onto a baking sheet lined with parchment paper. Place in the preheated oven and bake for an additional 5-10 minutes until the cheese inside is beautifully melted and bubbling. This final baking step ensures that each Cheesy Pocket Taco is indulgently gooey and satisfying.
Step 6: Serve
Once baked to perfection, remove the Cheesy Pocket Tacos from the oven and let them cool slightly. Serve warm, topped with freshly chopped green onions, a dollop of sour cream, and a sprinkle of cilantro for an added burst of flavor. These delightful treats are perfect for sharing with family and friends!
Expert Tips for Cheesy Pocket Tacos
• Monitor Heat: Keep your skillet at medium heat to prevent burning the tacos. Lower heat allows for even cooking and crispiness.
• Customize Fillings: Feel free to explore with different proteins or add veggies like bell peppers for extra flavor. Get creative with your Cheesy Pocket Tacos!
• Seal Well: Ensure tortilla pockets are sealed tightly; this will keep delicious fillings intact while frying and baking.
• Cooking Alternatives: For a healthier option, try using an air fryer instead. Just be sure to adjust cooking times for crispy perfection.
• Flavor Boost: Add jalapeños for a spicy kick or olives for a briny touch to elevate the taste of your Cheesy Pocket Tacos!
What to Serve with Loaded Cheesy Pocket Tacos?
Dive into a world of flavors with delightful sides that perfectly accompany these cheesy pockets.
-
Fresh Guacamole: This creamy avocado dip adds a rich, buttery contrast, enhancing the overall texture and flavor experience.
-
Zesty Salsa: A fresh homemade or store-bought salsa brings vibrant acidity and a burst of flavor that balances the taco’s richness.
-
Crisp Garden Salad: A light salad with mixed greens and a tangy vinaigrette introduces a refreshing crunch that complements the cheesy filling beautifully.
-
Spicy Jalapeño Poppers: These add an extra kick of heat, enticing spice lovers and bringing a fun appetizer vibe to your meal.
-
Mexican Street Corn: Grilled corn on the cob brushed with creamy sauce and sprinkled with cheese complements the Tex-Mex theme perfectly.
-
Chilled Margaritas: A fruity or classic margarita provides a refreshing contrast to the hearty tacos and is perfect for celebratory dinners.
-
Sweet Churros: Finish off your meal with these crispy donuts, coated in cinnamon sugar, offering a delightful sweet contrast to your cheesy pocket tacos.
Each of these pairings enhances the fun and flavor of your Loaded Cheesy Pocket Tacos, making for a memorable meal!
How to Store and Freeze Cheesy Pocket Tacos
Fridge: Keep any leftover Cheesy Pocket Tacos in an airtight container for up to 3 days. When reheating, a quick warm-up in the oven restores their delicious crispiness.
Freezer: For longer storage, freeze the taco pockets individually, wrapped tightly in plastic wrap or aluminum foil. They can last up to a month; just thaw in the fridge before reheating.
Make-Ahead: Assemble Cheesy Pocket Tacos and refrigerate them before cooking for up to 24 hours. This allows for quick meal prep on busy nights!
Reheating: Reheat cooked Cheesy Pocket Tacos in a preheated oven at 350°F (175°C) for about 10-15 minutes until heated through and crispy again.
Cheesy Pocket Tacos: Exciting Customizations
Are you ready to explore delightful twists on your Loaded Cheesy Pocket Tacos? Let your culinary creativity shine!
-
Vegan Delight: Replace ground meat with lentils or crumbled tofu, seasoned well for a hearty vegan experience. You won’t even miss the meat!
-
Gluten-Free Goodness: Swap out flour tortillas for corn tortillas, ensuring deliciousness without gluten. These golden shells will hold all those tasty fillings beautifully!
-
Zesty Veggie Boost: Add diced bell peppers, mushrooms, or zucchini to the filling mixture for extra nutrition and flavor. These veggies not only enhance texture but also bring a burst of freshness.
-
Spicy Kick: Mix in diced jalapeños or your favorite hot sauce to the meat or vegetable mixture for a spicy punch that’ll ignite your taste buds. Just be careful; a little heat goes a long way!
-
Cheesy Variations: Use different cheese blends like pepper jack or gouda to create exciting flavor combos. Each cheese contributes its unique touch, ensuring every bite is a surprise.
-
Salsa Substitution: Instead of diced tomatoes, use salsa for a flavor-packed alternative that adds zest and moisture. It’s a simple swap that amplifies the overall richness of your tacos.
-
Gourmet Touch: Try adding olives or sundried tomatoes for a briny, gourmet experience. This twist turns typical taco night into something extraordinary and sophisticated!
-
Crunchy Finish: Top off your tacos with crispy fried shallots or crushed tortilla chips for an enticing crunch. This delightful addition elevates the texture, making each bite irresistibly delicious.
Feel free to mix and match these variations based on your preferences. The only limit is your imagination! For more inspiration, don’t forget to check out these lovely recipes, like Parmesan Cheeseburger Bombs to explore comfort food or dive into the delightful flavors of Spicy Mexican Donkey. Enjoy crafting your unique Cheesy Pocket Taco experience!
Make Ahead Options
These Loaded Cheesy Pocket Tacos are perfect for meal prep enthusiasts! You can assemble the taco pockets up to 24 hours in advance and refrigerate them, keeping all those delicious fillings safely tucked inside. Simply layer your favorite ingredients on each tortilla, fold, and seal them well to prevent any filling from escaping. If you want to prep even further, cook the meat mixture and store it separately for up to 3 days in the refrigerator. When you’re ready to enjoy, just fry and bake the tacos as directed, and they will be just as delicious as if you made them fresh! This way, you can savor homemade goodness without the hassle during busy weeknights.
Cheesy Pocket Tacos Recipe FAQs
How do I choose the best tortillas for my Cheesy Pocket Tacos?
Absolutely! For optimal texture, I recommend using flour tortillas, which are soft and pliable. However, if you’re looking for a gluten-free option, corn tortillas work beautifully as well. Just be careful when folding; corn tortillas can be a bit more brittle.
What’s the best way to store leftover Cheesy Pocket Tacos?
To keep your tacos fresh, store any leftovers in an airtight container in the fridge for up to 3 days. When you’re ready to enjoy them again, I suggest reheating in the oven at 350°F (175°C) for about 10 minutes to regain that crispy texture.
Can I freeze Cheesy Pocket Tacos, and if so, how?
Yes, you can easily freeze your Cheesy Pocket Tacos! After cooking, let them cool completely. Wrap each taco tightly in plastic wrap or aluminum foil, and store them in a freezer-safe bag. They’ll last up to a month in the freezer. When you’re ready to eat, just thaw in the fridge overnight before reheating in the oven.
What should I do if my taco pockets are leaking fillings during cooking?
Very! If you find that your taco pockets are leaking, double-check that they’re sealed tightly after folding. To reinforce the seal, you can run a dab of water along the edges before pressing them down. This trick can really help keep all those delicious fillings inside!
Are Cheesy Pocket Tacos safe for kids and people with allergies?
Absolutely! You can customize the fillings to suit dietary needs. Just be cautious with allergens; for instance, use dairy-free cheese for those who are lactose intolerant. If you’re preparing a batch for kids, consider leaving out spicy ingredients or toppings like jalapeños to make them milder.
Tips for customizing Cheesy Pocket Tacos for dietary preferences?
For a plant-based version, simply replace the ground meat with lentils or tofu and opt for vegan cheese alternatives. You can also load them up with extra veggies like bell peppers or zucchini for a nutritious punch. The more, the merrier! Feel free to get creative with spices and toppings too!
Cheesy Pocket Tacos: Your New Favorite Comfort Food Delight
Ingredients
Equipment
Method
- Cook the Meat: In a large skillet, heat olive oil over medium heat. Add ground beef or turkey, cooking for 7-10 minutes until browned. Stir in taco seasoning and simmer for 3-4 minutes.
- Prepare Tortillas: Preheat oven to 350°F (175°C). Layer cooked meat mixture, black beans, corn, diced tomatoes, and cheeses on each tortilla.
- Form Taco Pockets: Fold each tortilla in half to form a sealed pocket.
- Fry Taco Pockets: Add cooking spray/oil to the skillet, and cook taco pockets for 2-3 minutes on each side until golden brown.
- Bake: Transfer taco pockets to a baking sheet, bake for 5-10 minutes until cheese is melted.
- Serve: Remove from oven, cool slightly, and serve topped with green onions, sour cream, and cilantro.
Leave a Reply