
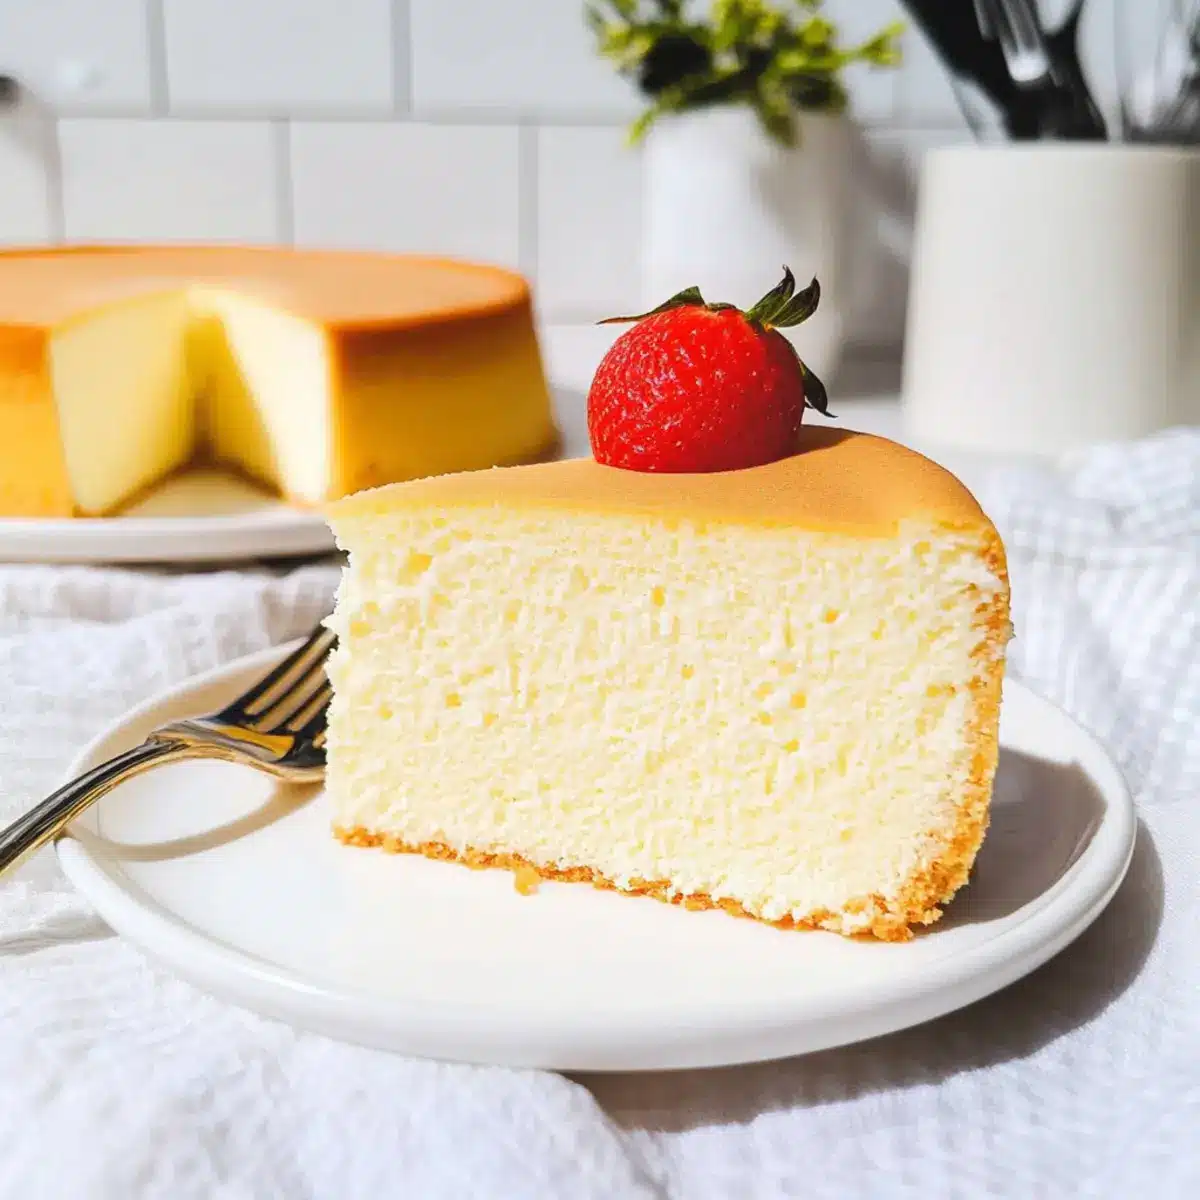
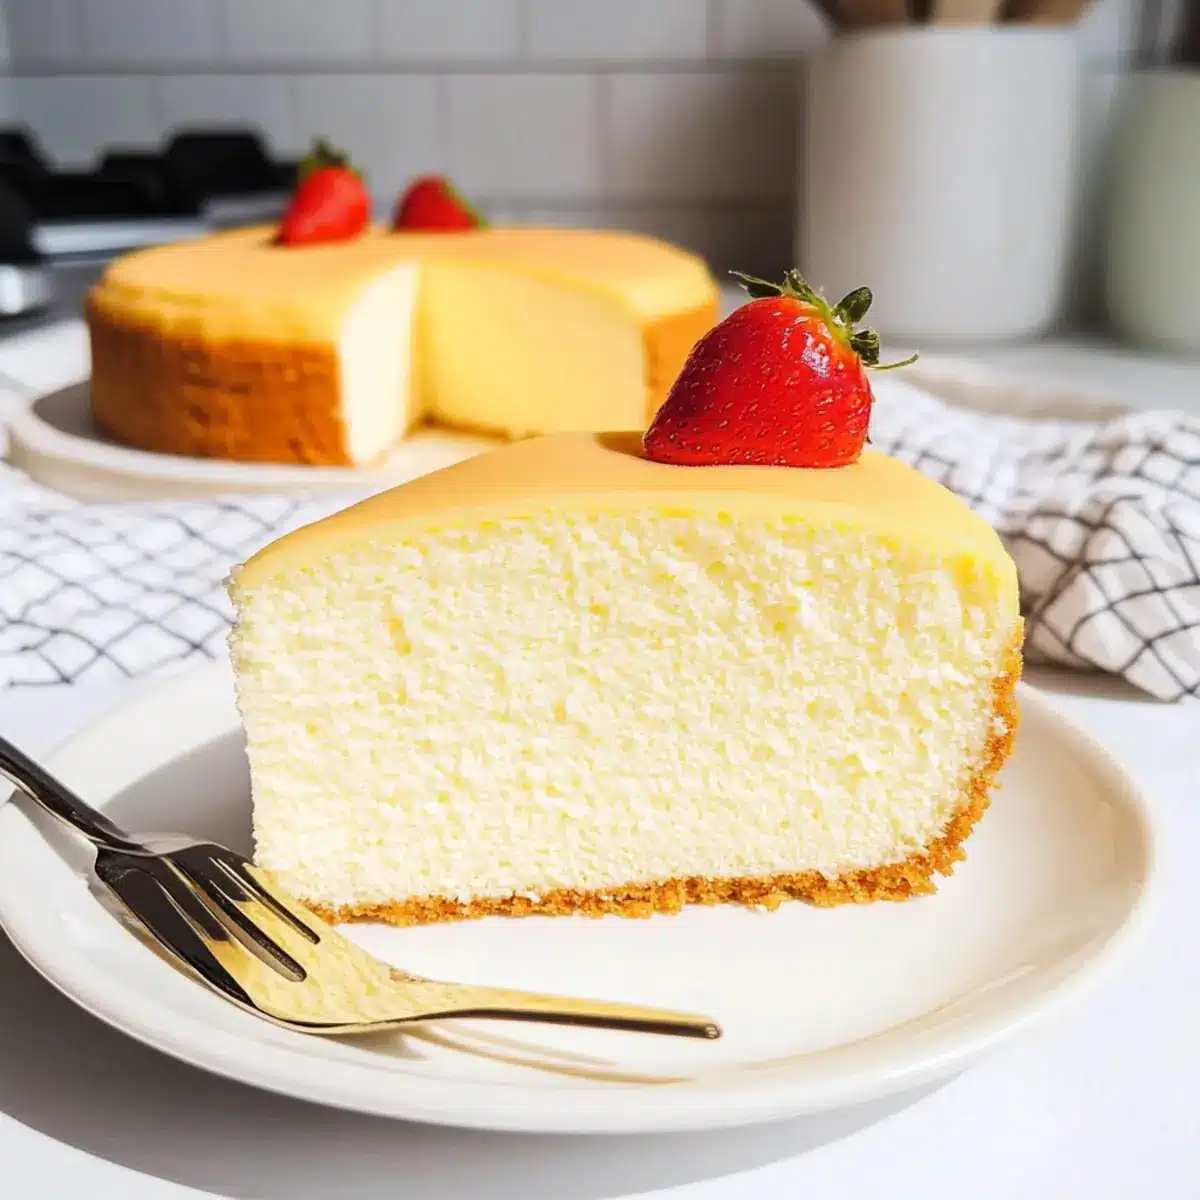
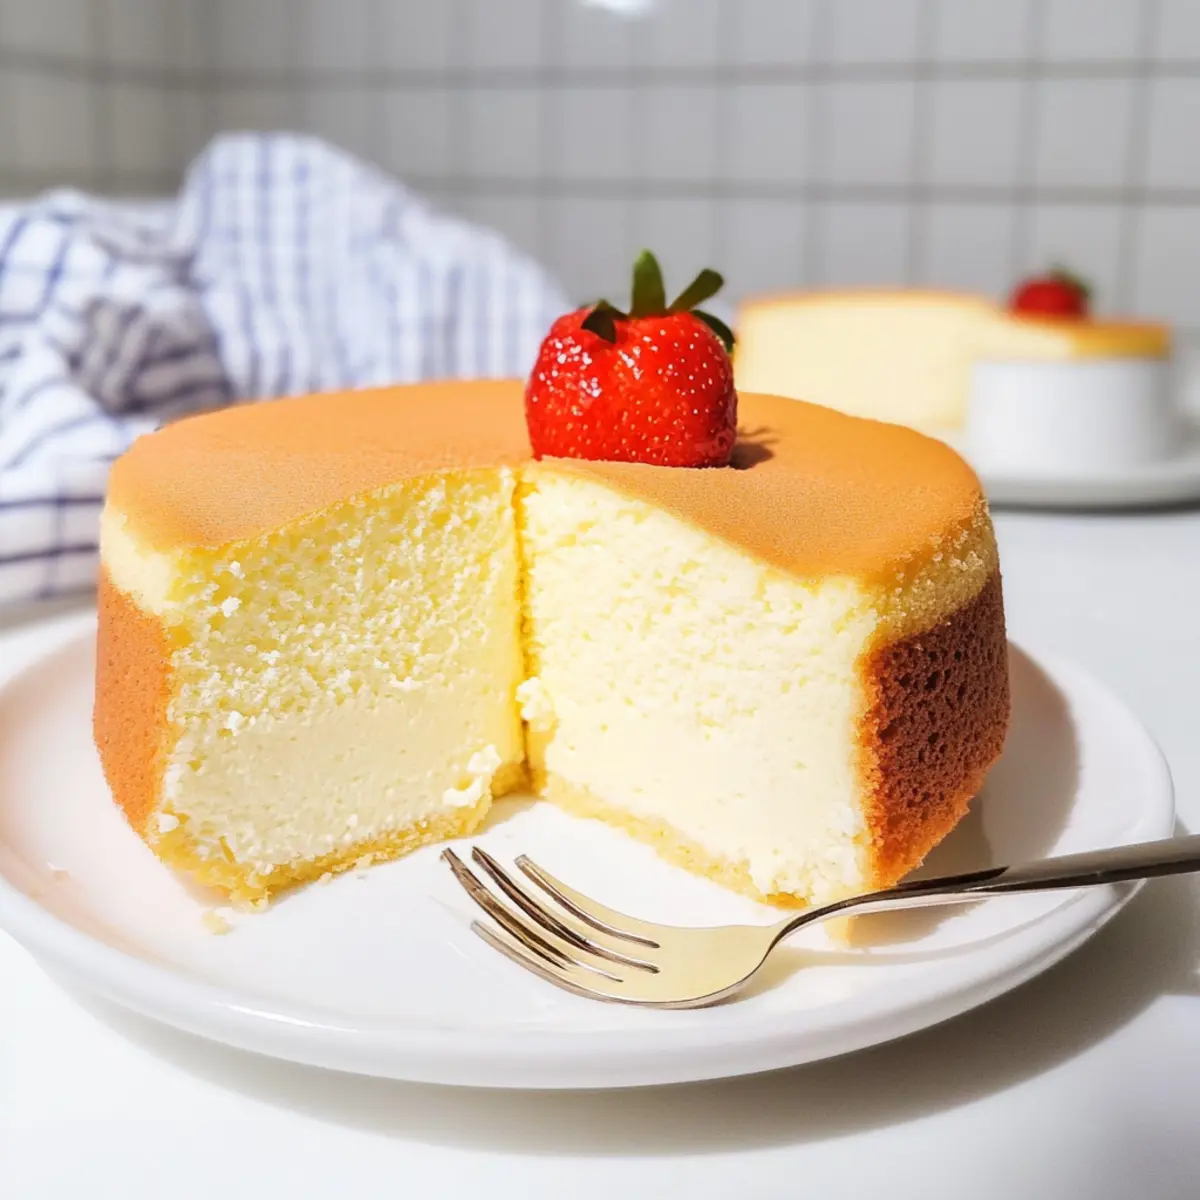
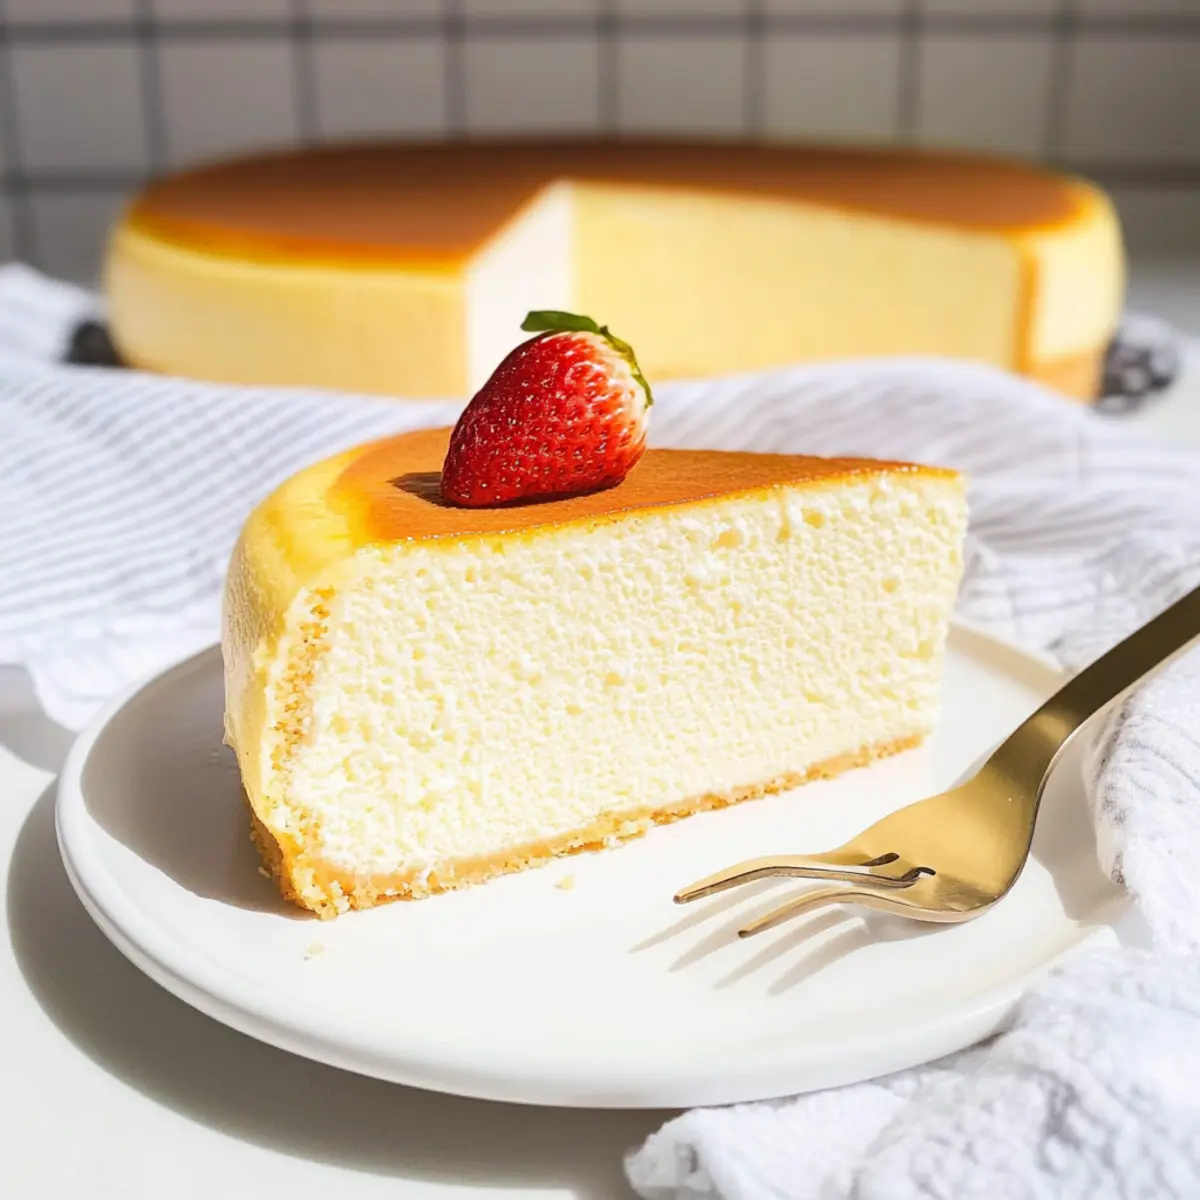
As the sweet aroma of baking fills the kitchen, I can’t help but feel a surge of excitement; there’s something magical about mastering the art of Japanese Cheesecake. This jiggly delight, often referred to as cotton cheesecake, offers a unique soufflé texture that will surprise and impress your guests. Not only is it a show-stopping dessert that’s sure to steal the spotlight at any gathering, but it also boasts a lightness that makes it a delightful end to any meal. Plus, with options to gluten-free variations, everyone can savor this heavenly treat. Ready to whip up your own slice of fluffy bliss? Let’s dive into this delectable recipe that will undoubtedly become a cherished favorite!
Why is Japanese Cheesecake so popular?
Light and Airy: This Japanese cheesecake has an astonishing fluffy texture that melts in your mouth, making it a delightful alternative to traditional cheesecakes.
Unique Flavors: The infusion of lemon zest and vanilla offers a subtle brightness that elevates each bite, ensuring it’s not overly sweet.
Versatile Options: Whether you’re entertaining guests or enjoying a cozy night in, it’s easy to adapt the recipe for gluten-free diets or flavored variations like matcha or chocolate.
Simple Steps: Unlike many desserts, this recipe keeps it straightforward. You can master it easily with basic baking techniques.
Showstopper Appeal: When served, its jiggly, golden-brown exterior is sure to impress, making it perfect for family gatherings or special occasions. Explore more delightful desserts like Pecan Pie Cheesecake or Pecan Pumpkin Cheesecake that also charm with their unique textures and flavors.
Japanese Cheesecake Ingredients
Explore the key ingredients that make this Japanese cheesecake a fluffy dream come true!
For the Batter
- Large Eggs (6, separated) – Provide structure and richness; make sure to separate yolks and whites carefully.
- Cream Cheese (8 oz, preferably softened) – Serves as the primary base for creaminess; use full-fat for the best flavor.
- Heavy Cream or Full-Fat Milk (¼ cup) – Adds moisture and richness to the batter.
- Unsalted Butter (4 tbsp, cut into smaller pieces) – Enhances richness and helps create a smooth texture.
- Cake Flour (½ cup, fluffed, spooned, and leveled) – Creates a light structure; swap with cornstarch for a gluten-free option.
- Lemon Zest (1 tbsp, about 1 lemon, optional) – Adds brightness and a hint of citrus to elevate the flavor.
- Vanilla Extract (1½ tsp, optional) – Provides warmth and depth of flavor; always a delightful addition!
- Granulated Sugar (⅓ cup) – Supplies sweetness and helps achieve that perfect meringue texture.
- Lemon Juice (2 tsp, about ⅓ of a lemon) – Enhances the flavor and stabilizes the meringue; optional but recommended.
For Toppings
- Powdered Sugar (for dusting) – An optional garnish for presentation that adds a touch of sweetness.
- Apricot Jam (for glazing, slightly warmed) – Adds aesthetic appeal and a touch of sweetness to the surface.
- Berries & Sweetened Whipped Cream – Optional toppings that enhance flavor and presentation; great for a festive touch!
Each ingredient plays a vital role in crafting this tender, airy Japanese cheesecake that’s sure to impress!
Step‑by‑Step Instructions for Japanese Cheesecake
Step 1: Preparation
Begin by preheating your oven to 300°F (150°C). Prepare an 8×3 inch round cake pan by lining it with parchment paper. Place this pan inside a larger baking tray. Fill the tray with hot water halfway up the sides of the cake pan to create a water bath, which helps the Japanese cheesecake bake evenly while preventing cracks.
Step 2: Base Batter
In a heatproof bowl over simmering water (bain-marie), combine 8 oz of softened cream cheese, 4 tbsp of unsalted butter, and ¼ cup of heavy cream. Stir gently until the mixture is smooth and completely blended, which will take around 5–7 minutes. Remove from heat, allowing it to cool slightly before moving on to the next step.
Step 3: Mix in Egg Yolks
Add 6 separated egg yolks to the cream cheese mixture, stirring until well incorporated. Gradually sift in ½ cup of cake flour, mixing until there are no visible dry spots. For an extra hint of flavor, fold in 1 tbsp of lemon zest and 1½ tsp of vanilla extract. Set this creamy batter aside while you prepare the meringue.
Step 4: Meringue Preparation
In a clean, dry bowl, beat 6 egg whites along with 2 tsp of lemon juice until frothy. Gradually add ⅓ cup of granulated sugar while continuing to beat. Keep whisking until medium-soft peaks form, which should take about 5 minutes using an electric mixer. The meringue should be glossy with a smooth consistency.
Step 5: Combine Batters
Carefully fold one-third of the meringue into the cream cheese mixture, using a spatula to gently combine without deflating it. Once incorporated, gently add the remaining meringue in two parts, folding delicately. This ensures that the light, airy texture of the Japanese cheesecake is maintained.
Step 6: Bake
Pour the combined batter into the prepared cake pan. Tap the pan lightly on the counter to release any trapped air bubbles, then carefully place it in the oven’s water bath. Bake for 80-90 minutes until the top is golden brown and a skewer inserted in the center comes out clean. Keep an eye on the cheesecake, as oven temperatures may vary.
Step 7: Cooling
Once baked, turn off the oven and slightly crack the door to let it cool gradually for about 10 minutes. Then, gently remove the cheesecake from the oven and carefully tilt it on its side on a cooling rack. Allow it to cool completely in this position before flipping it upright and transferring it to a serving plate.
Make Ahead Options
These Japanese cheesecake make-ahead tips are perfect for busy home cooks looking to save time! You can prepare the cream cheese batter and store it in the refrigerator for up to 24 hours before baking, ensuring it’s covered tightly to maintain freshness. The meringue can also be whipped and kept in a separate container to prevent it from deflating; just be sure to fold it into the batter right before baking. When you’re ready to serve, simply combine the batter and meringue, bake as directed, and enjoy a light and fluffy dessert that’s just as delicious as if it were freshly made! This way, you streamline your baking process without sacrificing quality.
Storage Tips for Japanese Cheesecake
-
Fridge: Store your Japanese cheesecake in an airtight container for up to 3-4 days. This will help maintain its fluffy texture and prevent absorption of odors from the fridge.
-
Freezer: For longer storage, freeze the cheesecake for up to 2 months. Wrap it tightly in plastic wrap, then place it in a freezer bag to protect it from freezer burn.
-
Thawing: When ready to enjoy, thaw the cheesecake in the fridge overnight or at room temperature for a few hours before serving. This will help retain its light, airy texture.
-
Reheating: If you prefer a warm slice, gently reheat the cheesecake in the oven at 300°F for about 10 minutes to rejuvenate its freshly baked taste.
What to Serve with Light and Fluffy Japanese Cotton Cheesecake
Every slice of this airy delight is a celebration on its own, but pairing it with complementary flavors can elevate your dessert experience to new heights.
-
Fresh Berries: Juicy strawberries or raspberries add a refreshing tartness that beautifully contrasts the cheesecake’s sweetness.
-
Whipped Cream: A dollop of sweetened whipped cream enhances the fluffy texture, making each bite even more indulgent.
-
Chocolate Drizzle: Rich melted chocolate drizzled over your cheesecake adds a decadent twist, creating a luscious flavor combination.
-
Citrus Sorbet: A scoop of lemon or orange sorbet offers a bright, refreshing palate cleanser that complements the cheesecake’s creamy texture.
-
Earl Grey Tea: This aromatic tea pairs wonderfully, with its bergamot flavor enhancing the cake’s subtle notes of vanilla and lemon.
-
Honey Glaze: A light drizzle of honey adds a touch of natural sweetness that harmonizes beautifully with the cheesecake’s fluffy richness.
Expert Tips for Japanese Cheesecake
-
Grease-Free Gear: Ensure all bowls and utensils are completely grease-free for optimal meringue performance; any residue can prevent proper whipping.
-
Water Bath Precision: The water bath is crucial in achieving that delicate texture, so always use hot water to bake your Japanese cheesecake evenly and prevent cracks.
-
Watch the Oven: Oven temperatures can vary significantly. If the top of the cheesecake is pale, use the broil setting briefly to achieve that perfect golden-brown finish.
-
Avoid Shrinkage: Some shrinkage is natural, but severe deflation indicates under-whipping or under-baking, so ensure you beat the meringue to the right consistency.
-
Cooling Carefully: Cool the cheesecake on its side first; this process helps to maintain its airy texture, achieving that signature fluffy top when flipped for serving.
-
Flavorful Variations: Experiment with adding flavors like matcha, chocolate, or fruit purees into the batter for a unique twist on your Japanese cheesecake!
Japanese Cheesecake Variations and Substitutions
Feel free to explore these delightful twists and adjustments to make this recipe your own!
-
Gluten-Free: Substitute cake flour with a blend of almond flour and cornstarch for a gluten-free delight. It still delivers on fluffiness and taste!
-
Flavor Infusion: Stir in 1-2 tbsp of matcha powder or cocoa powder into the batter for a unique flavor twist. Each bite will transport you to a new culinary experience!
-
Smaller Portions: Divide the recipe by half to make a petite Japanese cheesecake fit for one or two. It’s the perfect way to enjoy this treat without overindulging.
-
Lemon Lovers: Add a bit more lemon juice for extra tang, or incorporate lemon extract for a zesty boost that complements the creaminess beautifully.
-
Fruit Variations: Swirl in pureed strawberries or mango into the batter for a fruity flavor pop. Each slice will taste like spring with every blissful bite!
-
Cheesecake Bites: Pour the batter into muffin tins to create mini cheesecakes. These little bites are perfect for gatherings, like my scrumptious Crisp Mini Cheesecakes!
-
Cream Cheese Swaps: Use ricotta for a lighter texture or mascarpone for a richer flavor. Your choice can really transform the final result based on your cravings!
-
Topping Twist: Instead of plain whipped cream, top with a drizzle of caramel or chocolate sauce. It accentuates the sweetness while offering a beautiful presentation. Don’t forget to check out my Pecan Pie Cheesecakes for some topping inspiration!
Let your cravings guide you as you customize this fluffy delight, and don’t shy away from experimenting!
Japanese Cheesecake Recipe FAQs
What type of cream cheese should I use for the best results?
I recommend using full-fat cream cheese for optimal flavor and creaminess. Make sure it’s softened to room temperature before you start; this helps it blend smoothly into the batter, giving your Japanese cheesecake that dreamy texture we all love!
How can I tell when my eggs are fresh enough to use?
To check the freshness of your eggs, simply place them in a bowl of water. Fresh eggs will sink and lay flat on the bottom, while older eggs will stand upright or float. I always ensure I use the freshest eggs, as they provide the best structure and flavor to my cheesecake.
What’s the best way to store leftover Japanese cheesecake?
Store your Japanese cheesecake in an airtight container in the fridge for up to 3-4 days. This keeps the cheesecake moist and fluffy while preventing it from absorbing any odors. If you want to save it for longer, you can freeze it for up to 2 months. Just wrap it snugly in plastic wrap and place it in a freezer bag!
Can I freeze my Japanese cheesecake? If so, how?
Absolutely! To freeze, wrap the cooled cheesecake tightly in plastic wrap, ensuring there are no exposed areas, and then place it in a freezer bag. When you’re ready to enjoy it, simply thaw it in the fridge overnight or at room temperature for a few hours. This helps preserve its light, airy texture!
Are there any dietary alternatives I can use in this recipe?
If you’re looking for gluten-free options, substitute the cake flour with a mix of gluten-free all-purpose flour and cornstarch in equal ratios. For a lighter treat, consider using low-fat cream cheese or Greek yogurt in place of standard cream cheese. Just keep in mind that this may affect the texture slightly, so I encourage you to experiment until you find your favorite version!
What if my Japanese cheesecake cracks while baking?
Cracking usually happens due to sudden temperature changes or overbaking. To avoid this, always use a hot water bath to ensure even baking. Additionally, keep a close eye on your cheesecake as it bakes: it should be golden brown and slightly jiggly in the center. If it looks pale or under-baked, you can give it a quick broil for a minute or two to enhance the color.
Fluffy Japanese Cheesecake Recipe for Sweet Dreamy Desserts
Ingredients
Equipment
Method
- Preheat your oven to 300°F (150°C) and prepare an 8x3 inch round cake pan with parchment paper, placing it in a larger baking tray filled with hot water halfway up the sides.
- In a heatproof bowl over simmering water, combine 8 oz of softened cream cheese, 4 tbsp of unsalted butter, and ¼ cup of heavy cream. Stir until smooth, about 5-7 minutes, then cool slightly.
- Mix in 6 egg yolks, followed by ½ cup of cake flour, 1 tbsp of lemon zest, and 1½ tsp of vanilla extract until well combined.
- In a clean bowl, beat 6 egg whites with 2 tsp of lemon juice until frothy, gradually adding ⅓ cup of granulated sugar until medium-soft peaks form.
- Fold one-third of the meringue into the cream cheese mixture, then gently incorporate the remaining meringue in two parts.
- Pour the batter into the prepared cake pan, tap lightly to release air bubbles, and bake for 80-90 minutes until golden brown.
- After baking, turn off the oven, crack the door, and cool for about 10 minutes before removing and cooling completely on its side.
Leave a Reply