
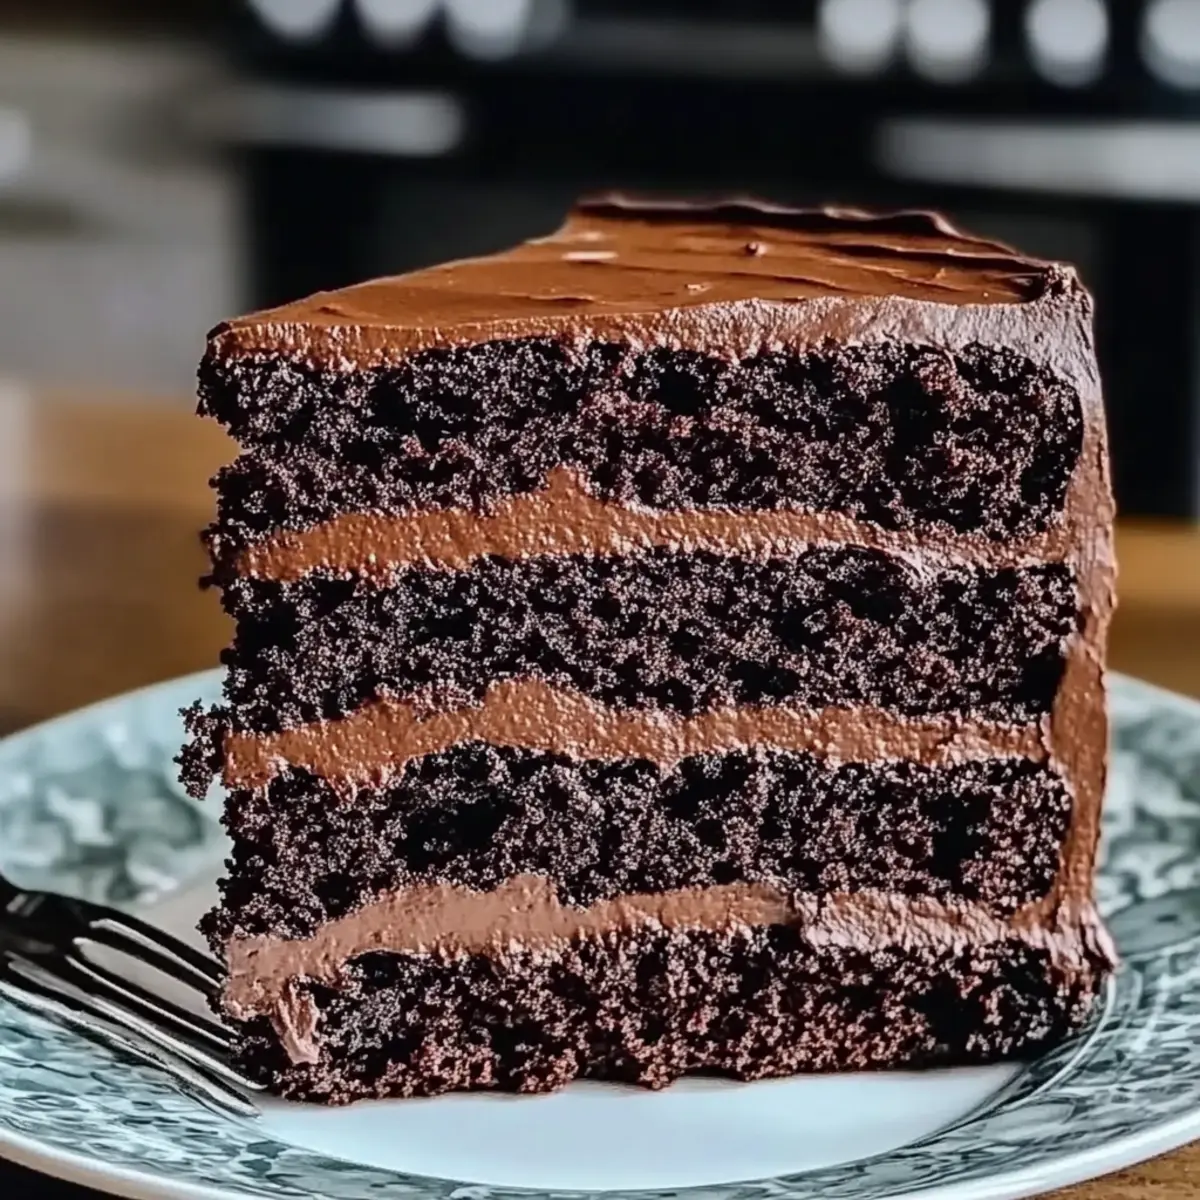
As I stood in my kitchen, the aroma of melting chocolate filled the air, transporting me back to that unforgettable scene in Matilda. Inspired by this cinematic classic, the Matilda Chocolate Cake is not just a dessert; it’s an experience. Rich, moist, and ludicrously fudgy, this cake is a perfect centerpiece for any birthday celebration or a cozy movie night. What makes it truly special? It’s not only easy to whip up, but it also features a delightful fusion of three different types of chocolate, creating layers of flavor in every slice. Imagine indulging your loved ones with a showstopper that’s sure to be their new favorite. Are you ready to create a chocolate masterpiece that will astonish everyone?
Why is Matilda Chocolate Cake a Must-Try?
Unforgettable Flavor: This cake boasts a triple dose of chocolate goodness that delivers an intense, satisfying taste in every bite. Effortless Preparation: With simple steps and minimal fuss, even novice bakers can achieve impressive results. Versatile Treat: Perfect as a birthday cake or a sweet surprise for movie nights, it adapts beautifully to any occasion. Decadent Texture: Its fudgy, moist layers pair perfectly with the velvety ganache, making it a true indulgence. Plus, don’t miss out on pairing it with a scoop of vanilla ice cream for an even richer experience!
Matilda Chocolate Cake Ingredients
For the Cake
• Dark Chocolate – Adds depth and moisture; use high-quality chocolate (60-70% cocoa) for best flavor.
• Dutch-Processed Cocoa Powder – Provides rich chocolate flavor; sift before use to avoid lumps.
• All-Purpose Flour – Gives structure to the cake; measure accurately for best results.
• Granulated Sugar – Adds sweetness; combined with brown sugar for a well-balanced flavor.
• Light Brown Sugar – Deepens flavor and adds moisture; perfect for that fudgy texture.
• Unsalted Butter – Creates a tender crumb; ensure it is at room temperature for easy incorporation.
• Large Eggs – Provides structure and stability; use room temperature eggs for better emulsification.
• Buttermilk – Adds moisture and a slight tang; can substitute with yogurt or milk mixed with vinegar.
• Baking Soda & Baking Powder – Leavening agents for rise; check expiration for effectiveness.
• Espresso Powder – Enhances the chocolate flavor; optional but recommended for extra depth.
• Pure Vanilla Extract – Adds flavor complexity; always use pure extract for best results.
• Salt – Balances sweetness and enriches flavors; use fine sea salt for even distribution.
• Semi-Sweet Chocolate Chips – Adds richness and texture; fold in gently to avoid melting.
For the Ganache
• Heavy Cream – Creates a rich, creamy base; heat until simmering to melt the chocolate properly.
• Semi-Sweet Chocolate – Perfect for a glossy ganache; allows for that luxurious finish.
• Unsalted Butter – Enhances shine and smoothness; the secret to a satiny texture.
Using these ingredients, you’ll create an utterly irresistible Matilda Chocolate Cake that will steal the show at any gathering!
Step‑by‑Step Instructions for Matilda Chocolate Cake
Step 1: Preheat Oven & Prepare Pans
Begin by preheating your oven to 350°F (175°C). While it’s warming up, prepare two 9-inch round cake pans by greasing them with butter and lining the bottoms with parchment paper. This will ensure the Matilda Chocolate Cake releases easily once baked. Set the pans aside and get ready for the next step as the oven reaches temperature.
Step 2: Melt Chocolate
Chop the dark chocolate into small pieces and place it in a heatproof bowl. Set it over a pot of simmering water to create a double boiler, allowing the chocolate to melt gently. Stir occasionally until fully melted, then remove from heat and let it cool slightly. This chocolate will add depth and moisture to your cake, enhancing its rich flavor profile.
Step 3: Cream Butter and Sugars
In a large mixing bowl, combine the room-temperature unsalted butter, granulated sugar, and light brown sugar. Using an electric mixer, beat on medium speed for about 3 minutes until the mixture becomes light and fluffy. The sugars should dissolve into the butter, creating an airy texture that will help your Matilda Chocolate Cake rise beautifully.
Step 4: Add Eggs & Vanilla
Crack the large eggs into the butter mixture, adding them one at a time. Beat well after each addition until fully incorporated. Then, add the pure vanilla extract, mixing until smooth. This step adds structure to your cake and infuses it with delightful flavor, ensuring each bite of the Matilda Chocolate Cake is memorable.
Step 5: Incorporate Chocolate
Once the melted chocolate has cooled slightly, pour it into the batter. Gently mix it in with a spatula or wooden spoon until well combined, taking care not to over-mix. The chocolate should seamlessly blend into your batter, adding a rich, fudgy texture that defines this indulgent Matilda Chocolate Cake.
Step 6: Combine Dry Ingredients
In a separate bowl, whisk together the all-purpose flour, Dutch-processed cocoa powder, baking soda, baking powder, espresso powder, and salt. This dry ingredient mixture is crucial for giving the cake structure and depth. Sift these ingredients together to eliminate lumps and ensure an even distribution before proceeding.
Step 7: Mix Wet and Dry Ingredients
Begin to add the dry flour mixture to the wet ingredients in three additions, alternating with the buttermilk. Start and end with the dry ingredients, mixing gently after each addition until just combined. Finally, fold in the semi-sweet chocolate chips, which will add delightful pockets of richness to your Matilda Chocolate Cake, ensuring every slice is a treat.
Step 8: Divide & Bake
Pour the cake batter evenly into the prepared pans, smoothing the tops with a spatula. Place them in the preheated oven and bake for 30-35 minutes, or until a toothpick inserted in the center comes out with moist crumbs. Keep an eye on them towards the end of cooking for perfect doneness, ensuring your cake rises beautifully.
Step 9: Cool
Once baked, remove the cake pans from the oven and let them cool in the pans for 10 minutes. Carefully invert the cakes onto wire racks, and peel off the parchment paper. Allow the layers to cool completely before frosting, as this will prevent the ganache from melting and sliding off the Matilda Chocolate Cake.
Step 10: Prepare Ganache
While your cakes cool, prepare the ganache by heating the heavy cream in a small saucepan until it reaches a simmer. Pour the hot cream over the chopped semi-sweet chocolate in a bowl. Let it sit for a few minutes to soften, then stir until smooth. To elevate the texture, add unsalted butter and mix until glossy, ready to pour over your cake.
Step 11: Assemble Cake
To assemble your Matilda Chocolate Cake, place one layer on a serving plate and spread a generous amount of ganache on top. Gently place the second layer on top, evenly centering it. Pour the remaining ganache over the top of the cake, allowing it to cascade down the sides for an irresistible finish.
What to Serve with Matilda Chocolate Cake
Creating a remarkable meal around the Matilda Chocolate Cake not only elevates your dessert but also enhances the experience for everyone involved.
-
Fresh Berries: The tartness of strawberries or raspberries beautifully contrasts the rich chocolate, adding a refreshing bite.
-
Whipped Cream: A dollop of lightly sweetened whipped cream adds airiness and balances the cake’s decadence, making every forkful a dream.
-
Vanilla Ice Cream: The creamy, smooth texture of vanilla ice cream melts into the cake, providing a comforting warmth and a delightful contrast to its fudginess.
-
Chocolate-Covered Almonds: These delightful treats add a crunchy texture and a nutty flavor that echoes the chocolate, creating an extraordinary chocolate lover’s playground.
-
Espresso: A hot cup of espresso brings out the flavors of the cake while providing a delightful contrast; it heightens the chocolate notes and serves as a perfect accompaniment.
-
Mint Chocolate Chip Milkshake: The cool, refreshing flavor of mint pairs perfectly with the cake’s rich chocolate, creating a fun and indulgent pairing.
-
Caramel Sauce: Drizzling warm caramel over each slice amplifies the sweetness and adds a luscious, sticky texture to your experience.
-
Fruit Salad: A light fruit salad with citrus notes can cleanse the palate, balancing the cake’s richness while introducing vibrant flavors.
-
Red Wine: A glass of full-bodied red wine, like Cabernet Sauvignon, enhances the chocolate notes, creating an elegant pairing for an adults-only dessert night.
Make Ahead Options
These Matilda Chocolate Cakes are perfect for meal prep enthusiasts looking to save time during busy weeknights! You can prepare the cake layers up to 24 hours in advance; simply bake the cakes, cool completely, and tightly wrap them in plastic wrap before refrigerating. This will help retain moisture and flavors. The ganache can also be made ahead of time; store it in an airtight container in the fridge for up to 3 days. When you’re ready to serve, let the ganache come to room temperature and reheat gently if needed. Finish assembling by spreading the ganache between the layers and over the top, and you’ll have an indulgent Matilda Chocolate Cake that tastes just as delicious as if it were freshly made!
How to Store and Freeze Matilda Chocolate Cake
Fridge: Store leftovers in an airtight container in the fridge for up to 3 days. This keeps the cake moist and fresh for your next indulgent treat.
Freezer: For longer storage, wrap slices tightly in plastic wrap or foil and place them in an airtight container. The Matilda Chocolate Cake can be frozen for up to 3 months.
Reheating: When ready to enjoy, thaw at room temperature for a few hours or overnight in the fridge. Warm individual slices in the microwave for about 10-15 seconds for a cozy, fudgy experience.
Layering: If you’ve assembled the cake, ensure it’s well-wrapped to prevent freezer burn, preserving the glossy ganache and rich flavors.
Expert Tips for Matilda Chocolate Cake
-
Room Temperature Ingredients: Use eggs and butter at room temperature to achieve a smoother batter and better rise for your Matilda Chocolate Cake.
-
Quality Chocolate Matters: Opt for high-quality dark chocolate (60-70% cocoa) to enhance the rich flavor of your cake, ensuring that every slice is decadent.
-
Avoid Over-Mixing: Gently fold the ingredients together to keep your cake light and fluffy. Excessive mixing can lead to a dense texture that’s less enjoyable.
-
Perfect Ganache: For a glossy finish, add a little corn syrup to your ganache and let the cream cool slightly before pouring it over the cake.
-
Sift Cocoa Powder: Always sift your Dutch-processed cocoa powder to avoid lumps, ensuring a smooth and lump-free batter for your chocolate cake.
-
Substitutions Made Easy: If you have dietary needs, feel free to substitute regular buttermilk with yogurt or a dairy-free milk to make a delicious version of the Matilda Chocolate Cake.
Matilda Chocolate Cake Variations
Feel free to put your own spin on this decadent cake, making it uniquely yours!
- Milk or White Chocolate: Swap dark chocolate for milk or white chocolate for a sweeter, lighter flavor profile. Each variation offers a different taste adventure.
- Dairy-Free Delight: Use almond milk or coconut milk instead of buttermilk for a lactose-free option. This keeps the cake moist while accommodating dietary restrictions.
- Fruity Layer: Incorporate fresh raspberries or cherries between the cake layers for a burst of flavor and color. The tartness complements the rich chocolate beautifully.
- Nutty Crunch: Fold in chopped walnuts or pecans into the batter for added texture and crunch. These nuts not only enhance the flavor but also provide a delightful contrast to the fudgy cake.
- Peppermint Twist: Add a few drops of peppermint extract to the batter for a refreshing seasonal touch. Perfect for holiday celebrations!
- Extra Rich Ganache: Mix in a tablespoon of corn syrup to your ganache for an ultra-glossy finish. This simple addition elevates both the flavor and appearance of your cake.
- Cocoa Nibs: Substituting some chocolate chips for cocoa nibs gives a slight bitterness that balances the sweetness perfectly. This tweak adds an artisan twist.
- Spicy Kick: Sprinkle in a touch of cinnamon or cayenne pepper to the dry mix for a warm, spicy note that pairs excellently with chocolate.
If you love customizing recipes, you might also enjoy making our delightful White Chocolate Cranberry Tart or the festive Gingerbread Wreath Cake. Each of these treats brings its own unique twist to any dessert table!
Matilda Chocolate Cake Recipe FAQs
What should I look for when selecting dark chocolate?
Absolutely! When choosing dark chocolate for your Matilda Chocolate Cake, look for high-quality chocolate with 60-70% cocoa content. This guarantees the depth and richness you desire. The packaging should also indicate whether it’s labeled as “bittersweet” or “semi-sweet” to ensure you get a flavor that complements your cake beautifully.
How should I store the leftover Matilda Chocolate Cake?
Very! To keep your delicious Matilda Chocolate Cake fresh, store leftovers in an airtight container in the refrigerator for up to 3 days. If it’s sliced, ensure each piece is wrapped well to retain its moisture. The cake tastes even better the next day, as the flavors continue to meld together!
Can I freeze Matilda Chocolate Cake? If so, how?
Absolutely! To freeze your cake, wrap each slice tightly with plastic wrap, then place them in an airtight container or a freezer bag. This will protect them from freezer burn and preserve their decadent flavor. Your Matilda Chocolate Cake can stay in the freezer for up to 3 months! When you’re ready to enjoy it, simply thaw at room temperature for a few hours or overnight in the fridge.
What if my cake doesn’t rise properly?
Oh, no! If your Matilda Chocolate Cake doesn’t rise as expected, the most common culprits are stale leavening agents or over-mixing the batter. Always check the expiration dates on your baking powder and baking soda. Additionally, mix your ingredients until just combined; over-mixing can create a dense texture. If you suspect your oven temperature may be off, you might want to invest in an oven thermometer to ensure accuracy.
Can I make this cake dairy-free?
Yes indeed! For a dairy-free version of the Matilda Chocolate Cake, simply substitute the buttermilk with a dairy-free option like almond milk mixed with a tablespoon of vinegar or yogurt. Additionally, ensure you use dairy-free chocolate, and you’ll have a delightful treat that everyone can enjoy!
Is this cake safe for pets or allergies?
Be cautious! Chocolate is toxic to pets, so ensure your furry friends don’t get any scraps. Additionally, if someone in your gathering has allergies, be mindful of substituting ingredients like eggs and gluten. You can easily replace eggs with a flaxseed meal mixture (1 tablespoon of ground flaxseed whisked with 2.5 tablespoons of water per egg) or use gluten-free flour for a suitable alternative.
Decadent Matilda Chocolate Cake: Ultimate Indulgence Awaits
Ingredients
Equipment
Method
- Preheat the oven to 350°F (175°C) and prepare two 9-inch round cake pans.
- Melt the dark chocolate in a double boiler until smooth, then cool slightly.
- Cream together unsalted butter, granulated sugar, and light brown sugar until light and fluffy.
- Add eggs one at a time, beating well, then mix in the vanilla.
- Incorporate the melted chocolate into the batter until well combined.
- Whisk together flour, cocoa powder, baking soda, baking powder, espresso powder, and salt in a separate bowl.
- Add dry ingredients to the wet ingredients in three additions, alternating with buttermilk, mixing gently.
- Fold in semi-sweet chocolate chips careful not to over-mix.
- Pour batter into prepared pans and bake for 30-35 minutes until a toothpick comes out with moist crumbs.
- Cool in pans for 10 minutes, then invert onto wire racks to cool completely.
- Prepare ganache by simmering heavy cream and pouring it over chopped semi-sweet chocolate until smooth, adding butter.
- Assemble the cake by spreading ganache between layers and pouring over the top.
Leave a Reply