
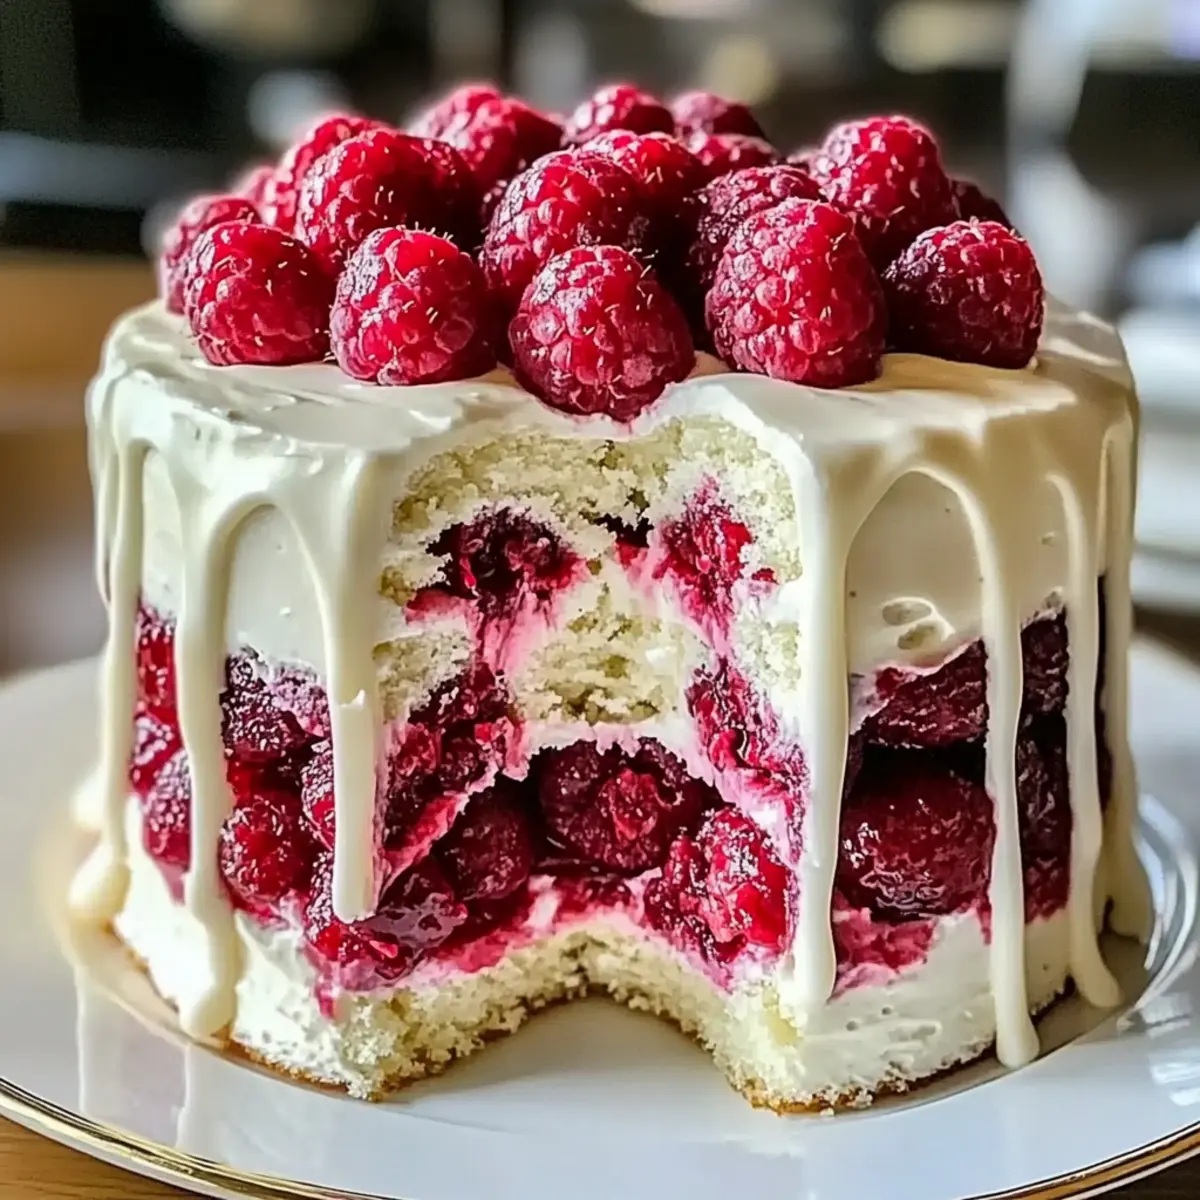
As I stood in my kitchen, the sweet aroma of melting white chocolate wafted through the air, drawing me into a blissful moment of pure indulgence. This is where the magic begins with my White Chocolate Raspberry Dream Cake—a show-stopping dessert that’s sure to impress. Not only does it feature rich, buttery cake layers, but it also cleverly blends the sweet-tart notes of fresh (or frozen) raspberries for a delightful contrast. This elegant dessert is quick to prepare and offers a sophisticated touch that makes it perfect for birthdays, holidays, or any special occasion. Curious about how to create this culinary masterpiece that will enchant your guests and satisfy your sweet cravings? Let’s dive into the recipe!
Why is this cake a must-try?
Indulgent layers of white chocolate envelop a delightful raspberry filling that strikes a perfect balance of sweetness and tartness. Elegant yet easy to prepare, this show-stopping dessert elevates any gathering, whether it’s a birthday or holiday celebration. Versatile enough to enjoy as cupcakes or a slab cake, it fits any occasion. Plus, it makes a stunning centerpiece that’ll have your guests raving! Don’t forget to try it with a scoop of vanilla ice cream for that extra touch of decadence.
White Chocolate Raspberry Dream Cake Ingredients
For the Cake
- All-Purpose Flour – Provides structure for the cake layers; gluten-free all-purpose flour works well too.
- Baking Powder – A leavening agent needed for the cake to rise; make sure it’s fresh for the best results.
- Salt – Enhances the flavors of the cake; use kosher salt for a milder taste.
- Unsalted Butter – Adds rich flavor and moisture; feel free to substitute with vegan butter for a dairy-free version.
- Granulated Sugar – Sweetens the cake and helps with tenderness; coconut sugar is a great lower glycemic alternative.
- Eggs – Essential for moisture and stability; flax eggs can replace them for a vegan option.
- Vanilla Extract – Adds depth of flavor; using pure vanilla ensures the best taste.
- White Chocolate Chips – Infuses the cake with creamy sweetness; opt for high-quality baking-grade chocolate instead of candy melts.
- Whole Milk – Adds moisture to the batter; almond or coconut milk can be used for lactose-free options.
For the Raspberry Filling
- Fresh or Frozen Raspberries – Creates the tart filling that contrasts beautifully with sweet chocolate; fresh offers brightness while frozen provides convenience.
- Sugar (for filling) – Sweetens the raspberry filling; adjust based on the sweetness of your raspberries.
- Lemon Juice – Brightens the raspberry flavor; freshly squeezed juice is always best.
- Cornstarch – Thicken the filling; arrowroot powder can be used as a substitute if desired.
For the Frosting
- Unsalted Butter (for frosting) – The base for a creamy and rich frosting; swap with vegan butter for a non-dairy version.
- Powdered Sugar – Sweetens and thickens the frosting; you can make your own by blending granulated sugar until fine.
- Milk (for frosting) – Adjusts the consistency of the frosting; plant-based milk works well for dairy-free.
Optional Garnishes
- Fresh Raspberries – Add a burst of color and flavor on top.
- White Chocolate Curls – Garnish for that elegant touch.
- Mint Leaves – Fresh mint can elevate the presentation.
With these ingredients, you’ll be one step closer to creating the stunning White Chocolate Raspberry Dream Cake!
Step‑by‑Step Instructions for White Chocolate Raspberry Dream Cake
Step 1: Prepare the Oven and Pans
Preheat your oven to 350°F (175°C) and grease three 8-inch round cake pans with unsalted butter. Dust the pans lightly with flour, tapping out any excess. This ensures that the cake layers release easily after baking. Take a moment to prepare your workspace, as the exciting process of making the White Chocolate Raspberry Dream Cake begins here!
Step 2: Combine Dry Ingredients
In a medium mixing bowl, whisk together 2 cups of all-purpose flour, 2 teaspoons of baking powder, and a pinch of salt until evenly combined. This mixing will aerate the flour and incorporate the leavening agent. Set the bowl aside as we prepare the buttery cake batter, ensuring your layers will rise beautifully in the oven.
Step 3: Cream Butter and Sugar
In a stand mixer fitted with a paddle attachment, beat 1 cup of softened unsalted butter and 1 cup of granulated sugar together on medium-high speed until the mixture becomes light and fluffy, about 4–5 minutes. The color should change to a pale yellow. This step is crucial for the White Chocolate Raspberry Dream Cake’s tender crumb, so take your time!
Step 4: Incorporate Eggs and Vanilla
With the mixer running, add 4 large eggs one at a time to the creamed butter and sugar, allowing each egg to fully incorporate before adding the next. Follow with 1 tablespoon of pure vanilla extract and 1 cup of melted white chocolate, mixing until smooth. This mixture will create the rich, flavorful foundation of your cake.
Step 5: Mix Wet and Dry Ingredients
Gradually add the dry ingredients to the butter mixture, alternating with 1 cup of whole milk. Begin and end with the dry ingredients, stirring until just combined to avoid overmixing. The batter should be smooth and creamy with a few small lumps remaining for the White Chocolate Raspberry Dream Cake texture that melts in your mouth.
Step 6: Bake the Cake Layers
Evenly divide the batter among the three prepared pans. Bake in the preheated oven for 25–30 minutes, or until a toothpick inserted in the center comes out clean. The cakes should be golden brown on top. Once baked, allow them to cool in the pans for 10 minutes before carefully inverting them onto wire racks to cool completely.
Step 7: Prepare the Raspberry Filling
In a saucepan over medium heat, combine 2 cups of raspberries, 1/2 cup of sugar, the juice of 1 lemon, and 2 tablespoons of cornstarch. Cook while stirring gently until the mixture thickens and bubbles, about 5–7 minutes. Once it has reached a thick consistency, remove it from the heat and let the filling cool completely before using.
Step 8: Make the Frosting
In a large mixing bowl, beat together 1 cup of softened unsalted butter, 4 cups of powdered sugar, 1/2 cup of melted white chocolate, and 2-3 tablespoons of milk. Mix on low speed until combined, then increase to high and beat until the frosting is smooth and fluffy, about 3-4 minutes. This luscious frosting will perfectly complement our White Chocolate Raspberry Dream Cake.
Step 9: Assemble the Cake
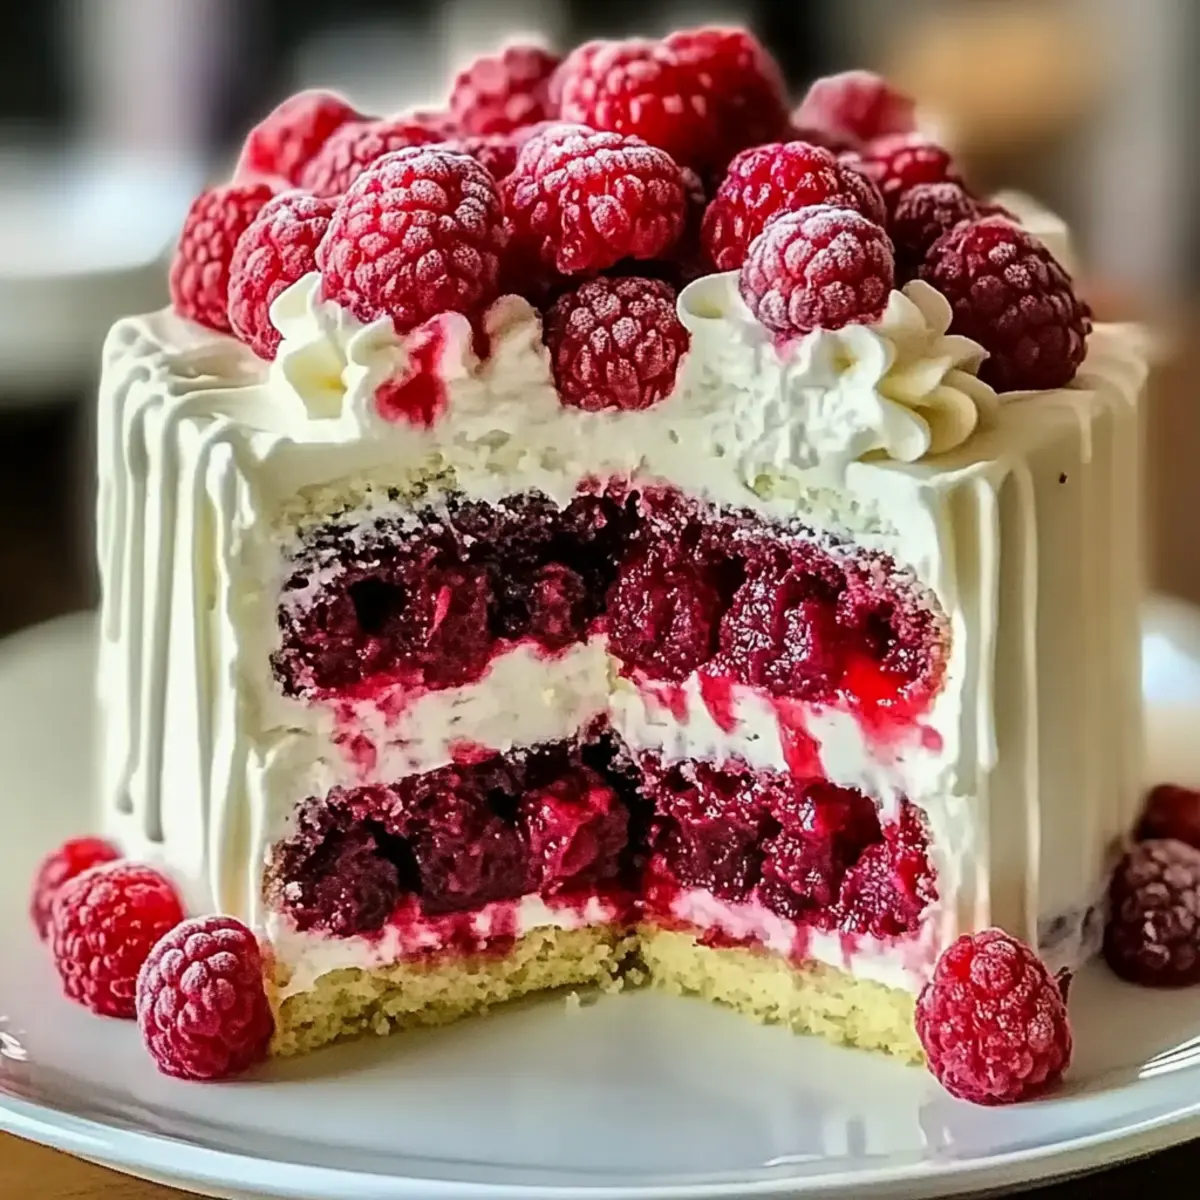
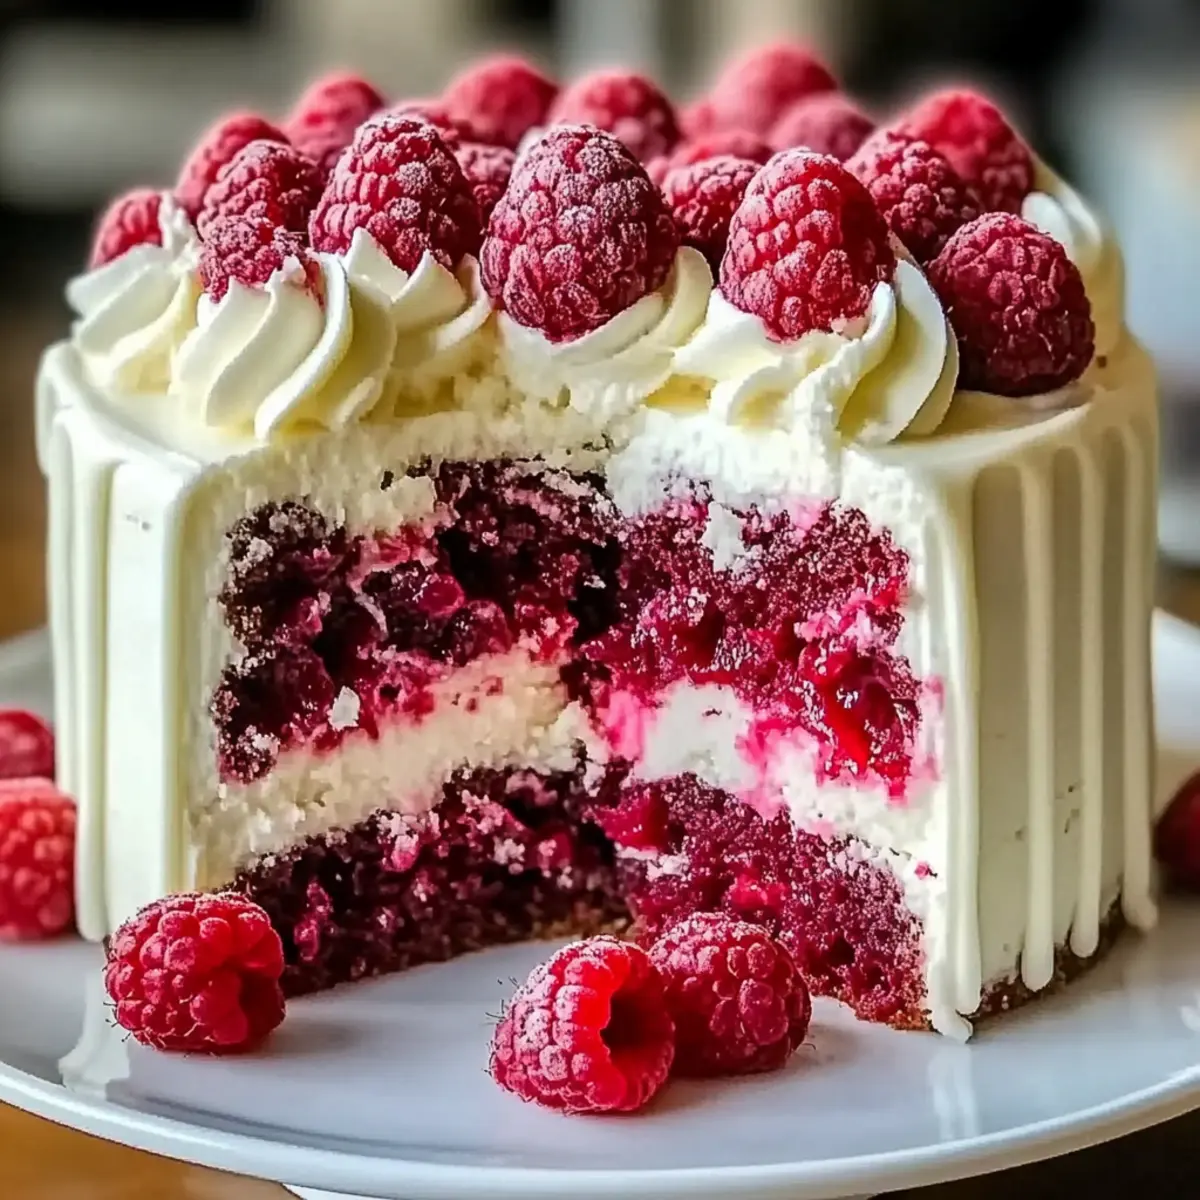
Place one cooled cake layer on a serving plate and spread an even layer of raspberry filling on top. Add the second layer and repeat the process. Finally, place the third layer on top. Use the remaining frosting to cover the entire cake, smoothing the sides and top for a beautiful finish.
Step 10: Decorate and Chill
For the finishing touch, garnish your White Chocolate Raspberry Dream Cake with fresh raspberries and white chocolate curls, arranging them creatively on top. Chill the assembled cake in the refrigerator for at least 30 minutes to set the frosting, allowing for clean cuts when you’re ready to serve. Enjoy the delightful visual and culinary masterpiece you’ve created!
How to Store and Freeze White Chocolate Raspberry Dream Cake
Fridge: Store the cake covered in an airtight container in the refrigerator for up to 4 days. This preserves the cake’s freshness and buttery texture.
Freezer: Wrap individual slices of the White Chocolate Raspberry Dream Cake tightly in plastic wrap, then place them in a freezer-safe bag. They can be frozen for up to 2 months.
Thawing: To thaw, simply move the wrapped slices to the fridge for several hours or overnight. Enjoy the cake chilled or let it sit at room temperature for 30 minutes before serving.
Reheating: If desired, reheat slices gently in the microwave for about 10-15 seconds to enjoy the cake warm, enhancing the creamy frosting and flavors.
What to Serve with White Chocolate Raspberry Dream Cake
Imagine delighting your guests at your next gathering with a meal that perfectly complements the sweet and tangy flavors of this luxurious cake.
-
Velvety Vanilla Ice Cream: A scoop of creamy vanilla ice cream elevates the harmony of sweet and tart, adding a delightful temperature contrast.
-
Fresh Fruit Salad: A medley of seasonal fruits, like strawberries and blueberries, adds brightness and freshness to balance the richness of the cake.
-
Chocolate Ganache Tart: Dark chocolate offers a bold flavor contrast, creating a delightful pairing that enhances the cake’s sweet elements.
-
Sparkling Raspberry Lemonade: This refreshing drink comes with a zesty fizz that echoes the raspberry filling, making each bite enticing.
-
Classic Cheesecake: The creamy texture and tangy notes of cheesecake pair beautifully, enriching the dessert experience on your table.
-
Mint and Berry Parfait: Layers of yogurt, mint, and berries bring a refreshing, light option that complements the cake’s decadence wonderfully.
-
Rich Coffee: A cup of strong, freshly brewed coffee adds a sophisticated touch, balancing the sweetness and enhancing the overall experience.
-
Mini Chocolate Tarts: These delicate mini desserts add an elegant flair while playing off the white chocolate flavors in the cake.
-
Lemon Sorbet: The citrus zing in this icy treat cleanses the palate and provides a refreshing contrast after indulging in the cake.
Make Ahead Options
These White Chocolate Raspberry Dream Cake components are perfect for busy home cooks looking to save time! You can prepare the cake layers up to 3 days in advance. Simply bake and cool the layers, then wrap them tightly in plastic wrap and refrigerate to keep them fresh. The raspberry filling can also be made up to 24 hours ahead; store it in an airtight container in the fridge to maintain its flavor and texture. When you’re ready to serve, just frost the cake as instructed and chill it for about 30 minutes before slicing. With these make-ahead steps, you’ll enjoy a beautiful, delicious cake that’s just as stunningly indulgent, all without the last-minute rush!
White Chocolate Raspberry Dream Cake Variations
Feel free to enhance your experience with these delicious twists that will make your cake even more delightful!
- Gluten-Free: Substitute all-purpose flour with a gluten-free blend to make this recipe accessible for everyone, without sacrificing texture.
- Fruit-Infused: Incorporate other berries like strawberries or blueberries into the raspberry filling for a vibrant mix of flavors. The combination of fruits will create a delightful surprise.
- Chocolate Layers: Add rich cocoa powder to a portion of the batter to create a chocolate-cake layer that pairs beautifully with the raspberry filling. The contrast is simply heavenly!
- Nutty Notes: Fold in crushed almonds or walnuts into the batter for a crunchy texture that complements the creamy filling. It brings an extra layer of warmth and comfort to each bite.
- Cream Cheese Frosting: Swap your white chocolate frosting with a tangy cream cheese frosting for a unique flavor profile that wonderfully balances the sweetness. It complements the raspberries so beautifully!
- Minty Fresh: Crush fresh mint leaves into the frosting for a refreshing touch that enhances the cake’s elegance. Mint and raspberry team up to deliver a delightful taste experience!
- Syrup Soaked Layers: Lightly soak each cake layer with raspberry syrup for added moisture and a burst of flavor. It will take your cake to new heights of deliciousness!
- Extra Garnish: Elevate the presentation by drizzling some raspberry sauce on the plate right before serving. You can also pair it with a scoop of vanilla ice cream for an indulgent treat!
Explore these variations and discover your own favorite twist while enjoying this charming dessert! For more ideas, try pairing this cake with our Gingerbread Wreath Cake or one of our seasonal favorites like the White Chocolate Cranberry.
Tips for the Best White Chocolate Raspberry Dream Cake
-
Room Temperature Ingredients: Ensure your butter, eggs, and milk are at room temperature. This helps create a smooth batter, contributing to the cake’s tender texture.
-
Don’t Overmix: When combining wet and dry ingredients, mix until just combined. Overmixing can lead to a dense cake, while a light, airy batter provides the perfect lift for your White Chocolate Raspberry Dream Cake.
-
Cool Layers Thoroughly: Allow your cake layers to cool completely before assembling. This prevents the raspberry filling from melting your frosting and helps maintain the cake’s beautiful layers.
-
Use Quality Ingredients: Opt for high-quality white chocolate and fresh, ripe raspberries for the best flavor. Declining on quality can impact your cake’s overall taste and presentation.
-
Chill Before Serving: After assembling your cake, chill it in the refrigerator for at least 30 minutes. This helps the frosting set, ensuring clean slices and an elegant look when serving.

White Chocolate Raspberry Dream Cake Recipe FAQs
What type of raspberries should I use?
Using fresh raspberries will provide a bright flavor and a lovely texture. However, if fresh raspberries are out of season or unavailable, frozen raspberries work perfectly too! Just make sure to thaw and drain them before using to avoid excess moisture in the filling.
How should I store the White Chocolate Raspberry Dream Cake?
To keep the cake fresh, store it in an airtight container in the refrigerator for up to 4 days. This method preserves the cake’s moisture and flavor, ensuring every slice remains soft and delicious.
Can I freeze the cake? If so, how?
Absolutely! To freeze, wrap individual slices of the White Chocolate Raspberry Dream Cake tightly in plastic wrap, then place them in a freezer-safe bag. This allows you to enjoy a slice at any time! The cake can be frozen for up to 2 months.
How do I thaw the cake properly?
To thaw, simply move the wrapped slices to the refrigerator and let them sit for several hours or overnight. If you’re short on time, leave them at room temperature for about 30 minutes before serving for optimal taste and texture.
What if the frosting is too thin?
If your frosting is too thin, you can fix it by adding more powdered sugar, one tablespoon at a time, mixing well until you reach your desired consistency. If it’s too thick, simply add a splash of milk to loosen it up. Remember, achieving a perfect frosting consistency can take a little tweaking, so stay patient!
Is this cake suitable for special diets?
Yes! You can make the White Chocolate Raspberry Dream Cake suitable for various diets by using gluten-free all-purpose flour, vegan butter, and flax eggs instead of regular butter and eggs. Always use high-quality chocolate that meets your dietary needs to ensure everyone can indulge in this delicious dessert.
Indulge in White Chocolate Raspberry Dream Cake Bliss
Ingredients
Equipment
Method
- Preheat your oven to 350°F (175°C) and grease three 8-inch round cake pans with unsalted butter.
- In a medium mixing bowl, whisk together all-purpose flour, baking powder, and salt until combined.
- Beat together softened unsalted butter and granulated sugar until light and fluffy.
- With the mixer running, add eggs one at a time, followed by vanilla extract and melted white chocolate.
- Gradually mix in the dry ingredients and whole milk until just combined.
- Divide the batter among pans and bake for 25–30 minutes, or until a toothpick comes out clean.
- In a saucepan, combine raspberries, sugar, lemon juice, and cornstarch. Cook until thickened.
- Beat together softened butter, powdered sugar, melted white chocolate, and milk until smooth.
- Assemble by layering the raspberry filling between cooled cake layers and frosting the outside.
- Garnish with fresh raspberries and white chocolate curls, then chill for 30 minutes before serving.
Leave a Reply